Flowers
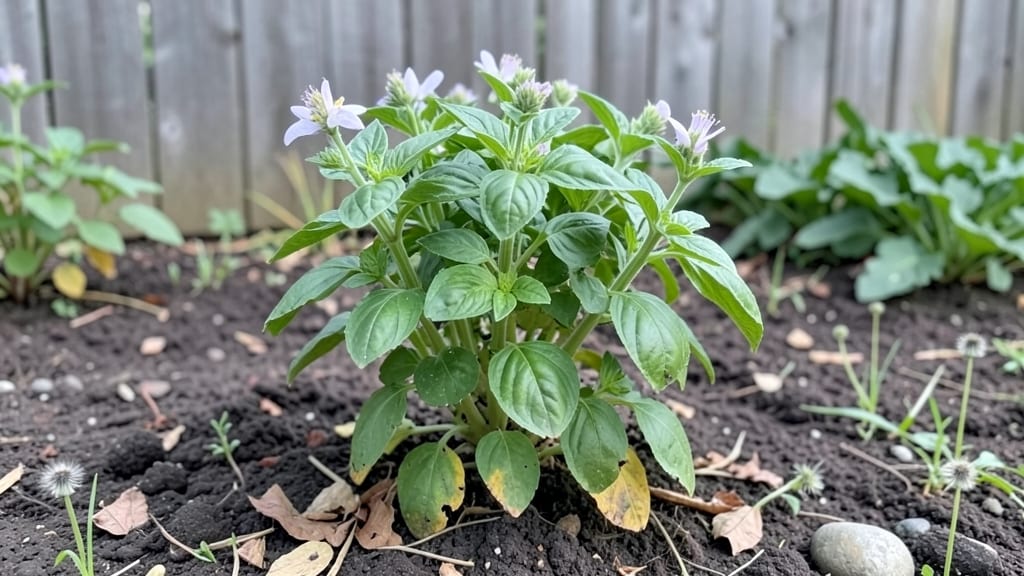
Lime basil flowers aren’t just pretty—they’re edible, fragrant, and the secret weapon in my kitchen garden. 🌿 That first flush of tiny white blooms appears when the plant matures, and if you’ve ever wondered whether to snip them off or let them stay, here’s the real deal: those flowers actually enhance flavor and attract pollinators.
The catch? Timing matters—prune too early, and you stunt growth; wait too long, and you sacrifice leaf production.
Growing lime basil with flowers in mind starts with the basics: bright light for 6+ hours daily, well-draining soil, and consistent moisture (never soggy). I’ve found that pinching off the first few flowers encourages bushier growth, while letting a few bloom improves air circulation and deters pests.
The key is balance—think of it like trimming your hair: too much, and it looks sparse; too little, and it gets wild.
What you’ll end up with is a plant that produces both fragrant leaves and delicate flowers you can use in teas, garnishes, or infused oils. The flowers add a citrusy note to dishes, and their nectar draws beneficial insects to your garden.
Best of all? The process is simple enough that even my black thumb can’t mess it up—just follow a few basic rules, and you’ll have a dual-purpose plant that keeps giving all season.
Whether you’re growing in pots or garden beds, this approach works in containers or in-ground, as long as you meet the light and soil needs.
The real magic happens when you let the plant do its thing while you guide it—like a well-behaved pet that rewards you with both beauty and flavor. Ready to grow yours?
📚 In This Guide
- What you need
- Instructions
- Tips and common mistakes
- Wrapping up and next steps
What you need
- ● Lime basil seeds or seedlings: 5–10 seeds (or 2–3 seedlings) for a small pot, 15+ for a garden bed.
- ● High-quality potting mix: Well-draining, organic soil blend (e.g., Miracle-Gro Potting Mix or homemade mix: 60% peat moss, 20% perlite, 20% compost).
- ● Containers or garden space: Containers: 6–12" pots with drainage holes (1–2 plants per 6" pot).
- ● Garden beds: Full sun (6+ hours/day) with rich, moist soil (pH 6.0–7.0).
- ● Watering can or spray bottle: For gentle hydration (avoid soggy soil!).
- ● Fertilizer: Balanced liquid fertilizer (10-10-10) or organic options like fish emulsion or compost tea.
- ● Pruning shears: Sharp, clean scissors for harvesting flowers and trimming.
- ● Grow lights: For indoor setups (12–16 hours of light/day).
- ● Mulch: Straw or shredded leaves to retain moisture.
- ● Cage or trellis: If your lime basil grows tall (up to 24"!).
- ● Beeswax or food-safe spray: To preserve harvested flowers for culinary use.
- ● Journal or labels: Track growth stages and blooming times!
How to grow lime basil flowers for fragrant edible blooms
Here's the simple, foolproof method I use to grow fragrant lime basil flowers—perfect for garnishes, teas, or pest-repelling potpourri.
🌱 Step 1: Start Seeds or Transplant Healthy Starts Indoors
Begin by sowing lime basil seeds ¼ inch deep in 4-inch pots filled with sterile seed-starting mix. I like to use biodegradable pots so I can transplant without disturbing roots later. Keep the soil consistently moist (not soggy) by misting lightly every 2-3 days until germination, which takes 7-14 days depending on your home’s warmth.
If you’re using transplants instead, choose healthy 4-inch plants with bright green leaves and no signs of yellowing. Gently remove them from their nursery pots and place them in 6-inch containers with well-draining potting mix. Water immediately after planting to settle the soil around the roots.
☀️ Step 2: Provide Bright Light and Warmth for Strong Growth
Lime basil thrives in full sun (6-8 hours daily), but seedlings need gentle light at first. Place your pots near a south-facing window or under a grow light (LED or fluorescent) 2-3 inches above the plants. You’ll know your light is right when the seedlings grow compact and sturdy—not leggy or stretching toward the window.
Keep the soil warm (65-75°F) to encourage fast growth. A seedling heat mat works wonders if your home runs cool. Once the plants develop 4-6 true leaves, you can gradually introduce them to more direct sunlight by moving them outside for 1-2 hours daily during mild weather.
💧 Step 3: Water and Fertilize for Lush, Flowering Plants
Water lime basil at the soil level (not overhead) to prevent fungal diseases. Let the top inch of soil dry out between waterings—this prevents root rot while keeping the plant hydrated. Overwatering is the #1 killer of basil, so I always check moisture with my finger before adding more water.
Feed your plants every 2-3 weeks with a balanced liquid fertilizer (10-10-10) diluted to half-strength. You’ll notice shinier leaves and faster growth within a week. To encourage flowering, pinch off any buds that form on the main stem—this redirects energy to leaf production and keeps the plant bushy.
✂️ Step 4: Encourage Blooms and Harvest for Fragrant Flowers
When your lime basil reaches 12-18 inches tall, it’s ready for its first hard pinch. Use clean scissors to snip the top set of leaves just above a pair of leaves. This stimulates branching and leads to more flowers. Repeat this every 2-3 weeks to keep the plant productive.
Watch for tiny white or pink flower buds to form in the leaf axils. These are your edible lime basil flowers! Harvest them in the morning when they’re fully open but still fragrant. Use them fresh in cocktails, salads, or teas, or dry them for later use. The flowers have a citrusy, slightly spicy flavor that’s perfect for garnishes.
🪴 Step 5: Transition to Outdoor or Container Garden
Once temperatures stay above 50°F at night, move your lime basil outside to a sunny spot with partial shade during the hottest afternoon hours. Harden off the plants by placing them outside for 1 hour daily, gradually increasing time over 5-7 days. This helps them adjust without shock.
If growing in containers, ensure they have drainage holes and are large enough to accommodate the plant’s root system (at least 8 inches deep). Use a well-draining potting mix and place the pots where they’ll get morning sun and afternoon shade—this prevents leaf scorch while still promoting flowering.
Tips & tricks for perfect lime basil flowers
These simple tricks will help you grow vibrant, fragrant lime basil flowers that'll elevate your dishes and drinks.
Seed Starting: To speed up germination in Step 1, place your 4-inch pots in a warm spot like on top of the fridge or near a heat vent. The consistent warmth helps seeds sprout faster within the 7-14 day window. I've found that maintaining soil temps between 70-75°F cuts germination time by nearly half.
Light Transition: In Step 2, when moving seedlings to direct sunlight, do it gradually over 5-7 days. Start with just 30 minutes of morning sun, then increase by 30 minutes each day. This gradual hardening off prevents shock and helps plants adjust to the 6-8 hours of full sun they'll eventually need.
Pinching Technique: When performing the hard pinch in Step 4, always use clean scissors and make the cut just above a set of leaves where a new branch emerges. This precise cut encourages bushier growth and more flowers. I pinch about 1/3 of the plant's height at each session to maintain balance.
Flower Care: For the most fragrant flowers, harvest them in the morning when they're fully open but still damp with dew. This preserves their citrusy aroma. Store harvested flowers in a paper towel-lined container in the fridge for up to 3 days, or dry them by hanging small bunches upside down in a dark, well-ventilated area for 1-2 weeks.
Pro Tips for Lime Basil Flowers
- These simple tricks will help you grow vibrant, fragrant lime basil flowers that'll elevate your dishes and drinks.
- Seed Starting: To speed up germination in Step 1, place your 4-inch pots in a warm spot like on top of the fridge or near a heat vent.
- Light Transition: In Step 2, when moving seedlings to direct sunlight, do it gradually over 5-7 days.
Frequently asked questions
Got questions about growing and using lime basil flowers?
Here are answers to the most common ones—so you can enjoy their fragrant beauty and culinary magic with confidence!
When do lime basil flowers bloom, and how long do they last?
Lime basil flowers typically bloom 6–8 weeks after planting, especially in warm climates (zones 9–11) or with consistent summer heat. Each flower cluster lasts 3–5 days but produces new blooms daily. For a continuous display, prune spent flowers and keep plants in full sun (6+ hours/day).
Can I eat lime basil flowers, and how do I use them in cooking?
These delicate, citrusy flowers are edible and add a bright, floral-lime flavor to dishes. Toss them into salads, garnish cocktails (like mojitos), or infuse oils/vinegars. Pro tip: Harvest flowers early in the morning for peak flavor.
Why aren’t my lime basil flowers opening, or are they wilting?
Wilting or closed blooms often signal stress. Check for:
- Water: Overwatering causes root rot; underwatering stresses plants. Keep soil consistently moist but not soggy.
- Sunlight: Lime basil needs full sun (6+ hours). Move pots to sunnier spots if indoors.
- Heat/Pests: Extreme heat (above 90°F) or pests (like aphids) can stunt blooms. Use shade cloth or neem oil if needed.
What’s the best alternative if I can’t grow lime basil flowers?
If lime basil proves tricky, try these fragrant, edible flower substitutes:
- Lemon thyme flowers – Citrusy and drought-tolerant.
- Nasturtiums – Peppery, edible blooms with a tangy kick.
- Borage flowers – Cucumber-like flavor, great in salads.
How do I preserve lime basil flowers for later use?
Preserve their beauty and flavor with these methods:
Method
How-To
Freeze
Wash flowers, pat dry, and freeze on a tray. Store in airtight bags for up to 6 months.
Dry
Hang upside-down in a dark, dry place for 1–2 weeks. Store in jars away from light.
Infuse
Steep flowers in oil or vinegar for 2–3 days (strain before use).
Wrapping up and next steps
Growing lime basil flowers is a rewarding journey that brings fragrant blooms and culinary versatility to your garden! 🌿 Whether you're a seasoned gardener or just starting, these delicate flowers add beauty and flavor to your space.
Now that you’re equipped with the right knowledge, it’s time to plant, nurture, and enjoy the sweet rewards of your hard work.
Ready to take the next step? Start with a single pot or a dedicated garden bed—your kitchen (and senses!) will thank you. Happy gardening! 🌸