
Flowers
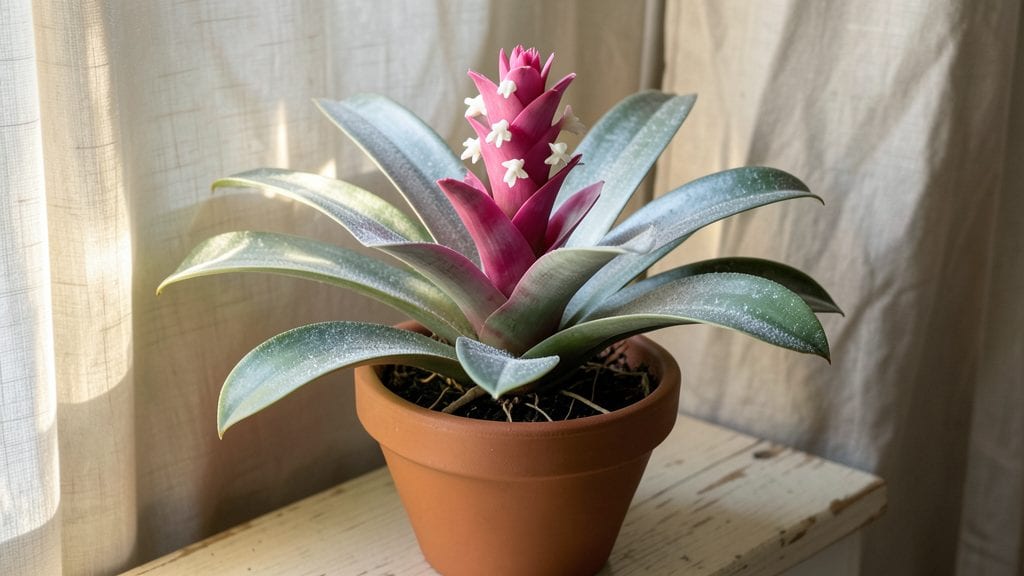
That first blush of a bromeliad’s pink flower brightens your Pacific Northwest garden with unexpected tropical charm.
It’s not just possible—it’s yours with the right bromeliad. 🌸 I’ve grown these striking plants through our damp winters and cloudy summers, and the secret lies in mimicking their tropical roots while working with our climate’s quirks.
Bromeliads like Aechmea fasciata and Neoregelia carolinae thrive in bright, indirect light—think filtered sunlight through sheer curtains or a north-facing window. They despise soggy soil, so well-draining mixes with orchid bark or perlite keep their roots happy.
The real magic happens when you recreate their natural humidity: a pebble tray with water or a humidifier nearby works wonders, especially in our dry indoor air.
You’ll know you’re doing it right when those vibrant pink bracts emerge, lasting for months. The plant itself stays compact, making it perfect for shelves, hanging baskets, or even outdoor planters during summer. With the right care, your bromeliad will reward you with bold color year after year—no greenhouse required.
Here’s the kicker: these plants are surprisingly resilient once you get their basics right. Brown tips? Usually just a sign of fluoride in tap water. No blooms? Adjust your light or give them a little extra warmth. Let’s troubleshoot and get yours flowering like a pro.
📚 In This Guide
- What you need
- Instructions
- Tips and common mistakes
- Wrapping up and next steps
What you need
- ● Bromeliad plant: Choose a cold-hardy variety like Aechmea or Neoregelia (check labels for pink blooms!). Start with 1-3 mature plants or 50-100 seeds (if growing from seed).
- ● Well-draining potting mix: 3-5 gallons of a blend like 50% peat moss, 30% perlite, and 20% orchid bark (or a pre-mixed bromeliad mix).
- ● Container or garden bed: For containers: 10-15 inch pots with drainage holes (terracotta or plastic).
- ● For garden beds: A sunny, sheltered spot with partial shade (especially in hot afternoons).
- ● Slow-release fertilizer: 1-2 tbsp of a balanced 10-10-10 or orchid fertilizer (apply at planting).
- ● Gloves & trowel (for handling soil and plants).
- ● Spray bottle (to mist leaves—bromeliads love humidity!).
- ● Mulch (e.g., pine bark or gravel) to retain moisture and regulate temperature.
- ○ Grow lights (optional for indoor setups or winter supplementation).
- ● Pebbles or charcoal (for the central cup—bromeliads collect water here!).
Step-by-step guide to growing cold-hardy pink bromeliads
Turn your Pacific Northwest garden into a vibrant display with these stunning, resilient plants.
🌱 Step 1: Select the Right Bromeliad Variety for Cold Climates
Look for Aechmea or Neoregelia species like 'Pink Quill' or 'Fireworks'—these handle cooler temperatures better than tropical varieties. I always check the USDA hardiness zone on the tag; aim for Zone 8-10 plants that can survive brief dips to 25°F with protection. These pink-flowering types thrive in partial shade, making them perfect for understory plantings or container gardens.
Skip the tropical showstoppers like Guzmania—those need 65°F+ year-round. Instead, focus on evergreen bromeliads that keep their foliage and produce striking pink bracts even when temperatures drop. Nursery staff often know which varieties perform best in your region, so ask for local recommendations.
☀️ Step 2: Prepare the Planting Site with Proper Drainage
Bromeliads hate soggy roots, so amend your soil with 30% perlite or orchid bark to improve drainage. I mix 2 parts native soil with 1 part perlite and a handful of coarse sand for the best texture. If planting in containers, use a well-draining mix designed for epiphytes or add chunks of fir bark for aeration.
Choose a spot with morning sun and afternoon shade—direct afternoon sun in summer can scorch the leaves. In containers, place them where they get 3-4 hours of indirect light daily. You'll know the light is right when the leaves stay deep green without yellowing or crispy edges.
💧 Step 3: Plant and Water for Optimal Growth
Dig a hole twice as wide as the bromeliad's root ball but only as deep as it was in its container. Gently remove the plant, loosen the roots, and position it so the base of the plant sits just above soil level—this prevents rot. Fill around the roots with your amended mix and water deeply until it drains from the bottom.
Water only when the top inch of soil feels dry—these plants store water in their leaves, so overwatering kills them faster than underwatering. I use a self-watering pot for container plants to keep moisture consistent. After planting, wait 3-4 days before watering again to let roots establish without sitting in wet soil.
✂️ Step 4: Maintain and Encourage Blooming
Feed your bromeliad once in early spring with a balanced 10-10-10 fertilizer diluted to half strength. I skip fall and winter feedings—cool weather slows growth, and extra nutrients just create weak, leggy plants. After flowering, the mother plant will die, but pups (baby plants) will form at its base. Remove the spent flower stalk but leave the pups to grow.
Divide and repot pups when they reach half the size of the mother plant. I repot in spring using fresh mix and a slightly larger container. This keeps your bromeliad collection thriving while maintaining the compact, bushy habit these plants are known for.
🪴 Step 5: Protect from Winter Chills
When temperatures drop below 30°F, move container-grown bromeliads to a garage or sheltered porch where they stay above freezing. For in-ground plants, mulch heavily with 4-6 inches of bark or straw to insulate roots. I wrap the base of the plant with burlap for extra protection—this prevents windburn and keeps moisture in.
Resist the urge to water in winter. Bromeliads enter a dormant phase and need minimal moisture. Check soil moisture monthly—only water if it feels completely dry. With proper winter care, your pink bromeliads will reward you with vibrant blooms in late winter or early spring, just when your garden needs a splash of color.
Tips & tricks for perfect pink bromeliad blooms
These simple yet game-changing tips will help your cold-hardy pink bromeliads thrive and bloom spectacularly in Pacific Northwest conditions.
Variety Selection: When choosing your Zone 8-10 bromeliads, look beyond just the pink flowers—examine the foliage too. 'Pink Quill' varieties have striking variegated leaves that add texture even when not in bloom. Pro tip: Ask your nursery for plants that have already shown signs of pups at the base, as these are more established and will bloom faster. I've learned that plants with visible pups often flower within 6-12 months rather than the typical 2-3 years.
Soil Mix Mastery: The 2:1 soil-to-perlite ratio is perfect, but here's the secret: sterilize your soil mix first. Microwave a small batch of native soil for 2 minutes to kill any pathogens that could harm your bromeliads. For containers, I add a handful of orchid bark chunks (not fine bark) to improve aeration—this mimics their natural epiphytic growing conditions.
Watering Wisdom: That 3-4 day waiting period after planting is crucial, but don't guess—use a moisture meter for the top inch of soil. Bromeliads store water in their leaves, so they actually prefer slightly drier conditions than most houseplants. I've found that container plants benefit from a self-watering pot with a reservoir to maintain consistent moisture without soggy roots.
Winter Protection Pro Tip: For in-ground plants, don't just mulch—create a mini greenhouse effect. After adding your 4-6 inches of bark mulch, place a clear plastic dome (like a large salad bowl) over the plant in extreme cold snaps (below 20°F). This traps warmth while still allowing light through. Remove it on sunny days to prevent overheating.
Pro Tips for Bromeliad Pink Flower
- These simple yet game-changing tips will help your cold-hardy pink bromeliads thrive and bloom spectacularly in Pacific Northwest conditions.
- Variety Selection: When choosing your Zone 8-10 bromeliads, look beyond just the pink flowers—examine the foliage too.
- Soil Mix Mastery: The 2:1 soil-to-perlite ratio is perfect, but here's the secret: sterilize your soil mix first.
Frequently asked questions
Got questions about growing bromeliad pink flowers—especially in the Pacific Northwest’s cooler climate? Here are answers to the most common queries to help you nurture these stunning plants with confidence!
How do I encourage my bromeliad to bloom pink?
Pink blooms in bromeliads (like Aechmea or Neoregelia varieties) are often genetic, but you can maximize their vibrancy! Ensure your plant gets bright, indirect light (east or north-facing windows are ideal) and maintain consistent moisture without soggy roots. A warmth shock—like a 2-week period of 70–80°F—can trigger blooming in some species. Patience is key: Bromeliads may take 1–3 years to flower after maturity!
Are pink bromeliads cold-hardy in the Pacific Northwest?
Most bromeliads are tropical and thrive in USDA Zones 10–12, but some varieties (like Tillandsia) can tolerate brief dips to 30°F if protected. In PNW’s Zones 7–9, grow them as container plants and bring them indoors before freezing temps. Opt for terracotta pots to prevent root rot, and use pebbles or bark for drainage. Mulch the soil in winter for extra insulation!
How often should I water my pink bromeliad?
Overwatering is the #1 killer of bromeliads! Water only when the top 1–2 inches of soil are dry (stick your finger in to check). For terrestrial bromeliads, water at the base (not the rosette) to avoid rot. Air plants (Tillandsia)? Mist them 2–3 times weekly or soak for 30 minutes monthly. Drainage is critical: Ensure pots have holes, and empty saucers after watering to prevent fungal issues.
What do I do after my bromeliad blooms?
Once the central spike (inflorescence) dies, don’t despair—pups (baby plants) will emerge from the base! Gently separate them when they’re 1/3 the size of the parent, using sterilized scissors. Repot the pups in fresh, well-draining soil and place them in bright, indirect light. The parent plant may slowly die after flowering, but its pups ensure a new generation of pink blooms!
Can I grow pink bromeliads indoors year-round?
Bromeliads make fantastic houseplants if you mimic their natural habitat. Place them near a sunny window (or under grow lights for 12–14 hours/day) and maintain 50–70% humidity (a pebble tray or humidifier helps). Avoid drafts or AC vents, and rotate the pot monthly for even growth. Fertilize lightly (every 2–3 months) with a balanced, diluted liquid fertilizer to keep them happy indoors!
Why are my bromeliad’s leaves turning brown or yellow?
Brown tips? Low humidity or fluoride in tap water are likely culprits. Yellow leaves often signal overwatering or poor drainage. Check these fixes:
- Brown tips: Trim with clean scissors, use filtered or rainwater, and increase humidity.
- Yellow leaves: Let soil dry out more between waterings and ensure pots have drainage holes.
- Mushy base: Root rot! Repot in fresh, dry soil and trim affected roots.
Pro tip: Bromeliads are sensitive to chemicals—always let tap water sit out 24 hours before using!
Wrapping up and next steps
Growing a bromeliad pink flower in your Pacific Northwest garden is not only rewarding but also a fantastic way to add vibrant color and tropical flair to your outdoor space. These cold-hardy beauties are surprisingly resilient, making them a perfect choice for gardeners who love bold hues without the fuss.
Whether you’re a beginner or a seasoned plant enthusiast, your new bromeliad will thrive with just a little care and attention.
Now that you’re armed with the right tips, why not take the next step? 🌸 Start by selecting your favorite pink variety, gather your supplies, and give these stunning plants the love they deserve.
Before you know it, your garden will be bursting with pink blooms that turn heads—and maybe even inspire your neighbors to try their hand at growing them too!