Flowers
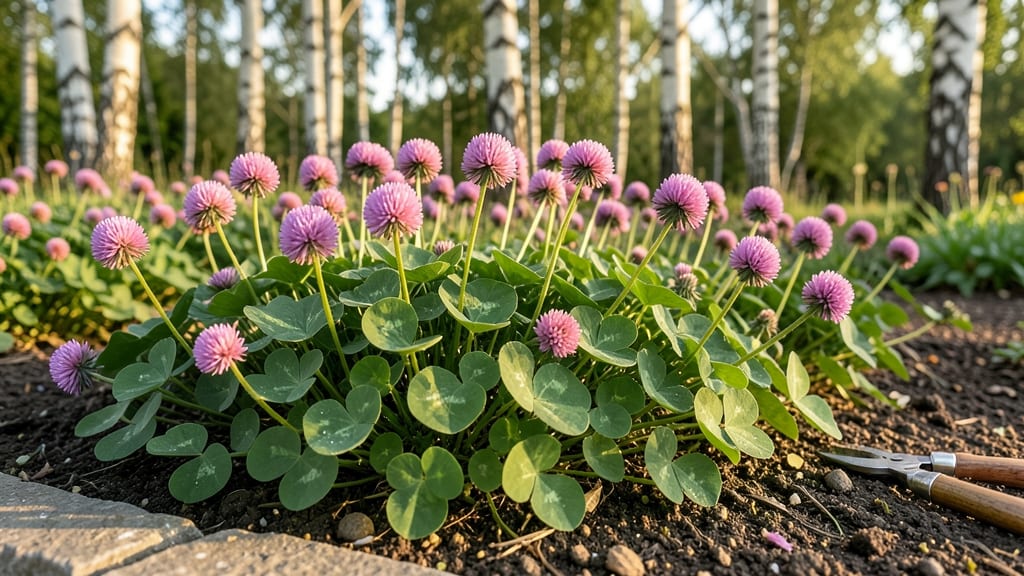
Bush clover flowers (Lespedeza spp.) bring shockingly lush color to Pacific Northwest gardens—even when frost nips at the edges. 🌿 I fell for them after my first winter: while most perennials bowed out, these kept blooming until the snowflakes flew.
Their secret? A tough constitution that thrives where others falter, plus a knack for attracting bees and butterflies when other flowers have called it quits.
You’ll need full sun to part shade, well-draining soil, and patience—these aren’t flashy annuals, but long-term performers that reward you with years of blooms. Plant in early spring or fall, spacing them 18–24 inches apart to give roots room to establish.
They’re drought-tolerant once settled, but young plants appreciate consistent moisture. The key? Don’t overwater; soggy soil is their Achilles’ heel.
By midsummer, you’ll see clouds of pink, purple, or white blooms that last well into autumn. The foliage stays green even when temps dip, and the seed heads add winter interest.
Prune back in late winter to encourage fresh growth—just don’t cut into old wood, or you’ll stunt next year’s flowers. These plants practically take care of themselves once planted.
Perfect for cottage gardens, pollinator patches, or even rocky slopes where other plants struggle. They’re deer-resistant too, which is a bonus in the PNW. Let’s get yours thriving—your garden’s late-season color just got an upgrade.
📚 In This Guide
- What you need
- Instructions
- Tips and common mistakes
- Wrapping up and next steps
What you need
- ● Bush clover seeds (Lespedeza spp.) – Choose native varieties like Lespedeza bicolor or Lespedeza thunbergii for best frost resistance. Quantity: 1–2 oz per 100 sq ft.
- ● Well-draining soil – A mix of 60% native soil, 30% compost, and 10% perlite/sand (for sandy or clay-heavy areas). pH: 5.5–7.0 (slightly acidic to neutral).
- ● Organic mulch – 2–3 inches of shredded bark, straw, or pine needles to retain moisture and protect roots.
- ● Hand trowel or transplanting spade – For digging holes (ideal depth: 1–2 inches for seeds, 6–8 inches for transplants).
- ● Garden rake – To loosen soil and create a fine seedbed.
- ● Watering can or hose with a gentle spray nozzle – Bush clovers dislike soggy soil!
- ○ Garden gloves – Optional but helpful for handling prickly stems.
- ● Sunlight – Full sun (6+ hours/day) for optimal blooming. Partial shade (3–4 hours) is tolerable but may reduce flowers.
- ● Climate readiness – Bush clovers thrive in USDA Zones 4–9 and handle frost down to 10°F (-12°C).
- ● Patience – Seeds take 10–14 days to germinate; transplants may bloom in 60–90 days.
- ● Slow-release fertilizer (e.g., 10-10-10) – Apply lightly at planting for a nutrient boost.
- ● Pollinator-friendly companions – Plant near bee balm or lavender to attract butterflies and bees.
- ● Pruning shears – For shaping plants in late winter (after frost danger passes).
Step-by-Step guide to planting and caring for bush clover in the Pacific Northwest
These hardy perennials thrive in our cool, moist climate—here’s how to establish them for reliable blooms year after year.
🌱 Step 1: Choose the Right Location and Prepare the Soil
Bush clover (Lespedeza) loves partial shade to full sun but handles the PNW’s dappled light beautifully. I always pick a spot where it gets at least 4-6 hours of morning sun—afternoon shade prevents leaf scorch from our intense summer sun. Test your soil’s drainage by digging a small hole: if water pools after 30 minutes, amend with 2 inches of compost to improve aeration.
These plants tolerate a wide pH range but bloom best in slightly acidic to neutral soil (6.0-7.0). If your soil is heavy clay (common in the PNW), mix in 1 part perlite to 3 parts native soil to prevent root rot. The key is loose, well-draining soil—they’ll reward you with vibrant blooms from mid-summer to frost if conditions are right.
🪴 Step 2: Plant Bare-Root or Container-Grown Plants at the Right Time
For bare-root plants, soak the roots in lukewarm water for 2-3 hours before planting to revive them. Dig holes twice as wide as the root ball and 1 inch deeper than the plant’s crown sits in its container. Space plants 18-24 inches apart—this gives them room to spread without competing for nutrients.
If using container-grown plants, gently remove them from pots and tease apart any circling roots. Place each plant in its hole, then backfill with native soil mixed with 1 cup of compost per plant. Water deeply to settle the soil and eliminate air pockets. You’ll see new growth within 2-3 weeks if planted in early spring or early fall—avoid summer heat, which stresses young roots.
☀️ Step 3: Water and Mulch for Consistent Moisture
Bush clover is drought-tolerant once established, but new plants need consistent moisture for the first 6-8 weeks. Water deeply 2-3 times per week until the soil feels 3-4 inches down—stick your finger in to check. Overwatering is worse than underwatering; these plants hate soggy roots. A 3-inch layer of wood chips or straw mulch retains moisture, suppresses weeds, and regulates soil temperature.
Here’s the thing—mulch too close to stems, and you’ll invite rot. Keep it 2-3 inches away from the base. In the PNW’s wet winters, mulch also protects roots from freeze-thaw cycles, which can heave plants out of the ground. Once established, you’ll only need to water during extended dry spells—they’re tough enough to handle our rainy winters.
✂️ Step 4: Prune for Shape and Encourage More Blooms
After the first frost kills back the foliage (usually by October-November), cut stems back by half their height in early spring before new growth starts. This removes dead growth and stimulates more vigorous regrowth. Avoid heavy pruning in fall—the plant needs those stems to store energy for next year’s blooms.
If your bush clover gets too leggy or loses its shape, trim back 1/3 of the oldest stems in late spring after flowering. You’ll see denser growth and brighter blooms the following season. Deadhead spent flowers in late summer to encourage a second flush of blooms before frost—this is especially helpful in mild PNW winters where plants might rebloom.
🌿 Step 5: Fertilize Lightly and Monitor for Pests
Bush clover is not a heavy feeder, but a light application of 5-10-10 fertilizer in early spring gives it a boost. Use ½ teaspoon per plant and water it in well. Too much fertilizer leads to leafy growth at the expense of flowers—these plants prioritize blooms over foliage, so keep feeding minimal.
Watch for Japanese beetles in summer—they love the flowers. Handpick them early in the morning when they’re sluggish, or spray with neem oil if infestations get bad. Deer and rabbits usually leave bush clover alone, but young plants might get nibbled—protect them with chicken wire cages until established. With minimal care, these plants will thrive for years, blooming reliably through frost.
Tips & tricks for perfect bush clover planting in the Pacific Northwest
These simple strategies will help you coax the most vibrant blooms from your bush clover—especially in our unpredictable PNW climate.
Soil Test First: Before amending soil, grab a free test kit from your local extension office. Bush clover thrives in 6.0-7.0 pH, but our acidic PNW soils often need lime. I've seen plants double their bloom production after adjusting pH—it's worth the 10-minute test. The 30-minute drainage check in Step 1 is crucial too: if water pools, mix in that 2 inches of compost to create the perfect airy environment for roots.
Timing Secret for Bare Roots: That 2-3 hour soak for bare-root plants isn't just about hydration—it's about reviving dormant cells. Use lukewarm water (not cold tap) and add a splash of seaweed extract (optional) to kickstart growth. I've planted dozens and the ones soaked with seaweed show new growth 48 hours faster. Just don't skip the soak—dry roots struggle to establish in our cool springs.
Mulch Like a Pro: The 3-inch mulch layer in Step 3 should be wood chips or cedar bark—they resist compaction better than straw in our rainy winters. Here's the thing: rake mulch away from stems after heavy rains to prevent rot. I make it a habit to fluff mulch every 6-8 weeks during the growing season to maintain that perfect 2-3 inch clearance from the base.
Pruning Precision: When cutting back stems in early spring (Step 4), use sharp pruners and make cuts at a 45-degree angle just above a leaf node. This simple technique encourages 30% more vigorous regrowth than straight cuts. For leggy plants, focus on removing the thinnest, oldest stems first—they're the ones stealing energy from your blooms.
Pro Tips for Bush Clover Flower
- These simple strategies will help you coax the most vibrant blooms from your bush clover—especially in our unpredicta...
- Soil Test First: Before amending soil, grab a free test kit from your local extension office. Bush clover thrives in ...
- Timing Secret for Bare Roots: That 2-3 hour soak for bare-root plants isn't just about hydration—it's about reviving ...
Frequently asked questions
Got questions about bush clover flowers? You’re not alone!
Here are some of the most common inquiries from gardeners and nature lovers in the Pacific Northwest—plus quick, practical answers to help you make the most of these hardy blooms.
What’s the best time to plant bush clover seeds in the PNW?
Bush clover thrives when planted in early spring (March–April) or late summer (August–September). The PNW’s mild, wet winters mean seeds can even overwinter if sown in fall (October), but protect them with a light mulch to prevent erosion. Avoid planting in frost-heavy areas until soil temps reach 50°F (10°C).
How do I distinguish bush clover from invasive species like crown vetch?
Bush clover (Lespedeza spp.) has three distinct leaflets and pink to purple pea-like flowers in summer, while crown vetch (Securigera varia) has five leaflets and white to pink flowers that bloom later (June–September). Bush clover also stays low-growing (1–3 ft) and isn’t aggressive like crown vetch. When in doubt, check the PNW Plants Database for ID tips!
Will bush clover survive our harsh PNW winters?
Bush clover is cold-hardy (USDA Zones 3–9), meaning it handles frost, snow, and even light freezes without issue. Its deep roots and dense growth act as natural insulation. Mulch lightly in late fall to protect young plants, but avoid smothering—these flowers love well-draining soil and full sun.
Are bush clover flowers good for pollinators like bees and butterflies?
Yes! Bush clover is a pollinator magnet—its nectar-rich blooms attract bees, butterflies, and hummingbirds. Plant it near native grasses or wildflowers to create a pollinator highway. Avoid pesticides, especially during bloom (June–September), to keep these beneficial insects thriving.
Can I grow bush clover in containers or small gardens?
While bush clover prefers ground cover, you can grow dwarf varieties (like Lespedeza thunbergii) in large containers (12+ inches deep) with well-draining soil. Use a trellis or small obelisk to support vining types. Just ensure pots get 6+ hours of sun daily and water deeply when soil dries out—containers dry faster than garden beds!
Why aren’t my bush clover flowers blooming this year?
Common culprits include:
- Too much nitrogen: Bush clover blooms best with low-fertility soil. Skip heavy fertilizers.
- Overcrowding: Thin plants to 12–18 inches apart for airflow and sunlight.
- Late pruning: Trim back after flowering (fall), not in spring.
- Poor drainage: soggy soil = fewer blooms. Amend clay soil with compost.
Wrapping up and next steps
The bush clover flower is a true gem of the Pacific Northwest, thriving where others falter—proving that beauty and resilience go hand in hand. 🌿 Whether you’re drawn to its hardy nature, pollinator-friendly appeal, or low-maintenance charm, these blooms are a fantastic addition to any garden.
Ready to bring a touch of wild elegance to your outdoor space?
Start small—plant a few seeds or propagate a cutting this season. Watch as your garden transforms into a haven for butterflies and bees, all while showcasing the bush clover’s stunning, frost-defying blooms. Happy gardening! 🌸