Propagation
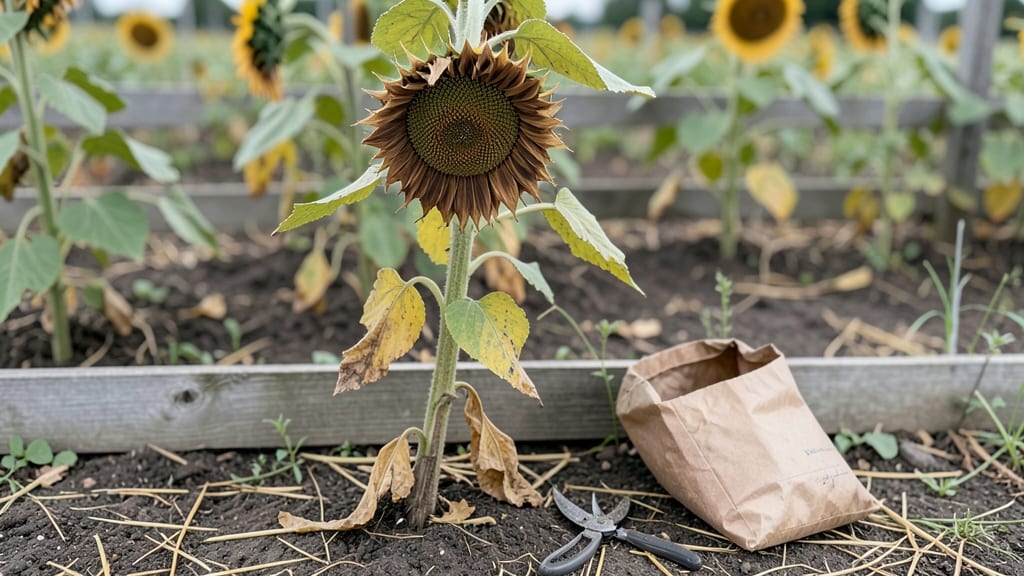
Saving sunflower seeds for next year starts with choosing the right varieties—open-pollinated types like 'Mammoth' or 'Autumn Beauty' yield seeds that grow true, while hybrids often disappoint. I learned this the hard way after planting saved hybrid seeds that grew into scraggly, underwhelming plants.
The key is patience: let the heads fully mature on the stalk, turning brown and dry before harvest, usually 8-10 weeks after flowering.
Once the heads are dry, cut them off and hang them upside down in a warm, dry spot for 2-3 weeks to finish drying. This prevents mold and ensures seeds stay viable.
After that, rub the dried heads between your hands or use a fork to scrape out the seeds—just don’t rush it, or you’ll end up with chaff and debris mixed in. A fine-mesh sieve makes cleaning a breeze, leaving you with plump, healthy seeds ready for storage.
Store your seeds in an airtight container—glass jars or sealed plastic bags work best—in a cool, dark place like a pantry. Label them with the variety and harvest year to avoid confusion.
With proper storage, these seeds stay viable for 3-5 years, giving you a head start on next season’s garden. The first time you watch seedlings sprout from your saved seeds, you’ll know it was worth the effort.
Here’s the secret weapon: test a few seeds before storing the whole batch. Place them between damp paper towels in a sealed bag for a week—if most sprout, your batch is good to go.
This simple step saves you from wasted effort later. Now, let’s get those seeds ready for planting!
📚 In This Guide
- What you need
- Instructions
- Tips and common mistakes
- Wrapping up and next steps
What you need
- ● Mature sunflower heads – Choose fully dried, brown seed heads (no green stems or leaves). Aim for 5–10 healthy heads for a good seed yield.
- ● Paper bags or breathable fabric sacks – 2–3 large bags (12"x18" or larger) to collect seeds and allow airflow.
- ● Scissors or pruning shears – For harvesting seed heads cleanly from the stalk.
- ● Drying surface – A clean, flat tray (baking sheet or cardboard) lined with parchment paper or newspaper.
- ● Fine-mesh sieve or colander – A 12–16" diameter with small holes (1/8" or less) to sift seeds from chaff.
- ● Air-tight storage containers – 2–4 containers (mason jars, plastic bins with lids, or resealable bags) with desiccant packets (silica gel or food-grade clay).
- ● Permanent marker or labels – To mark containers with the variety name and harvest date.
- ● Seed cleaning kit – A manual seed cleaner or blower fan for faster chaff removal (great for large batches!).
- ● Food dehydrator or oven – Set to 140–160°F (60–71°C) to speed-dry seeds if humidity is high.
- ● Humidity monitor – A digital hygrometer to track seed moisture (ideal: 5–8% humidity).
- ○ Vacuum sealer – Extends seed viability by removing excess air (optional but highly effective for long-term storage).
- ● Glove – A lightweight cotton or nitrile glove to protect hands from seed residue.
Step-by-Step instructions for harvesting and storing sunflower seeds
Here's the method I've used for years to collect seeds that sprout just as reliably as store-bought.
Select and Harvest Mature Sunflower Heads
Wait until the sunflower heads turn completely brown and begin to dry out on the plant. The back of the head should feel papery, and the seeds inside should rattle when you shake the head gently. Use clean, sharp pruning shears to cut the entire head from the stem, leaving about 2 inches of stem attached—this makes handling easier later.
Harvest on a dry day when the heads have had time to dry naturally in the sun. If rain is forecast, bring them indoors immediately. I always harvest in the morning so the heads have the full day to dry if needed. Place the cut heads in a dry, well-ventilated area out of direct sunlight to finish drying for 2-3 days.
Remove Seeds from the Heads
Once the heads are completely dry, lay them on a clean tarp or large sheet of newspaper. Rub the back of the head firmly with your hands or use a rubber mallet to gently break apart the dried petals and release the seeds. The seeds will fall out while the chaff (husks) remains behind. I like to do this outside on a breezy day—it makes cleanup much easier.
Separate the seeds from the chaff by placing them in a large bowl and gently blowing or fanning away the lighter debris. You can also use a mesh strainer or sieve to sift through the mixture. Discard any seeds that are shriveled, discolored, or have visible damage—they won't germinate well. Healthy seeds should be plump, uniform in color, and free of cracks.
Dry the Seeds Thoroughly
Spread the cleaned seeds in a single layer on a clean, dry baking sheet or tray. Place them in a warm, dry location with good air circulation—like a sunny windowsill or a spot near a heater (but not directly in front of it). Let them dry for 3-5 days, stirring them occasionally to ensure even drying.
The seeds are ready when they feel completely dry to the touch and have a hard, papery texture. You can test this by gently squeezing a few seeds—if they don't leave any moisture on your fingers, they're ready for storage. Avoid using a food dehydrator or oven, as high heat can reduce germination rates.
Store Seeds Properly for Long-Term Viability
Transfer the dried seeds to an airtight container, such as a glass jar or sealed plastic bag. I use small paper envelopes labeled with the sunflower variety and the year harvested—it keeps things organized and makes next year's planting a breeze. Store the container in a cool, dark place, like a pantry or refrigerator, where the temperature stays between 35-50°F.
Seeds stored this way can remain viable for 3-5 years, though germination rates may decline slightly over time. Check the seeds annually for signs of moisture or pests—if you notice any, transfer them to a new container immediately. When it's time to plant, soak the seeds in warm water for 4-6 hours before sowing to speed up germination.
Tips & tricks for perfect sunflower seed preservation
These simple tricks will help you maximize germination rates and avoid common pitfalls when saving sunflower seeds.
Harvest Timing: The 2-3 day drying period after cutting is crucial—don't rush it. I've learned the hard way that seeds harvested too early won't dry properly and risk mold. Check for readiness by gently squeezing a seed: if it feels dry and papery, it's ready for the next step. The 2-inch stem attachment isn't just for convenience—it provides a better grip when handling large heads.
Drying Environment: For Step 3, I recommend placing your baking sheet near a heater (but not directly in front) for consistent warmth. If your seeds aren't drying evenly, spread them out more thinly or move to a warmer location. The 3-5 day drying window accounts for humidity variations—if your climate is particularly damp, lean toward the longer end of that range. Avoid direct sunlight which can cause uneven drying and potential cracking.
Seed Quality Control: In Step 2, when separating seeds from chaff, I use a fine mesh strainer to catch any small seeds that might fall through when blowing. Discard any seeds with visible cracks or discoloration immediately—they won't germinate. Healthy seeds should have a uniform color and feel plump to the touch. This quality check is where most people lose viable seeds without realizing it.
Storage Organization: The 35-50°F storage temperature range is critical for long-term viability. I keep my seed containers in the back of my refrigerator where it stays consistently cool. Labeling with the variety and year harvested is a game-changer—last year I found a container of seeds I'd completely forgotten about! For extra organization, I use small paper envelopes inside larger containers to separate different sunflower varieties.
Pro Tips for Save Sunflower Seeds For Next Year
- These simple tricks will help you maximize germination rates and avoid common pitfalls when saving sunflower seeds.
- Harvest Timing: The 2-3 day drying period after cutting is crucial—don't rush it.
- Drying Environment: For Step 3, I recommend placing your baking sheet near a heater (but not directly in front) for consistent warmth.
Frequently asked questions
Got questions about saving sunflower seeds? You’re not alone!
Here are answers to the most common concerns—from timing to troubleshooting—to help you master seed storage like a pro.
When is the best time to harvest sunflower seeds?
Harvest seeds when the flower heads turn brown and the back of the seed hull (the part attached to the head) is dry and papery. This usually happens 8–12 weeks after flowering. Wait too long, and birds or pests may snack on them—or the seeds could shatter. Aim for a crisp, dry rattle when shaken gently!
How long can I store sunflower seeds before planting?
Properly dried and stored seeds stay viable for 3–5 years, though germination rates drop after 2–3 years. Store them in a cool (32–40°F), dark, and dry place (like a sealed jar in the fridge) to maximize longevity. Test a few seeds annually by planting them—if germination drops below 50%, it’s time to refresh your stash!
What if birds or squirrels eat my seeds before I can harvest them?
Don’t worry—there are easy fixes! Cover flower heads with mesh bags or cheesecloth once they’re mostly dry (but still green). For stubborn pests, try reflective tape or old CDs hung nearby to scare them off. Harvest seeds early morning when birds are less active for the best chance of success.
Do I need to dry seeds indoors, or can I leave them outside?
While you can leave seeds outside to dry naturally, it’s riskier due to humidity and pests. For best results, hang heads upside-down in a dry, well-ventilated spot (like a garage or shed) for 1–2 weeks. If your climate is damp, speed things up with a dehydrator or low oven (140°F for 1–2 hours)—just avoid high heat, which can kill viability.
Can I save seeds from store-bought sunflowers?
Unfortunately, no—most commercial sunflowers are hybrid varieties, meaning their seeds won’t grow true to the parent plant. For reliable seeds, save from heirloom or open-pollinated sunflowers (check seed packets for labels). If you’re curious, try planting store-bought seeds anyway—you might get a surprise (but don’t expect perfect blooms)!
Pro Tip:
Label your seed packets with the variety name and harvest year! Sunflowers come in dozens of types (giant, snack-size, multi-branched), and mislabeling can lead to disappointing results. A simple masking tape tag with a Sharpie does the trick!
Wrapping up and next steps
Saving sunflower seeds for next year is easier than you think—just follow the right steps! By drying, cleaning, and storing them properly, you’ll ensure healthy germination and a fresh harvest in spring. 🌱
Now that you’re equipped with the know-how, give it a try and enjoy the satisfaction of growing sunflowers from seeds you saved yourself. Ready to plant? Start by selecting the best seeds and preparing your garden beds—your future blooms are waiting! 🌻