Tools
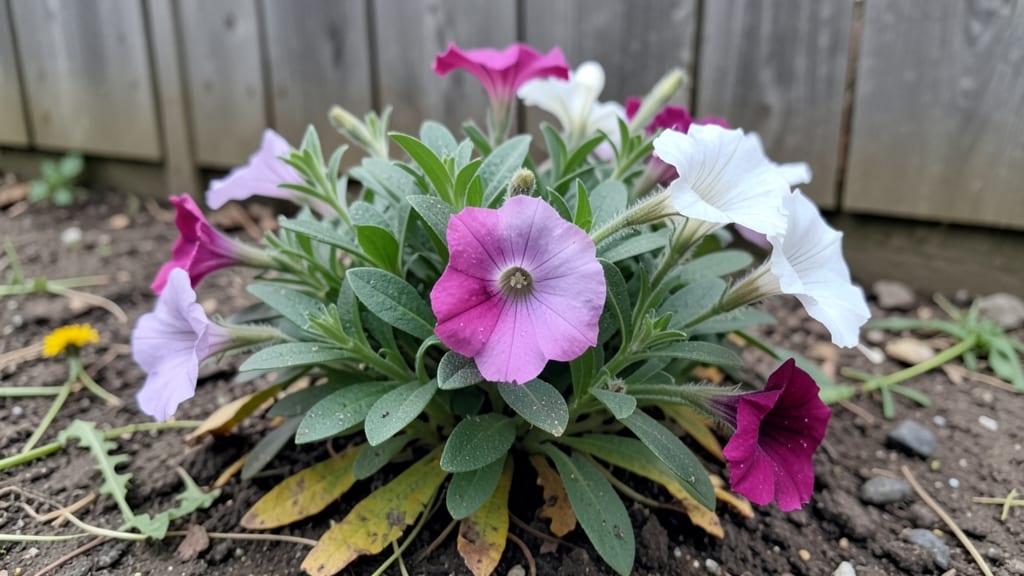
A mini flower garden in containers can transform even the tiniest balcony into a fragrant, colorful oasis—no yard required. 🌸 I started mine on a 4-foot-wide ledge with just three pots and a handful of dwarf petunias, and now it’s the first thing neighbors notice when they visit.
The secret isn’t fancy tools or rare plants—it’s smart spacing, the right container sizes, and choosing flowers that thrive in small spaces without needing constant care.
You’ll need containers with drainage (think window boxes, hanging baskets, or stacked pots), lightweight potting mix, and plants that fit your light conditions—sun-loving succulents for south-facing spots or shade-tolerant impatiens for north sides.
A 5-gallon pot holds one tomato plant or three petunias, while tiny 1-gallon containers work for herbs or trailing lobelia. The key is grouping plants by water needs to simplify maintenance—no more forgetting to water half your garden.
By summer’s end, you’ll have a garden that spills over with blooms, hums with pollinators, and feels like a curated retreat. The dwarf cosmos will sway in the breeze, the sweet alyssum will perfume the air, and even the smallest corner will look intentional.
Best of all? You’ll spend less than 10 minutes a week keeping it thriving—no weeding, no backbreaking work, just pure, portable beauty.
Whether you’re going for a cottage-core charm with lavender and roses or a sleek modern look with monochromatic succulents, containers let you mix styles without commitment. Start small, experiment, and watch your space bloom—literally. The instructions ahead will show you exactly how to pull it off, step by step.
📚 In This Guide
- What you need
- Instructions
- Tips and common mistakes
- Wrapping up and next steps
What you need
- ● Container(s): 1–5 small pots (5–12" diameter), window boxes, or hanging planters. Ensure they have drainage holes!
- ● Potting Soil: 1–2 bags of lightweight, well-draining container mix (avoid garden soil—it compacts!).
- ● Flowers: 3–10 small plants or seeds (choose fast-growing, compact varieties like pansies, petunias, marigolds, or succulents).
- ● Drainage Material: Small pebbles, perlite, or broken pottery (¼" layer at the bottom of each pot).
- ● Watering Can or Spray Bottle: A fine-mist nozzle works best for delicate seedlings.
- ● Slow-release fertilizer granules (follow package instructions).
- ● Decorative mulch (like moss or colored pebbles) for a polished look.
- ● Mini labels to track plant names (or use toothpicks + Sharpie!).
- ● Sunlight meter or app (to check light conditions for your flowers).
- ● Self-watering wick system (for forgetful gardeners—DIY with a wick + water reservoir!).
Step-by-Step instructions for creating your mini flower garden
Here's how to transform even the tiniest space into a vibrant, low-maintenance floral display.
🪴 Step 1: Select and Prepare Your Containers
Choose containers with drainage holes—terracotta pots, hanging baskets, or window-box planters all work beautifully. I prefer 6-8 inch diameter pots for single blooms and 10-12 inch for small clusters. Clean any reused containers thoroughly with a 10% bleach solution to prevent disease, then rinse well. Place a 1-inch layer of gravel or broken pottery at the bottom to ensure proper drainage.
For hanging baskets, line the bottom with coconut coir to retain moisture while allowing excess to drain. If using decorative outer pots, nestle them inside slightly smaller nursery pots to create a hidden reservoir—this keeps roots consistently moist without waterlogging. Remember, the right container isn't just about looks; it's about creating the perfect microclimate for your flowers.
🌱 Step 2: Layer Soil and Plant Your Flowers
Fill containers with lightweight potting mix (never garden soil) mixed with perlite or vermiculite for aeration. I like to add a slow-release fertilizer at this stage—just follow package instructions for mini-garden quantities. Leave 1 inch of space at the top for watering. For a 4-pot arrangement, plant 3-5 flowers per container, depending on size, to create a lush look without overcrowding.
Dig holes twice as deep as the root ball and twice as wide. Gently remove plants from their nursery pots, tease the roots if they're circling, and place them in the holes. Fill around the base with soil, pressing lightly to eliminate air pockets. Water immediately after planting to help roots settle—you'll see the soil sink slightly as it absorbs moisture.
☀️ Step 3: Position for Optimal Light and Care
Most mini flower gardens thrive in 4-6 hours of morning sun with afternoon shade—this prevents wilting while providing enough energy for blooming. If your space gets full sun, choose heat-tolerant varieties like geraniums or petunias. For shadier areas, opt for impatiens or begonias. Rotate containers quarter-turn weekly so plants grow evenly toward the light source.
Water early in the morning to reduce evaporation, aiming for 1 inch of water per week (check soil moisture—top inch should feel dry before watering again). Mulch with 1 inch of decorative pebbles or shredded bark to retain moisture and suppress weeds. Watch for yellowing leaves (overwatering) or drooping flowers (underwatering)—both are quick fixes with proper hydration.
✂️ Step 4: Maintain and Encourage Continuous Blooms
Deadhead spent blooms weekly by pinching off faded flowers just above the next set of leaves. This redirects the plant's energy into producing new buds instead of seeds. For trailing flowers like nasturtiums, gently weave stems through the container edges to create a cascading effect—this also improves air circulation and reduces disease risk.
Feed every 4-6 weeks with a balanced liquid fertilizer diluted to half-strength. I like to fertilize right after deadheading to give plants a nutrient boost for their next growth cycle. Monitor for pests like aphids or spider mites—spray affected areas with neem oil solution (1 tsp per quart of water) at the first sign of trouble. With consistent care, your mini garden will bloom continuously for months.
Tips & tricks for perfect mini flower gardens
Here's what I've learned after turning my own balcony into a blooming oasis—these tricks will help you avoid common pitfalls and create a thriving mini garden that lasts all season.
Container Selection: In Step 1, don't overlook the material! Terracotta pots breathe better in hot weather but dry out faster, while ceramic holds moisture longer but can crack in freezing temps. For maximum versatility, I opt for fiberglass containers—they won't crack, hold moisture well, and come in endless styles. Also, remember that 10-12 inch containers can handle up to three plants if you choose compact varieties like pansies or calibrachoa.
Soil Science: When layering your soil in Step 2, create a "soil sandwich" for optimal drainage and moisture retention. Start with your 1-inch gravel layer, then add 2 inches of perlite at the bottom of your potting mix layer. This prevents compaction while still allowing water to flow freely. For extra nutrients, mix in 1 part compost to your potting mix—just don't overdo it, or you'll risk root rot in those small containers.
Light Management: The 4-6 hours of morning sun recommendation is perfect for most flowers, but here's a pro trick: use reflective surfaces to amplify light. Place your containers on a white tray or near a light-colored wall to bounce extra sunlight onto your plants. For afternoon shade, position containers under sheer curtains—they filter harsh light while still allowing beneficial UV rays to penetrate.
Pest Prevention: In Step 4, when monitoring for pests, don't wait until you see aphids to act. Start with a preventive spray: mix 1 tsp neem oil with 1 quart of water and 1 drop of dish soap (the soap helps the oil adhere to plant surfaces). Spray your plants lightly every 2 weeks during growing season. This creates a protective barrier that deters pests before they become a problem, and it's completely safe for your flowers once dry.
Pro Tips for Mini Flower Garden
- Here's what I've learned after turning my own balcony into a blooming oasis—these tricks will help you avoid common pitfalls and create a thriving mini garden that lasts all season.
- Container Selection: In Step 1, don't overlook the material!
- Soil Science: When layering your soil in Step 2, create a "soil sandwich" for optimal drainage and moisture retention.
Frequently asked questions
What’s the best container size for a mini flower garden?
Aim for containers at least 6–12 inches deep to give roots room to grow. Smaller pots (like 4–6 inches) work for succulents or herbs, but most flowers thrive in deeper spaces. Just ensure drainage holes are included to avoid soggy soil!
How often should I water my mini flower garden?
Check soil moisture daily—containers dry out faster than ground soil. Water when the top inch feels dry, but avoid overwatering (yellow leaves = too much!). Early morning is ideal to reduce evaporation. Pro tip: Use a spray bottle for delicate blooms!
Can I reuse old containers or household items?
Clean, food-safe containers (like yogurt cups or tin cans) work great—just drill drainage holes. Avoid toxic materials (e.g., treated wood) and sanitize with soap/water. Paint or decorate for a cute touch! Warning: Skip plastic that degrades in sunlight.
How do I keep pests away from my mini garden?
Prevent pests with neem oil spray or companion planting (e.g., marigolds repel bugs). Check leaves regularly for aphids or spider mites. For severe issues, isolate the plant and treat with insecticidal soap. Bonus: Ladybugs are natural pest controllers!
What flowers are easiest for beginners in small spaces?
Start with low-maintenance picks like pansies, petunias, or succulents. Herbs (basil, thyme) and dwarf varieties (like mini roses) also thrive. Avoid heavy feeders (e.g., sunflowers) unless your container is large. Pro tip: Choose self-watering pots for hassle-free care!
Wrapping up and next steps
A mini flower garden is your ticket to bringing nature’s beauty into even the tiniest spaces—whether it’s a sunny balcony, a windowsill, or a cozy corner. With the right containers, soil, and a little creativity, you can cultivate vibrant blooms that brighten your day and lift your spirits. 🌸
Now that you’re armed with the know-how, why not start small and watch your green thumb grow? Grab your supplies, pick a sunny spot, and let your container garden flourish—one petal at a time! Ready to plant? 🌱