Container Gardens
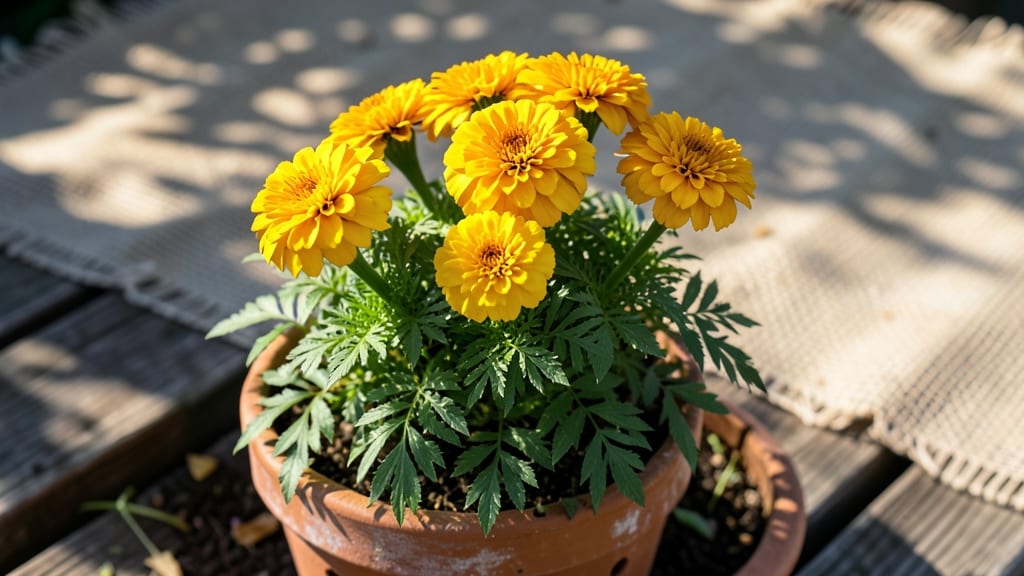
Growing marigolds in flower pots delivers that bold, cheerful color all year—without the fuss of a full garden. 🌼 I’ve grown them in pots for five summers now, and they’ve never failed to bring sunshine to my patio, balcony, or even a sunny windowsill.
The key is choosing the right pot, soil, and a few simple care habits that keep them thriving.
You’ll need containers with drainage holes (at least 5-7 inches deep for single plants), well-draining potting mix, and a spot that gets 6-8 hours of sunlight daily.
French marigolds, like ‘Bonanza’ or ‘Janie,’ are my top picks—they stay compact, bloom nonstop, and repel pests naturally. Skip the heavy garden soil; marigolds hate soggy roots.
By late spring, you’ll have pots bursting with bright orange, gold, or lemon blooms that last until frost. Pinch back leggy stems early to encourage bushier growth, and deadhead spent flowers to keep the show going.
Even in winter, with a grow light and cozy spot, they’ll reward you with fresh color when most gardens are dormant.
This method works for balconies, patios, or even indoors—no yard required. The only real challenge is avoiding overwatering, but once you get the rhythm, marigolds practically grow themselves. Let’s get those pots prepped for a season of effortless beauty.
📚 In This Guide
- What you need
- Instructions
- Tips and common mistakes
- Wrapping up and next steps
What you need
- ● Marigold seeds or seedlings: Choose disease-resistant varieties like French Marigolds (e.g., 'Bonanza') or African Marigolds (e.g., 'Crackerjack'). Aim for 3–5 plants per 12-inch pot or 1–2 plants per 6-inch pot for optimal spacing.
- ● Well-draining flower pots: Use containers with drainage holes (plastic, terracotta, or fabric grow bags). Size: 12+ inches deep for full-grown plants.
- ● High-quality potting mix: A lightweight, sterile mix (e.g., 60% peat moss, 30% perlite, 10% compost) works best. Avoid garden soil—it compacts and drains poorly.
- ● Slow-release fertilizer: A balanced 10-10-10 or 14-14-14 granular fertilizer (e.g., Osmocote) to mix into the soil at planting.
- ● Watering can or hose with a gentle spray nozzle: Marigolds hate soggy roots, so precise watering is key!
- ○ Gloves (optional): Protect your hands from prickly stems or dirty soil.
- ● Hand trowel or small shovel: For transplanting seedlings or mixing soil.
- ● Pruning shears: To trim dead blooms and encourage bushier growth.
- ● Sunny spot: Marigolds thrive in 6+ hours of direct sunlight daily—place pots where they’ll get plenty of rays!
- ○ Mulch (optional): A thin layer of straw or pine bark to retain moisture and suppress weeds.
Step-by-Step instructions for growing marigolds in flower pots
Here's how to bring bold, cheerful marigolds into your space with minimal effort.
🌱 Step 1: Choose the Right Pots and Soil Mix
Select 4-inch diameter pots for each plant—marigolds thrive in cozy spaces where roots can't sprawl. I prefer terracotta because it breathes and prevents root rot, but any container with drainage holes works. Fill each pot with a well-draining potting mix (avoid garden soil—it compacts and suffocates roots). Add a handful of perlite or sand to the mix for extra aeration.
Moisten the soil until it feels like a damp sponge—squeeze it gently, and it should hold together but not drip water. This ensures roots get moisture without drowning. I like to use a 50/50 blend of potting soil and perlite for marigolds, as they despise soggy feet. Tap the pot lightly to settle the soil before planting.
🌿 Step 2: Plant Seeds or Transplants at the Right Depth
For seeds, plant two per pot about ¼ inch deep—marigolds germinate best in warmth, so I use a seedling heat mat if my space runs cool. Cover lightly with soil and mist the surface until damp. Seeds need 70-80°F soil temperatures to sprout within 7-10 days. If using transplants, dig a hole twice as wide as the root ball and place the plant so the top of the roots sits just below the soil line. Gently firm the soil around the base to eliminate air pockets.
This is the moment that matters: don’t overcrowd. Two seeds per pot give you insurance against germination failures, but if both sprout, thin to the strongest seedling. You’ll know it’s ready when it has two true leaves—snip the weaker one at the soil line with clean scissors. Water lightly after planting to settle the soil.
☀️ Step 3: Place in Bright, Indirect Light Immediately
Marigolds crave 6+ hours of sunlight daily, but direct midday sun can scorch young leaves. Start them in a south-facing window or under a grow light for 12-14 hours/day. You’ll see leggy growth if they’re stretching toward the light—this means they’re not getting enough intensity. Adjust the light source so it’s 4-6 inches above the plants and raise it as they grow.
Once seedlings develop 3-4 sets of leaves, they can handle direct morning sun. Rotate pots a quarter turn weekly so plants grow upright instead of leaning. Watch for pale, stretched stems—this is your cue to move them closer to the light or supplement with a grow bulb. Marigolds reward bright conditions with bold, vibrant blooms in just 6-8 weeks from seed.
💧 Step 4: Water and Feed for Continuous Blooms
Water when the top inch of soil feels dry—stick your finger in to check. Marigolds hate soggy soil but also wilting stems, so consistency is key. I water deeply once a week in summer, letting excess drain completely. Use a watering can with a narrow spout to target the base and avoid wetting leaves (this prevents fungal diseases). Yellowing leaves? You’re either overwatering or underwatering—check the soil moisture next time.
Feed every 2-3 weeks with a balanced liquid fertilizer (10-10-10 or 20-20-20). I dilute it to half-strength to avoid burning tender roots. The goal is lush foliage and nonstop blooms. Deadhead spent flowers by pinching them off at the base—this redirects energy to new buds. You’ll see a second flush of blooms within 2-3 weeks if you keep this up.
✂️ Step 5: Prune and Overwinter for Next Season
When blooms slow in fall, give your marigolds a haircut. Trim back one-third of the plant to encourage bushier growth. This is also the time to divide crowded pots—if roots are circling, repot into slightly larger containers. I move mine to a sunny indoor spot (like a bright kitchen windowsill) for winter, where they’ll linger as houseplants until spring.
Real talk: marigolds are tough. If you forget to overwinter them, they’ll self-seed like crazy—just pull up volunteers in spring and replant. For a head start next year, sow seeds indoors in late winter under grow lights. You’ll have colorful pots ready by Memorial Day without the fuss of annual replanting.
Tips & tricks for perfect marigolds in flower pots
A few simple tricks will help you grow marigolds that bloom nonstop with minimal effort.
Soil Mix Secret: The 50/50 blend of potting soil and perlite in Step 1 is non-negotiable for marigolds. I've learned the hard way that skipping the perlite leads to compacted soil and root rot—marigolds despise soggy conditions. For extra insurance, add a thin layer of coarse sand at the bottom of your 4-inch pots before adding the soil mix. This creates a drainage barrier that prevents water from pooling at the roots.
Germination Game-Changer: When planting seeds in Step 2, don't just sprinkle them randomly—use a toothpick to create small divots about ¼ inch deep. This ensures consistent planting depth, which is crucial for even germination. Place your pots on a seedling heat mat set to maintain 70-80°F soil temperature. If you don't have a heat mat, set the pots on top of your refrigerator (not inside) for gentle warmth. The goal is to mimic their natural tropical environment.
Lighting Strategy: In Step 3, those 12-14 hours of light are critical for strong seedlings. If you're using a grow light, position it just 4-6 inches above the plants—closer than most people think. I use a simple LED grow bulb on a timer to automate the process. Watch for leggy seedlings stretching toward light; this means they need more intensity. Rotate your pots weekly to prevent them from leaning toward one light source, which creates uneven growth.
Watering Wisdom: The "top inch dry" rule in Step 4 works, but here's what nobody tells you: marigolds actually prefer slightly drier conditions than most plants. Let the soil dry out completely between waterings in summer—stick your finger 2 inches deep. If it's still damp, wait another day. The key is consistency: soggy soil leads to root rot, while wilting stems mean you've gone too far the other way. A moisture meter makes this foolproof.
Pro Tips for Marigolds In Flower Pots
- A few simple tricks will help you grow marigolds that bloom nonstop with minimal effort.
- Soil Mix Secret: The 50/50 blend of potting soil and perlite in Step 1 is non-negotiable for marigolds. I've learned ...
- Germination Game-Changer: When planting seeds in Step 2, don't just sprinkle them randomly—use a toothpick to create ...
Frequently asked questions
Got questions about growing marigolds in flower pots? You’re not alone! Here are some of the most common queries—and their simple solutions—to help you keep your container garden blooming beautifully.
How deep should the flower pot be for marigolds?
Marigolds thrive in pots that are at least 6–8 inches deep and 6–12 inches wide. This gives their roots enough room to spread while preventing waterlogging. If you’re growing larger varieties like ‘French Marigolds,’ opt for deeper pots (10+ inches) to support their taller stems. Pro tip: Add drainage holes to avoid soggy soil!
When is the best time to plant marigolds in pots?
For spring planting, wait until after the last frost when soil temps hit 50°F+. In summer or fall, marigolds can be planted anytime—just ensure they get 6+ hours of sunlight daily. Bonus: Start seeds indoors 4–6 weeks before the last frost for an early bloom!
How often should I water potted marigolds?
Water marigolds when the top inch of soil feels dry—usually every 2–3 days in hot weather or 3–4 days in cooler temps. Avoid soggy soil (a common killer of potted plants) by ensuring pots have drainage holes. Quick fix: Use a moisture meter or stick your finger in the soil to check!
Can I grow marigolds in pots year-round?
Yes! With the right care, marigolds can bloom indoors or outdoors year-round. Move pots to a sunny windowsill (south-facing) or under grow lights in winter. In cold climates, bring them indoors before temps drop below 40°F. Fun fact: Some varieties, like ‘Signet Marigolds,’ are compact enough for year-round container life!
Why are my potted marigolds wilting or turning yellow?
Wilting often means overwatering or underwatering, while yellow leaves usually signal root rot or nutrient deficiency. Check for:
- Drainage issues (fix with better pots or soil mix).
- Pests (aphids, spider mites—spray with neem oil).
- Nutrient burn (use a balanced fertilizer like 10-10-10).
Wrapping up and next steps
Marigolds in flower pots are a bright, low-maintenance way to add vibrant color to your space—whether on a balcony, patio, or windowsill! 🌼 With the right soil, sunlight, and occasional care, these cheerful blooms thrive year-round, proving that gardening doesn’t have to be complicated.
Ready to transform your outdoor (or indoor!) oasis? Start small: grab a pot, pick your favorite variety, and let nature do the rest!
Pro tip: Snap a photo of your first blooms—you’ll love tracking your progress! 📸