How To
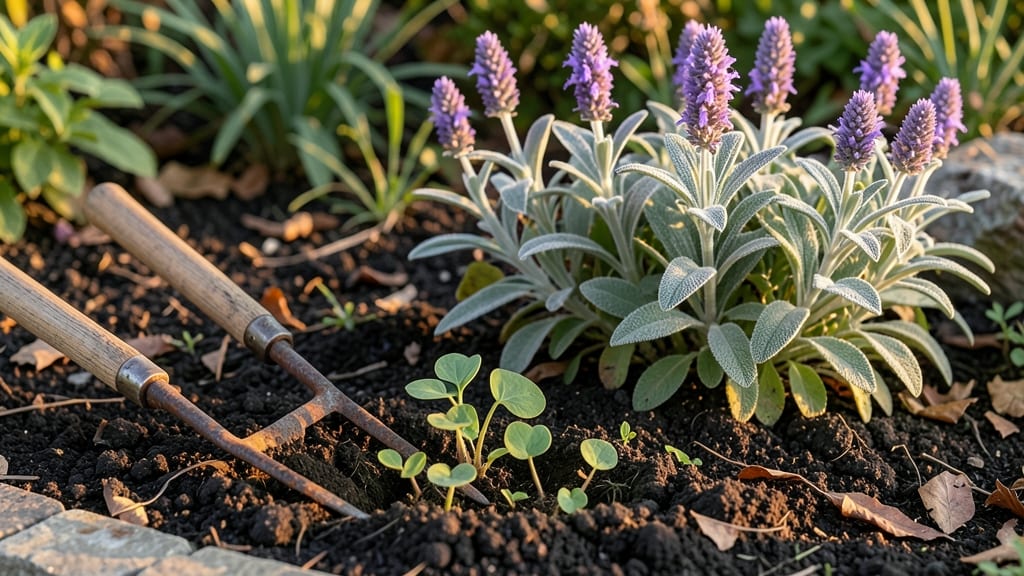
Building a flowerbed that stays stunning through every season starts with a solid foundation and smart layering. I learned the hard way that skipping soil prep means flowers fight for nutrients—now my beds burst with color from spring through frost.
The key is balancing drainage, sun exposure, and the right materials to keep weeds at bay and roots happy.
You’ll need basic tools—a shovel, rake, and edging material (bricks, stones, or metal)—plus a mix of topsoil, compost, and mulch. My go-to setup costs under $50 and takes a weekend, even for a 4x8-foot bed.
The secret? Amending native soil with compost creates a rich, crumbly base that holds moisture without drowning roots.
By the time you’re done, you’ll have a defined space with lush foliage, bold blooms, and minimal maintenance. Perennials thrive with deep roots, annuals get the perfect stage for showy displays, and seasonal interest keeps things vibrant.
This isn’t just a flowerbed—it’s a low-stress garden feature that pays off year after year.
Works for small urban plots or sprawling backyard spaces, and adapts to sun or shade. Let’s get your design sketched out and ready for planting!
📚 In This Guide
- What you need
- Instructions
- Tips and common mistakes
- Wrapping up and next steps
What you need
- ● Soil & Amendments: Topsoil – 2–3 cubic yards (depending on flowerbed size)
- ● Compost or aged manure – 1–2 bags (20–40 lbs each) for nutrient-rich soil
- ● Perlite or sand – 1–2 small bags (for drainage in heavier clay soil)
- ● Edging & Border: Landscape fabric – 1 roll (10–15 ft wide) to suppress weeds
- ● Edging material (brick, stone, or metal) – Quantities based on flowerbed perimeter
- ● Tools: Garden shovel or spade
- ● Wheelbarrow or large bucket
- ● Garden rake
- ● Measuring tape
- ● Gloves (heavy-duty)
- ● Mulch (pine straw, wood chips) – 2–3 bags (for moisture retention and weed control)
- ● Slow-release fertilizer – 1–2 bags (for long-term plant health)
- ● Garden hose with spray nozzle (for watering during planting)
- ● Knee pads or a small stool (for comfort while working)
- ● Plant markers or stakes (to label and support taller plants)
Step-by-Step guide to building a functional flowerbed
Here's the method I've used for years to create flowerbeds that stay healthy, look stunning, and require less maintenance.
Mark and Outline Your Flowerbed Shape
Use a garden hose or spray paint to sketch your flowerbed design on the ground. I like to create curves rather than straight lines—they soften the look and reduce soil erosion. For a 4-foot-wide bed, mark the edges with stakes every 3-4 feet to keep the shape consistent. Check your layout from multiple angles to ensure it fits the space and your vision.
Step back and visualize how the bed will look when planted. You'll want to leave at least 18-24 inches of open space between the bed and any walkways or structures. This prevents soil compaction from foot traffic and makes future weeding easier. If you're unsure about the shape, start small—you can always expand later.
Remove Sod or Existing Vegetation
Use a sharp spade or sod cutter to remove the existing grass or weeds within your marked area. Work in 12-inch-wide strips to avoid overstretching. Lift the sod carefully and flip it over to expose the roots—this helps dry it out for removal later. If you're dealing with stubborn weeds, like creeping charlie, dig deeper to ensure they don’t regrow.
Don’t rush this step. Taking the time to remove all vegetation now prevents future competition for water and nutrients. Once the area is clear, rake away any remaining debris, including rocks or roots larger than 1 inch in diameter. Smooth the soil surface with a leveling rake to create an even base for the next layers.
Amend the Soil for Optimal Plant Growth
Test your soil’s drainage by digging a 6-inch-deep hole and filling it with water. If the water drains within 30 minutes, your soil is well-drained. If not, you’ll need to improve drainage by adding 2-3 inches of coarse sand or gravel to the bottom of the bed before proceeding. Mix the top 6 inches of soil with 2-3 inches of compost to enrich it—this boosts fertility and improves moisture retention.
For heavy clay soil, blend in 1 part peat moss or coconut coir to every 2 parts soil to lighten the texture. If your soil is sandy, add 1 part compost to every 1 part soil to help retain moisture. Work the amendments into the soil until it looks dark, crumbly, and uniform. Avoid overworking it—just break up clumps and mix gently.
Install Edging and Mulch
Choose edging that matches your garden style—plastic, metal, or natural stone all work well. For a 4-foot-wide bed, install edging 2-3 inches deep along the perimeter to keep soil contained and prevent grass from encroaching. Press it firmly into the ground, ensuring it’s level. If using flexible edging, bend it into place and secure it with landscape staples.
Spread a 2-3 inch layer of mulch over the soil surface, leaving a 1-inch gap between the mulch and any plants you’ll add later. Use shredded bark, pine straw, or compost for organic options, or gravel or stones for a low-maintenance look. Mulch helps suppress weeds, retain moisture, and regulate soil temperature. Keep the mulch layer even—uneven piles can smother plants or create drainage issues.
Plant and Maintain for Long-Term Beauty
Start by planting perennial flowers at the back of the bed, followed by shrubs or taller annuals, and finish with low-growing plants or ground covers in the front. Space plants according to their mature size—check the tags for guidance. Water deeply after planting to settle the soil and encourage root growth. For the first 2-3 weeks, water lightly every 2-3 days to keep the soil moist but not soggy.
Once your plants are established, maintain the flowerbed by replenishing mulch annually and removing spent blooms to encourage continuous flowering. Every 2-3 years, refresh the soil by adding a 1-inch layer of compost and mixing it lightly into the top layer. This keeps nutrients high and prevents soil depletion. With proper care, your flowerbed will thrive for years, offering color and texture throughout the seasons.
Tips & tricks for perfect flowerbed design
A few simple strategies will help you create a flowerbed that stays beautiful and functional for years to come.
Design Tip: When marking your flowerbed shape in Step 1, consider creating a slight slope (about 1 inch over 4 feet) if your yard has drainage issues. This subtle grade helps water flow away from plants, preventing root rot. I've found that even a small slope makes a big difference in keeping plants healthy during heavy rains.
Vegetation Removal: In Step 2, if you encounter creeping charlie or other aggressive weeds, don't just cut them—dig them out completely, including the roots. I learned this the hard way after spending months pulling back the same weeds. For stubborn patches, apply a vinegar-based weed killer first to weaken the roots before digging.
Soil Preparation: The 30-minute drainage test in Step 3 is crucial. If your soil drains too slowly, don't just add sand—mix in perlite or vermiculite instead. These materials improve drainage while also helping the soil retain moisture. For clay-heavy soil, I've had great success with a 50/50 mix of native soil and coconut coir, which breaks up the clay while adding organic matter.
Planting Strategy: When planting in Step 5, arrange your perennials in odd-numbered groups (3, 5, or 7 plants) rather than straight lines. This creates a more natural, organic look that's visually appealing. Also, leave about 2 inches of space between mulch and plant stems to prevent moisture buildup that can cause rot.
Pro Tips for Build A Flowerbed
- A few simple strategies will help you create a flowerbed that stays beautiful and functional for years to come.
- Design Tip: When marking your flowerbed shape in Step 1, consider creating a slight slope (about 1 inch over 4 feet) if your yard has drainage issues.
- Vegetation Removal: In Step 2, if you encounter creeping charlie or other aggressive weeds, don't just cut them—dig them out completely, including the roots.
Frequently asked questions
Got questions about building your dream flowerbed? You’re not alone! Here are answers to common concerns to help you create a stunning, functional space with confidence.
When is the best time to build a flowerbed?
The ideal time is early spring or fall—when soil is workable but not frozen. Spring lets you enjoy blooms all season, while fall gives roots time to establish before winter. Avoid planting in extreme heat or drought conditions, which can stress new plants.
Can I build a flowerbed on a budget?
Skip expensive mulch by using free yard waste (like grass clippings or shredded leaves) and repurpose materials like bricks, logs, or even old tires as edging. Local nurseries often sell bulk soil or compost at discounted prices, too.
How do I keep pests and weeds out of my new flowerbed?
Start with a thick layer of cardboard or landscape fabric under mulch to block weeds. Use organic mulch (like straw or wood chips) to deter pests naturally. Planting pest-repellent flowers (e.g., marigolds or lavender) also helps keep critters at bay!
Do I need to fertilize my flowerbed right after building it?
Not immediately! Wait until you’ve planted flowers, then use a slow-release fertilizer or compost. Over-fertilizing new soil can burn plants. Test your soil first—many garden centers offer affordable kits to check pH and nutrient levels.
What if my flowerbed looks uneven or messy?
Don’t stress—even pros tweak designs over time! Rake the soil lightly to smooth bumps, and adjust mulch or plants as they grow. A layered approach (like adding taller plants at the back) can hide imperfections while creating depth. Patience pays off!
Wrapping up and next steps
Building a stunning, functional flowerbed is all about planning, layering, and patience—but the results are totally worth it! 🌸 Whether you’re a gardening newbie or a seasoned pro, these steps will help you create a space that thrives year-round while adding beauty and value to your outdoor area.
Now that you’ve got the design, materials, and tips down, it’s time to roll up your sleeves and watch your vision bloom.
Ready to take the next step? Start small—pick one section of your yard, gather your tools, and begin layering! And once your flowerbed is flourishing, experiment with seasonal swaps or even expand your green thumb to a full garden. Happy planting! 🌱