
Flowers
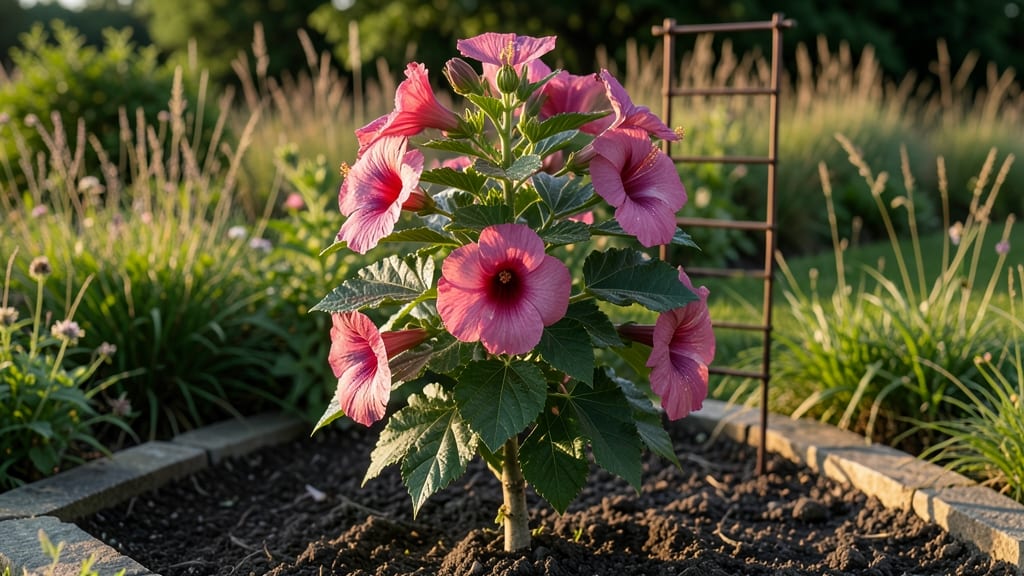
Growing hardy hibiscus flowers in the Pacific Northwest means defying frost with bold, tropical blooms that thrive where others freeze. 🌱 I’ve watched these plants push through damp winters and explode with color by summer—proof that hardiness isn’t about fragility.
The secret lies in understanding their soil cravings, sunlight needs, and how to shelter them from our famously wet winters without smothering their roots.
You’ll need well-draining soil mixed with compost (think rich loam, not heavy clay), a spot with at least 6 hours of sun daily, and patience for their slow start.
Hardy hibiscus roots run deep, so mulch heavily in fall to insulate them through Zone 7 winters—the key to surviving our chilly springs and late frosts. Pruning in early spring clears out weak growth and encourages those signature dinner-plate blooms by midsummer.
By summer’s end, you’ll have a plant bursting with 3-foot-tall blooms in shades of pink, red, or white, attracting hummingbirds while your neighbors’ tender varieties wilt. The trade-off?
A little extra winter prep, but the payoff—months of vibrant color—makes it worth every effort. Let’s get those roots established right from the start.
This guide covers everything from site prep to winter mulching, including how to spot (and fix) slow growth or frost damage before it becomes a problem.
Whether you’re starting with a bare-root plant or a small container, the same principles apply—so grab your gloves, and let’s grow something stunning that actually survives our weather.
📚 In This Guide
- What you need
- Instructions
- Tips and common mistakes
- Wrapping up and next steps
What you need
- ● Hardy hibiscus plants: 1–3 nursery-grown plants (zones 5–9 hardy; look for Hibiscus moscheutos varieties like 'Lady Baltimore' or 'Southern Belle').
- ● OR seeds (start indoors 8–10 weeks before last frost).
- ● Soil: 4–6 cubic yards of well-draining, fertile soil (amend with compost or peat moss for moisture retention).
- ● pH: 5.5–6.5 (test kit recommended).
- ● Sunlight: Full sun (6+ hours/day) or partial shade (afternoon shade in hotter PNW summers).
- ● Watering supplies: Garden hose with adjustable nozzle or drip irrigation system.
- ● Mulch (2–3 inches of shredded bark or straw to retain moisture).
- ● Fertilizer: Balanced 10-10-10 or 5-10-10 fertilizer (apply in early spring and mid-summer).
- ○ Optional: Slow-release organic fertilizer (e.g., fish emulsion or compost tea).
- ● Pruning shears (for shaping in early spring).
- ● Stakes or cages (to support tall varieties like 'Purple Pillar').
- ● Frost cloth (for young plants in late spring/early fall).
- ● Soil moisture meter (to monitor watering needs in dry spells).
- ● Garden gloves (for handling thorny stems or soil).
Step-by-Step guide to planting hardy hibiscus in the Pacific Northwest
Here's how I've successfully grown frost-resistant hibiscus for years in our chilly climate.
🌱 Step 1: Choose the Right Location and Prepare the Soil
Select a site that gets full sun—at least 6-8 hours daily—with protection from harsh winds. Hardy hibiscus thrives in well-draining soil with a slightly acidic to neutral pH (6.0-7.0). I always test my soil first because our Pacific Northwest clay can be too dense. Amend with 2-3 inches of compost mixed into the top 12 inches of soil to improve drainage and fertility.
Dig a hole twice as wide as the root ball but only as deep. This encourages roots to spread outward rather than settling too low. Work the amended soil into the existing earth until it's loose and crumbly. The goal is a fluffy, airy mix that won't compact when watered—hibiscus roots need room to breathe, especially in our wet winters.
🪴 Step 2: Plant at the Correct Depth and Water Thoroughly
Place your hibiscus in the hole, ensuring the top of the root ball sits 1 inch above soil level. This prevents water from pooling around the crown, which can rot stems in our damp climate. Backfill with the amended soil, pressing gently to eliminate air pockets but not compacting too firmly.
Water immediately after planting with 1-2 gallons of water, enough to settle the soil around roots. You'll know it's right when water drains through the bottom of the hole—hibiscus hate soggy roots. Mulch with 2-3 inches of organic mulch (like shredded bark) around the base, keeping it 6 inches away from the stem to prevent rot. This mulch layer insulates roots in winter and retains moisture during our dry summer spells.
☀️ Step 3: Provide Season-Long Care for Frost Resistance
Water deeply 1-2 times per week during the first growing season, aiming for 1-2 inches of water weekly. Let the top 2 inches of soil dry out between waterings—this prevents fungal diseases that thrive in our cool, wet conditions. In winter, reduce watering to once every 2-3 weeks unless we get heavy rain, as hibiscus enter dormancy.
Fertilize in early spring with a balanced 10-10-10 fertilizer at half strength. I apply it in three equal doses—once in spring, again in midsummer, and a final light feeding in early fall. This gradual approach prevents excessive growth that can't survive our frosts. Prune back one-third of the plant in late winter or early spring before new growth begins. This encourages bushier growth and stronger stems for our windy Pacific Northwest winters.
⏰ Step 4: Protect from Late Frosts and Prepare for Winter
Wait until after the last frost date (typically mid-May in most of the PNW) before removing winter protection. I use burlap wraps or frost cloth to shield young plants from late frosts, securing them loosely so air can circulate. Never use plastic—it traps moisture and causes rot in our damp climate.
In late fall, after the first hard frost, cut back the plant to 6-12 inches above the ground. This protects the crown from freezing and encourages new growth in spring. Cover the base with 4-6 inches of mulch (like straw or leaves) to insulate roots. Hardy hibiscus can survive down to 10°F, but this extra protection ensures vibrant blooms next season. I always remove the mulch in early spring before new growth appears—waiting too long can suffocate emerging shoots.
Tips & tricks for perfect hardy hibiscus flower planting
These pro tips will help you grow stunning, frost-resistant hibiscus that thrive in our Pacific Northwest climate—no matter how chilly the winters get.
Soil Preparation Secret: In Step 1, when amending your soil with 2-3 inches of compost, I recommend adding a handful of perlite or coarse sand to the mix. Our PNW clay retains too much moisture, and hibiscus roots need excellent drainage. This creates that perfect airy texture mentioned in the instructions—think of it as giving your roots a spa treatment to prevent rot. The 12-inch deep amendment is crucial because hibiscus roots spread wide, not deep.
Planting Depth Visual Cue: In Step 2, when positioning your plant so the root ball sits 1 inch above soil level, here's my trick: use a pencil to mark that 1-inch height on your shovel handle before digging. This ensures perfect placement every time. I've learned the hard way that even a quarter-inch difference can cause water pooling—hibiscus stems rot faster than you'd think in our damp climate. Also, avoid pressing the soil too firmly when backfilling; it should feel like packing snow, not concrete.
Watering Technique: The 1-2 gallons of water in Step 2 should be applied slowly to prevent runoff, especially in our heavy clay soils. I use a watering wand with a gentle spray setting to mimic natural rainfall. After watering, check for proper drainage by looking for water emerging from the bottom of the hole—this confirms you've achieved the airy soil texture from Step 1. The 2-3 inches of mulch acts like a natural water reservoir during our dry summer spells, but remember to keep it 6 inches away from the stem to prevent rot.
Winter Protection Hack: For Step 4's winter care, I've found that wrapping the base with burlap before adding mulch creates a double layer of protection against our 10°F winters. The burlap acts as a windbreak while allowing air circulation—critical in our windy PNW climate. When cutting back in late fall, make clean cuts at the 6-12 inch mark using sharp pruners. This precise cut prevents ragged edges that can harbor disease, giving you healthier growth next spring.
Pro Tips for Hardy Hibiscus Flower
- These pro tips will help you grow stunning, frost-resistant hibiscus that thrive in our Pacific Northwest climate—no matter how chilly the winters get.
- Soil Preparation Secret: In Step 1, when amending your soil with 2-3 inches of compost, I recommend adding a handful of perlite or coarse sand to the mix.
- Planting Depth Visual Cue: In Step 2, when positioning your plant so the root ball sits 1 inch above soil level, here's my trick: use a pencil to mark that 1-inch height on your shovel handle before digging.
Frequently asked questions
Got questions about growing hardy hibiscus in your Pacific Northwest garden? You’re not alone! Here are answers to the most common queries—plus a few pro tips to keep your blooms thriving through frost and rain.
Can hardy hibiscus survive PNW winters?
Hardy hibiscus (like Hibiscus moscheutos) are bred to tolerate USDA Zones 5-9, making them perfect for the PNW’s chilly, wet climate. With proper mulching (3–4 inches of straw or wood chips) and winter pruning, they’ll bounce back stronger each spring. Pro tip: Avoid pruning until late winter—wait until after the last frost to encourage new growth.
How often should I water hardy hibiscus?
These plants love moisture but hate soggy roots. Water deeply 1–2 times per week during the growing season (spring–fall), aiming for 1–2 inches of water per week. In the PNW’s rainy climate, focus on well-draining soil—amend clay with compost or sand to prevent root rot. Drought-tolerant once established, but they’ll reward you with bigger blooms if kept consistently hydrated!
When and how should I prune hardy hibiscus?
Prune in late winter or early spring (February–March) to shape the plant and remove dead wood. Cut back 1/3 of the plant’s height to encourage bushier growth and more flowers. Avoid heavy pruning in fall—it reduces winter hardiness. For extra-large blooms, pinch back new growth in early summer. Warning: Wear gloves—hibiscus stems can be prickly!
Are hardy hibiscus deer- or pest-resistant?
Unfortunately, deer and rabbits adore them! Use physical barriers (chicken wire) or repellents like rotten egg spray to deter critters. As for pests, watch for aphids or spider mites—spray with soapy water or neem oil if you spot sticky leaves or webs. Good news: Hardy hibiscus are disease-resistant compared to tropical hibiscus, so fungal issues are rare in the PNW.
Why aren’t my hardy hibiscus blooming?
Blooms thrive with full sun (6+ hours/day) and balanced fertilizer (use a low-phosphorus formula in spring). If your plant is leafy but flower-less, it may need more sunlight or less nitrogen-heavy fertilizer (too much = foliage over flowers). Deadhead spent blooms to encourage more flowers. Bonus: Some varieties (like ‘Disco Belle’) bloom all summer—choose based on your goals!
What’s the best companion plant for hardy hibiscus?
Pair them with moisture-loving perennials like canna lilies, asters, or catmint for a PNW-friendly garden. Avoid competitive plants like mint or invasive ground covers that steal nutrients. For height contrast, try Joe Pye weed or Russian sage. Design tip: Group 3–5 hibiscus together for a dramatic, pollinator-friendly display!
Wrapping up and next steps
Growing hardy hibiscus flowers in the Pacific Northwest is absolutely doable—even with frost! 🌿 With the right frost-resistant varieties, well-drained soil, and a little patience, you’ll soon be rewarded with stunning, long-lasting blooms that thrive in your climate.
Whether you’re a seasoned gardener or just starting out, these tips will help you cultivate a vibrant, resilient hibiscus garden that brings joy year after year.
Ready to take the next step? Pick your favorite variety, grab your gardening tools, and start planting—your future hibiscus haven awaits! 🌸