Planting
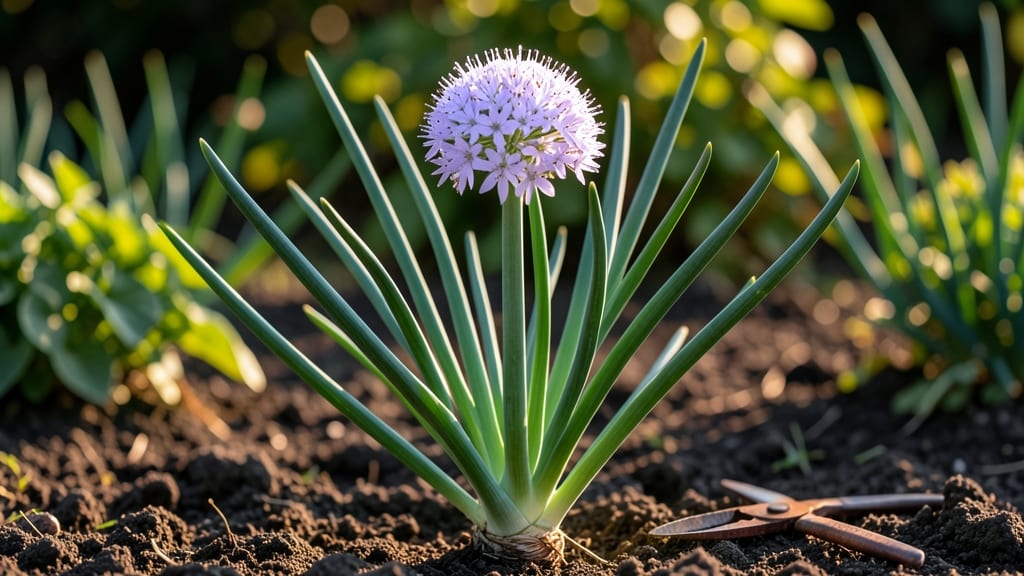
When your green onion plants send up those delicate purple flowers, it’s not a sign to panic—it’s actually nature’s way of telling you it’s time to decide whether you want seeds or scallions. 🌱 I’ve learned the hard way that flowering doesn’t ruin your harvest, but it does shift your plant’s focus from leafy greens to seed production, so timing matters if you want those tender shoots to keep coming.
The good news? You can still get multiple harvests from a single plant if you act fast. Snip off the flower stalks before they bloom, and your green onions will redirect energy back into leaf growth.
I’ve done this for years, and my scallions keep producing fresh shoots for weeks longer than they would otherwise. It’s all about understanding the plant’s priorities—and working with them.
What you’ll end up with is a steady supply of crisp, mild green onions, perfect for salads, stir-fries, or garnishes. The key is staying ahead of the flowering cycle, so you’re not left with tough, bitter stalks when you actually want to eat them.
Once you master this, you’ll never waste another harvest again.
This works just as well for container gardens as it does for in-ground planting, so whether you’re growing on a windowsill or in raised beds, the same principles apply. Let’s get those scallions back to their leafy best before the flowers take over.
📚 In This Guide
- What you need
- Instructions
- Tips and common mistakes
- Wrapping up and next steps
What you need
- ● Green onion plants (scallions) – 5–10 mature plants (with visible flower stalks or ready to bolt). Choose organic or disease-free varieties if possible!
- ● Well-draining potting mix – 2–3 gallons (for containers) or enrich your garden soil with compost (aim for 60% organic matter for best results).
- ● Organic fertilizer – A balanced 10-10-10 or nitrogen-rich fertilizer (like fish emulsion or compost tea) to revive growth.
- ● Pruning shears or clean scissors – Sharp tools to trim flowers and foliage without damaging the plant.
- ● Watering can or hose with a gentle spray nozzle – Overhead watering is key to prevent stress.
- ● Gloves – Protect your hands from soil and sharp onion edges.
- ○ Shade cloth (30–50%) – Optional but helpful if your climate gets too hot (>85°F/30°C) to prevent bolting.
- ● Plant labels – Mark varieties if growing multiple types.
- ● Mulch (straw or grass clippings) – Retains moisture and regulates soil temp.
- ● Grow lights (LED, full-spectrum) – For indoor setups or extending the growing season.
- ● A location with 6+ hours of sunlight daily (or a sunny windowsill for indoors).
- ● Access to cool to moderate temps (50–75°F / 10–24°C). Avoid extreme heat or frost.
- ● Patience! Reviving blooms and regrowing green onions takes 4–6 weeks.
How to revive green onion plants after flowering
Flowering signals your green onions are ready for a second harvest—here's how to keep them producing.
🌱 Step 1: Identify and Remove Flower Stems
When you spot a flower stalk emerging, act fast—these stalks drain energy from leaf production. Use clean scissors to snip the stalk at the base, just above the bulb. I always check plants twice weekly after they reach 6-8 inches tall, since flower stalks can appear suddenly. The moment you see a thin, hollow stem pushing upward, cut it immediately.
Don't pull the stalk—this can damage the bulb. Instead, make a clean cut to prevent disease entry. You'll notice new side shoots emerge within 3-5 days of removing the flower stalk, signaling the plant is redirecting energy back to leaf growth. This is your first sign the plant is reviving for another harvest cycle.
☀️ Step 2: Adjust Light and Temperature
Green onions need 6-8 hours of direct sunlight daily to recover after flowering. If your plants look pale or leggy, move them to a sunnier spot immediately. A south-facing window or grow light positioned 6-12 inches above the plants works best. I've found that 65-75°F temperatures encourage fastest regrowth—any cooler, and new leaves grow slowly.
Watch for wilting in afternoon heat. If leaves droop by midday, provide afternoon shade with a sheer curtain. You'll see stronger regrowth when leaves stay upright and dark green. Avoid placing plants near drafts or heat vents, as sudden temperature swings stress the plant and delay recovery.
💧 Step 3: Water Strategically for Recovery
Water deeply every 2-3 days until the top 1 inch of soil feels moist but not soggy. Overwatering after flowering causes rot, while underwatering stunts new growth. I use the "finger test"—stick your finger into the soil to check moisture before watering. The soil should feel slightly damp, like a wrung-out sponge.
Water at the base of the plant in the morning to prevent fungal issues. Avoid getting leaves wet, as this encourages disease. You'll notice new growth within 7-10 days if moisture is consistent. If leaves yellow at the tips, you're either overwatering or using hard water—switch to distilled or rainwater if this happens.
✂️ Step 4: Fertilize for Strong Regrowth
After removing flower stalks, feed your plants with a balanced liquid fertilizer (10-10-10 ratio) diluted to half strength. I apply this every 2 weeks until new growth reaches 4-6 inches tall. The fertilizer boosts leaf production and strengthens the bulb for future harvests. Avoid high-nitrogen fertilizers—they promote leafy growth at the expense of bulb development.
You'll see thicker, darker green leaves within 10-14 days of fertilizing. If leaves develop brown tips, flush the soil with water to prevent salt buildup. Stop fertilizing 2 weeks before your final harvest to ensure the best flavor and texture.
🌿 Step 5: Harvest Strategically for Continuous Yield
Once new leaves reach 6-8 inches tall, you can begin harvesting again. Cut the outer leaves at the base, leaving the inner leaves and bulb intact. This method lets you harvest every 2-3 weeks for months. I always leave at least 3-4 leaves on the plant to maintain growth—removing too many weakens the bulb.
If the bulb begins to swell and the leaves yellow, it's time to harvest the entire plant. Pull gently to avoid breaking the bulb. You'll get 3-4 harvest cycles per plant if you follow these steps. Store harvested bulbs in a cool, dark place with 50-60% humidity to keep them fresh for up to 2 weeks.
Tips & tricks for reviving green onion plants after flowering
Here's what nobody tells you about keeping your green onions productive after they bloom.
Timing is Everything: In Step 1, those 6-8 inch plants are your golden window to catch flower stalks early. I've seen stalks appear overnight—check plants twice weekly once they reach 5 inches. The earlier you remove a stalk, the faster you'll see those new side shoots emerge within 3-5 days. Don't wait until the stalk is thick and woody, or you'll lose valuable regrowth time.
Light and Temperature Secrets: Step 2's 6-8 hours of sunlight is non-negotiable, but here's the secret: if your plants look pale after moving to a sunny spot, they might need an extra day to adjust. I've found that moving plants gradually from shade to full sun over 2-3 days prevents shock. And while 65-75°F is ideal, don't stress if your home runs cooler—just be patient, as new growth will still appear, just more slowly.
Watering Wisdom: The finger test in Step 3 is your best friend, but here's a pro move: water in the morning when the soil is cooler. This prevents evaporation and keeps moisture where the roots need it. If you notice leaves curling upward during the day, that's your plant's way of saying "I need water now"—but wait until evening to water so the leaves have time to dry before nightfall, reducing fungal risk.
Fertilizer Strategy: When you're fertilizing every 2 weeks in Step 4, here's my trick: mix your diluted fertilizer with water in a spray bottle. Lightly mist the soil (not the leaves) around the base—this gives you better control and prevents salt buildup. And that 10-14 day wait for thicker leaves? That's when the real magic happens if you've been consistent with all the other steps.
Pro Tips for Green Onion Plant Flower
- Here's what nobody tells you about keeping your green onions productive after they bloom.
- Timing is Everything: In Step 1, those 6-8 inch plants are your golden window to catch flower stalks early.
- Light and Temperature Secrets: Step 2's 6-8 hours of sunlight is non-negotiable, but here's the secret: if your plants look pale after moving to a sunny spot, they might need an extra day to adjust.
Frequently asked questions
Why does my green onion plant flower?
Green onions flower as a natural part of their life cycle, signaling they’re ready to produce seeds. This happens when days get longer (spring/early summer) or if they’re mature. While it’s normal, flowering often means the greens become tougher and bitter—time to harvest or take action!
How long until green onions flower after planting?
Most green onion varieties bolt (flower) within 6–8 weeks in warm weather. If planted in cooler seasons, they may take longer. To delay flowering, use slow-bolting varieties like ‘Evergreen Hardy White’ or grow them in partial shade.
Can I still harvest green onions after they flower?
Yes! Once flowers appear, focus on harvesting the base (white/light green part) and outer leaves. Avoid cutting too close to the bulb—this can stress the plant further. For best results, snip leaves 2–3 inches from the base and let regrowth continue.
What can I do to prevent green onions from flowering?
Try these tricks:
- Choose bolt-resistant varieties (e.g., ‘Tokyo Long White’).
- Plant in cool seasons (spring/fall) or use shade cloth (30–50%) in hot climates.
- Harvest leaves regularly to redirect energy to growth, not flowers.
- Use container gardening—small pots limit root space, slowing bolting.
Pro tip: Succession planting every 2–3 weeks ensures a steady supply of fresh, non-flowering greens!
My green onions flowered—are they still edible?
While the greens may taste slightly milder post-flowering, they’re still safe to eat. For milder flavor, harvest young leaves or use the bulbs in cooked dishes (like stir-fries or soups). If the plant looks wilted, compost it and replant.
Can I save seeds from green onion flowers?
Yes! Let the flower stalks mature into seed pods (they’ll turn brown and dry). Collect seeds, clean them, and store in a cool, dark place for up to 2 years. Note: Homegrown seeds may not produce identical plants to store-bought varieties.
Wrapping up and next steps
Growing green onions with vibrant flowers isn’t just a bonus—it’s a sign of a thriving, productive plant! 🌱 By understanding their lifecycle, pruning blooms strategically, and providing the right care, you can enjoy both lush greens and stunning flowers year-round.
Whether you’re a seasoned gardener or just starting out, these tips will help you keep your green onions flourishing and your harvests abundant.
Ready to put your new knowledge into action? Start today by checking your green onions for early blooms and giving them the love they need—your garden (and taste buds!) will thank you. Happy growing! 🌟