Flowers
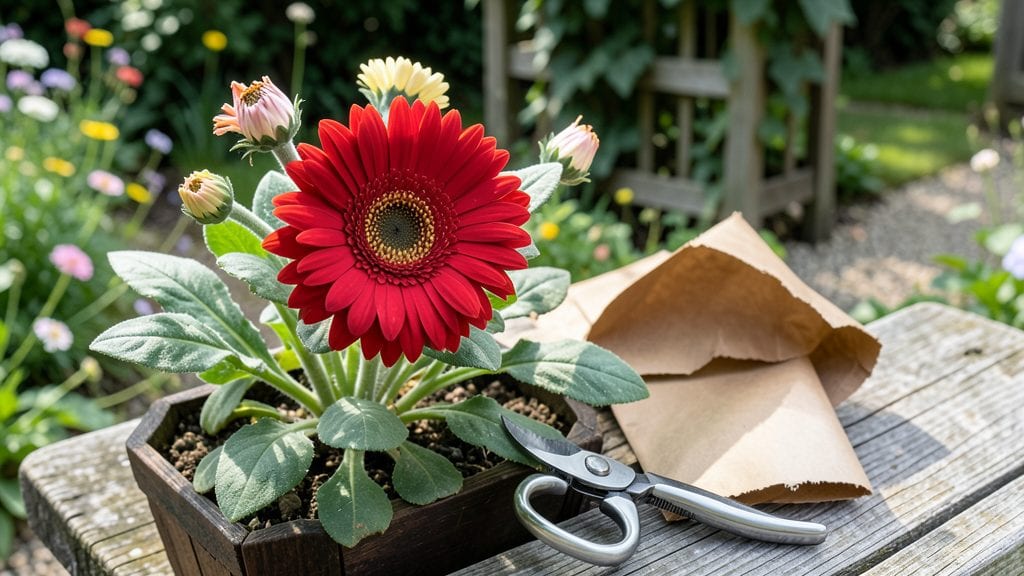
Growing gerbera daisies from seeds saved from your own flowers is easier than you think—no nursery trips or expensive packets required. 🌼 I’ve propagated these vibrant blooms from store-bought flowers, and the secret lies in timing and patience.
The right seeds yield plants that burst into color in just 8-12 weeks, with blooms brighter than anything you’ve seen before.
Start by letting a healthy gerbera daisy flower fully mature and dry on the stem—this usually takes about 2-3 weeks after blooming. Once the petals fall away, you’ll find fluffy seed heads that look like tiny dandelions.
These are your treasure trove, but only the seeds from the center are viable. Collect them carefully, as they’re delicate and light enough to float away.
With proper storage in a cool, dry place, these seeds stay fresh for up to 6 months, ready to sprout into your next garden masterpiece.
The germination process is straightforward: scatter them on damp potting mix, keep them warm, and watch as tiny green leaves emerge within 10-14 days. Each seedling has the potential to grow into a plant that produces dozens of blooms per season.
This method works for gardeners in USDA Zones 8-11, but with a little extra care—like starting seeds indoors early—you can enjoy gerberas even in cooler climates.
The best part? You’ll never buy gerbera seeds again, and your garden will always have fresh, homegrown color. Ready to give it a try?
📚 In This Guide
- What you need
- Instructions
- Tips and common mistakes
- Wrapping up and next steps
What you need
- ● Mature gerbera daisy flowers: Choose healthy, fully bloomed flowers with seeds (usually the center disc). Aim for at least 3-5 flowers for better chances of success.
- ● Scissors or pruning shears: Sterilized tools to carefully harvest the seed heads.
- ● Paper towels or newspaper: For drying and storing seeds (1-2 sheets per batch).
- ● Small containers or paper bags: To collect and store seeds (e.g., 2-3 small breathable bags or containers with lids).
- ● Potting mix: Well-draining, seed-starting mix (e.g., 1 small tray or 4-inch pots filled with 2-3 inches of mix).
- ● Small pots or seed trays: With drainage holes (e.g., 4-6 individual pots or a 10x20-inch tray).
- ● Spray bottle with water: For gentle hydration (avoid over-saturating seeds).
- ○ Clear plastic wrap or humidity dome: To create a mini greenhouse effect (optional but helpful for germination).
- ● Grow lights or sunny windowsill: Gerbera seeds need bright, indirect light (6-8 hours/day).
- ● Seedling heat mat: Speeds up germination if your space is cool (70-75°F is ideal).
- ● Fertilizer (balanced, diluted): Use after sprouts appear (e.g., half-strength 10-10-10).
- ● Labels and markers: To track planting dates and varieties.
- ● Tweezers: For delicate seed placement (if not sowing directly).
How to extract gerbera daisy seeds from flowers
Here's the simple method I use to turn spent blooms into new plants—no fancy tools needed.
🌱 Step 1: Select and Prepare the Right Flowers
Choose fully mature gerbera daisy flowers that have already bloomed and begun to dry on the plant. These will have developed seed heads—look for the center disk turning brown and papery. Cut the flower head off cleanly with sharp scissors, leaving about 1 inch of stem. Remove any remaining petals by gently pulling them away, exposing the central seed disk.
Place the seed heads in a paper bag and store them in a warm, dry spot for 7-10 days. This drying process helps loosen the seeds from their fuzzy bases. I keep mine on my kitchen counter near the window—just don’t let them get damp. You’ll know they’re ready when the seed disk crumbles easily between your fingers.
🌿 Step 2: Extract and Clean the Seeds
Once the seed heads are dry, rub the papery disk between your palms or tap it gently against the paper bag. The seeds will fall out as small, dark brown flakes with tiny white hairs attached. These hairs help with seed dispersal in nature, but for propagation, we’ll remove them to encourage faster germination.
Spread the seeds on a clean sheet of paper and use your fingers to separate any remaining chaff. For stubborn hairs, lightly run the seeds through a fine-mesh strainer under running water—this removes the fuzz without damaging the seeds. Let them air-dry completely on the paper for 24 hours before planting. This step prevents mold and ensures even moisture when you sow.
⏰ Step 3: Stratify Seeds for Better Germination
Gerbera daisy seeds need a cold period to break dormancy. Place the clean seeds in a small container with a damp paper towel, then seal it in a plastic bag. Store the bag in your refrigerator’s vegetable crisper for 4-6 weeks. Check the towel weekly—it should stay moist but not soggy. If it dries out, mist it lightly with water and reseal.
This cold treatment mimics winter conditions and tricks the seeds into thinking spring has arrived. After the stratification period, remove the seeds from the fridge and let them sit at room temperature for 24 hours to acclimate. You’ll see the seeds plump up slightly as they prepare to germinate—this is your cue they’re ready for planting.
🪴 Step 4: Sow and Care for New Seedlings
Fill small pots with well-draining seed-starting mix and sow the seeds ¼ inch deep, spacing them ½ inch apart. Gerbera daisies germinate best in warmth (70-75°F) and bright, indirect light. Place the pots in a seedling heat mat or on top of your fridge to maintain consistent warmth. Keep the soil lightly moist—never soggy—by misting the surface with water.
Germination takes 14-21 days, so be patient. Once seedlings emerge, move them to a sunny windowsill or under grow lights (12-14 hours daily). Thin the seedlings to the strongest one per pot when they reach 2 inches tall, using clean scissors to avoid disturbing the roots. Transplant them into individual pots when they have 4-6 true leaves—this usually happens after 6-8 weeks.
Tips & tricks for perfect gerbera daisy seed propagation
Here's what I learned after propagating dozens of gerbera daisies—these tricks make all the difference between success and frustration.
Flower Selection Matters: In Step 1, don't just grab any wilted flower! Look for seed heads where the center disk has turned completely brown and papery—this is your sign the seeds are mature. I've tried using flowers that were still slightly green, and they never produced viable seeds. The 1-inch stem is important too—it helps support the seed head during drying.
Drying Strategy: The 7-10 days drying time in Step 1 is crucial, but don't let humidity mess it up. I place my paper bags in a spot with good airflow—like near an open window with a fan blowing gently. If your kitchen feels damp, add a small packet of silica gel to the bag. You'll know it's ready when the disk crumbles easily between your fingers (not when it looks dry—sometimes it can look dry but still need more time).
Seed Cleaning Hack: When removing those stubborn white hairs in Step 2, I've found that a fine-mesh strainer works best under lukewarm (not hot) water. The hairs float away while the seeds sink. After rinsing, I pat them dry with a paper towel, then spread them on a clean coffee filter for that final 24-hour drying. The coffee filter's texture helps prevent seeds from sticking together.
Stratification Shortcut: For the 4-6 weeks cold treatment in Step 3, I use a small plastic container with a tight-sealing lid instead of a bag. This creates a more controlled environment where I can check moisture levels without opening it. Place a small piece of cardboard between the container and fridge shelf to prevent cold air from circulating directly on the seeds. After the 24 hours at room temperature, I can tell they're ready when they look slightly plump and the hairs have softened.
Pro Tips for Gerbera Daisy Seeds From Flowers
- Here's what I learned after propagating dozens of gerbera daisies—these tricks make all the difference between success and frustration.
- Flower Selection Matters: In Step 1, don't just grab any wilted flower!
- Drying Strategy: The 7-10 days drying time in Step 1 is crucial, but don't let humidity mess it up.
Frequently asked questions
Got questions about growing gerbera daisy seeds from flowers?
You’re not alone! Here are some of the most common queries—and their straightforward answers—to help you succeed.
Can I really grow gerbera daisies from seeds harvested from store-bought flowers?
Yes, but with a few caveats! Store-bought gerberas are often hybrids bred for vibrant colors and long vase life, not seed viability. While you can collect seeds, they may not produce true-to-parent blooms. For better results, source seeds from healthy, homegrown flowers or reputable seed suppliers.
How long does it take for gerbera daisy seeds to germinate?
Gerbera seeds typically sprout in 14–30 days under ideal conditions (warmth, moisture, and indirect light). Keep the soil consistently moist but not soggy, and maintain temperatures around 70–75°F (21–24°C). Patience is key—some seeds may take longer, especially if the environment is cooler.
What’s the best indoor temperature for germinating gerbera seeds?
Aim for a cozy 70–75°F (21–24°C) range to encourage germination. If your home runs cooler, place the seed tray on a heat mat or near a sunny window. Avoid drafts or extreme temperature swings, which can stall growth. A simple thermometer helps monitor conditions!
Why aren’t my gerbera seeds sprouting? Troubleshooting tips
Seeds too old?
Gerbera seeds lose viability quickly—plant them within 1–2 months of harvest.
Poor soil contact?
Press seeds lightly into soil (don’t bury deeply) to ensure moisture reaches them.
Lack of light?
Provide bright, indirect light (e.g., a south-facing window or grow light).
Over/under-watering?
Keep soil damp but not waterlogged—use a spray bottle for gentle hydration.
What’s a good alternative if my gerbera seeds fail to grow?
No stress! Try these easy alternatives:
- Buy seedlings from nurseries for a faster, foolproof start.
- Propagate from cuttings (root gerbera stems in water or soil).
- Grow from division—split mature gerbera clumps in spring for instant plants.
Wrapping up and next steps
Growing gerbera daisy seeds from flowers is a rewarding way to expand your garden with vibrant blooms! With the right tools, patience, and care, you can successfully propagate these cheerful flowers from seed.
Whether you’re a beginner or a seasoned gardener, this method opens up endless possibilities for colorful, homegrown beauty.
Now that you’re ready to take the next step, grab your supplies and start your gerbera daisy journey today! 🌱✨ Happy gardening!