Flowers
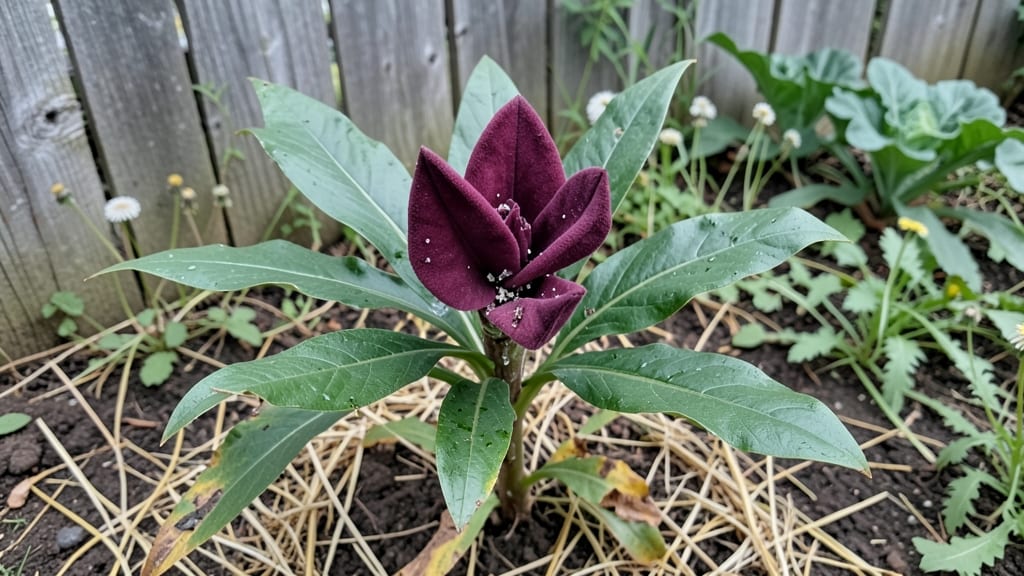
Growing curcuma ginger flowers in containers turns your patio into a fragrant tropical escape—those bold, waxy blooms smell like spiced vanilla and last for days. 🌿 I still remember the first time I saw my first Hedychium flower unfurl after months of lush green leaves; it felt like a secret garden had bloomed right on my balcony.
The key isn’t just sunlight or water—it’s mimicking their native rainforest conditions in just a few square feet.
You’ll need a 10-15 gallon container with drainage holes, well-draining potting mix (think chunky, not compact), and a spot that gets morning sun and afternoon shade—ginger flowers hate scorching. Most gardeners overwater these tropicals, but the secret is keeping the soil evenly moist but never soggy.
Propagating from rhizomes is easier than you’d think: just bury a chunk with buds in spring, and within weeks, you’ll see fresh growth.
By late summer, you’ll be rewarded with 3-foot-tall flower spikes bursting with clusters of fragrant blooms that last for weeks. The scent alone makes it worth the effort—imagine walking past and catching that warm, citrusy perfume on the breeze.
Even if pests like aphids appear, a quick spray of soapy water keeps them at bay without harsh chemicals.
This works for zone 8-11 gardeners or anyone with a sunny balcony—just move containers indoors before frost. The rhizomes even survive winters if you keep them barely alive in a cool, dark spot.
Once you’ve mastered one plant, you’ll want more varieties to fill your garden with color and fragrance year after year.
📚 In This Guide
- What you need
- Instructions
- Tips and common mistakes
- Wrapping up and next steps
What you need
- ● Curcuma Ginger Flower Rhizomes: 1–3 healthy, firm rhizomes (size: ~2–4 inches long, with visible "eyes" or buds). Pro tip: Choose organic, disease-free rhizomes from a reputable nursery!
- ● Containers: 1–2 pots (12–18 inches in diameter) with drainage holes. Materials: Terracotta, ceramic, or fabric grow bags.
- ○ Optional: A shallow tray or saucer for water drainage.
- ● Potting Mix: 1 bag (5–10 gallons) of well-draining, peat-based mix (e.g., 60% peat moss, 30% perlite, 10% compost). Or: Pre-mixed tropical plant soil.
- ● Garden Tools: 1 small trowel or hand shovel
- ○ 1 pair of gardening gloves (optional but recommended!)
- ● 1 spray bottle (for misting)
- ● Fertilizers: 1 bottle of balanced liquid fertilizer (10-10-10 or 20-20-20, diluted to half-strength)
- ○ Optional: Slow-release granular fertilizer (e.g., osmocote) for long-term growth.
- ● Mulch: 1 bag of organic mulch (e.g., pine bark or coconut coir) to retain moisture.
- ● Support (for tall varieties): 1–2 bamboo stakes or a small trellis (if growing Hedychium varieties that reach 3–5 feet).
- ● A warm, humid environment (ideal temps: 70–85°F / 21–29°C). Pro tip: If outdoors, choose a spot with partial shade in hot climates!
- ○ Access to bright, indirect sunlight (4–6 hours daily). Optional: A grow light for indoor setups.
- ● Consistent watering schedule (keep soil moist but not soggy).
Step-by-step instructions for growing curcuma ginger flower in containers
Here's how to coax vibrant tropical blooms from your curcuma rhizomes—even in pots.
🌱 Step 1: Select and Prepare Your Rhizomes
Choose plump, firm rhizomes with visible buds—these are your future blooms. Each rhizome should have at least one eye (a small bump) and weigh about 2-3 ounces. I like to soak mine in lukewarm water for 12 hours before planting; this softens the outer skin and encourages faster rooting.
Use a sharp knife to trim any rotting or mushy spots, then let the rhizome dry for 1-2 hours at room temperature. This prevents rot once planted. The drying process also reveals fresh cuts where roots will emerge most vigorously.
🪴 Step 2: Choose Containers and Planting Mix
Curcuma needs well-draining soil to thrive, so pick containers with drainage holes and use a mix of 50% potting soil, 30% perlite, and 20% compost. I fill a 12-inch diameter pot (big enough for 2-3 rhizomes) with this blend, leaving 2 inches of space at the top for watering.
Place the rhizome horizontally, 2 inches below the soil surface, with the buds facing upward. Cover lightly with soil, pressing gently to eliminate air pockets. The rhizome should sit half-buried—this mimics its natural tropical habitat where it partially emerges from the ground.
☀️ Step 3: Position for Warmth and Light
Curcuma craves bright, indirect light and warmth—think 70-85°F consistently. A south-facing window or under grow lights works best. If your home runs cooler, place a heating mat under the pot to maintain root warmth.
Water thoroughly after planting, then let the top 1 inch of soil dry out before watering again. Overwatering is the fastest way to kill curcuma—its rhizomes rot easily. You’ll know moisture is right when the soil feels damp but not soggy to the touch.
⏰ Step 4: Encourage Growth and Bloom
After 4-6 weeks, you’ll see new shoots emerging—this is your cue to fertilize. Use a balanced liquid fertilizer (10-10-10) diluted to half-strength every 4 weeks. I pause fertilization in winter when growth slows.
When leaves reach 12-18 inches tall, your curcuma is ready for its blooming push. Move it to a sunniest spot (or supplement with 12-14 hours of grow light daily). Blooms typically appear 6-12 months after planting, but patience pays off—each tropical spike can reach 4 feet tall!
✂️ Step 5: Prune and Overwinter for Next Year
After flowering, cut back dead leaves to 2 inches above the rhizome to redirect energy. In fall, reduce watering but keep the soil slightly moist. Curcuma enters dormancy when temperatures drop below 60°F—this is normal and necessary for reblooming.
In late winter, trim all dead foliage and resume watering. The rhizome will sprout again, ready for another season of growth. If your pot feels crowded (after 2-3 years), divide the rhizome and repot—each section needs space to thrive.
Tips & tricks for perfect curcuma ginger flower growth
Here’s what I’ve learned after growing curcuma for years—small details make all the difference.
Rhizome Prep Matters: That 12-hour soak in lukewarm water isn’t just optional—it’s crucial. I’ve seen rhizomes with tough skins take weeks longer to root without this step. Use a clean bowl of water and change it halfway through to prevent bacterial growth. After soaking, let them dry for the full 1-2 hours, even if they look dry sooner. This drying step is what prevents rot in Step 1.
Soil Mix Secrets: The 50-30-20 soil blend (potting soil/perlite/compost) is perfect, but here’s the trick: add a handful of coarse sand to improve drainage further. Curcuma roots need oxygen, and this blend ensures they don’t sit in soggy conditions. When planting in Step 2, press the soil gently around the rhizome—this eliminates air pockets that could cause uneven root growth.
Light and Temperature Balance: That 70-85°F range is non-negotiable, but here’s how to troubleshoot: If your home stays below 70°F, use a heating mat under the pot during the day and remove it at night. For light, rotate your pot every 2-3 weeks so all sides get even exposure—this prevents lopsided growth. The 12-14 hours of grow light in Step 4 should be bright LED lights, not dim bulbs.
Pro Tips for Curcuma Ginger Flower
- Here’s what I’ve learned after growing curcuma for years—small details make all the difference.
- Rhizome Prep Matters: That 12-hour soak in lukewarm water isn’t just optional—it’s crucial.
- Soil Mix Secrets: The 50-30-20 soil blend (potting soil/perlite/compost) is perfect, but here’s the trick: add a handful of coarse sand to improve drainage further.
Frequently asked questions
Got questions about growing curcuma ginger flower (like Hedychium or Alpinia varieties)? You’re not alone! Here are answers to the most common queries to help your tropical blooms thrive.
Can I grow curcuma ginger flower from a grocery store ginger root?
Not exactly! While both are Zingiberaceae family members, grocery ginger (Zingiber officinale) won’t produce flowers. For blooms, opt for Hedychium or Alpinia rhizomes (like butterfly ginger or shell ginger), available at specialty nurseries or online. Pro tip: Look for "fleshy, knobby rhizomes" labeled for ornamental use.
How long does it take for curcuma ginger flower to bloom?
Patience is key! With ideal conditions (warmth, humidity, and bright indirect light), you may see first blooms in 6–12 months. Established plants in containers can flower annually if given winter dormancy (cool, dry rest). Hedychium often blooms in late summer/fall, while Alpinia may flower spring to summer.
What’s the best temperature range for these tropical plants?
Curcuma ginger flowers love warmth but hate frost. Keep them in 70–90°F (21–32°C) day and 60°F (15°C) minimum night temps. In winter, let them rest at 55–60°F (13–16°C) to encourage blooming. If temps drop below 50°F (10°C), move them indoors or provide insulation (like burlap wraps).
Why aren’t my curcuma ginger flowers blooming?
No flowers? Check these fixes:
- Light: Too little? Move to brighter spot (but avoid harsh sun).
- Dormancy: Did it rest in winter? Skip this if you’re in a warm climate.
- Age: Young plants (under 2 years) may not bloom yet.
- Fertilizer: Overdoing nitrogen = leaves, not flowers. Use a balanced 10-10-10 or bloom booster in spring/summer.
Can I grow curcuma ginger flower in small containers?
Yes! These plants adapt well to 5–7 gallon pots with drainage holes. Use a well-draining mix (50% potting soil, 30% perlite, 20% compost). Repot every 2–3 years or when roots circle the pot. Bonus: Smaller pots = easier to move indoors in winter!
Where can I buy curcuma ginger flower rhizomes?
Try these sources:
- Online: Etsy, Terracotta Gardens, or Plantern Nursery (ship rhizomes in winter).
- Local: Check tropical/nursery plant sales in spring or ask at ginger specialty shops.
- Divide existing plants: Share with gardeners or split your own clumps in early spring!
Pro tip: Order early—rhizomes sell out fast!
Wrapping up and next steps
Growing curcuma ginger flower in containers isn’t just about adding a splash of tropical beauty—it’s a rewarding journey that brings vibrant blooms and natural healing to your space! 🌺 With the right soil, sunlight, and care, you’ve got everything you need to nurture these stunning plants.
Whether you’re a seasoned gardener or just starting, your effort will pay off with mesmerizing orange and yellow flowers that brighten up any corner.
Ready to take the next step? Start small—pick a sunny spot, prep your container, and plant those rhizomes. Before you know it, your curcuma ginger flower will be thriving, and you’ll be sharing your green thumb success with friends! Happy growing! 🌱