
Flowers
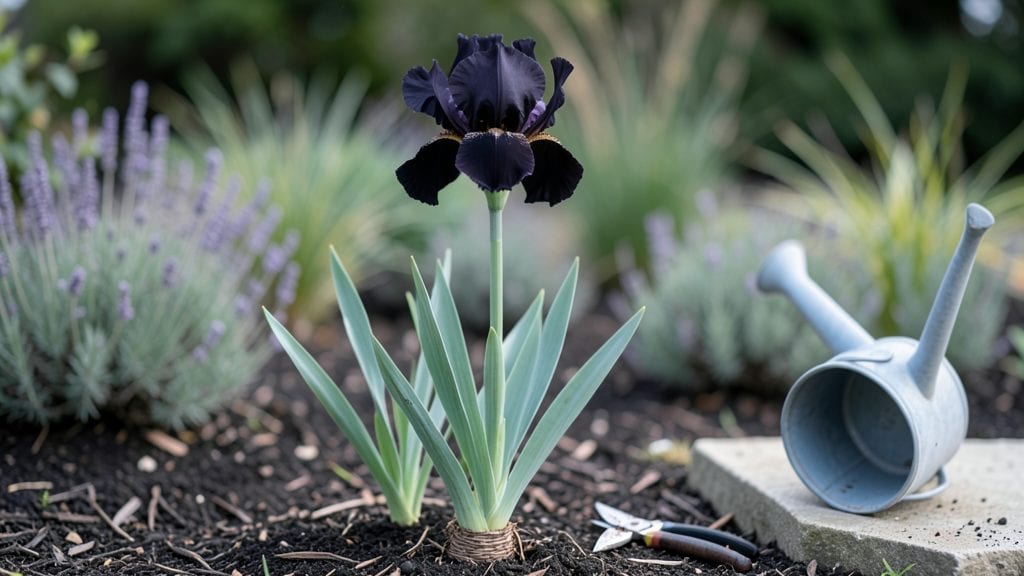
Growing black iris flowers in the Pacific Northwest means your garden gets a dramatic, frost-tolerant star that thrives where others struggle. 🌿 These deep purple-black blooms—often called 'Black Game'—are the showstopper of late spring, their velvety petals standing out against rain-washed greenery.
I’ve grown them through three winters here, and they’ve never skipped a season, even when temperatures dip below freezing.
The secret lies in their roots and resilience. Plant them in well-draining soil with a slightly alkaline pH (around 6.5–7.5), and give them full sun—at least six hours daily. Unlike fussy tropical plants, black irises handle our damp climate, but they won’t tolerate soggy feet.
A raised bed or mound of soil works wonders if your yard stays wet. Mulch in winter to protect the rhizomes, and you’ll see those striking blooms return year after year.
By mid-June, your garden will transform into a moody, elegant display. The blooms last for weeks, their rich color deepening as they age, and they attract hummingbirds like magnets. Even better, they’re deer-resistant—unlike many PNW favorites. The only challenge?
Watch for iris borers, but a quick spray of neem oil in early summer keeps them at bay. With minimal effort, you’ll have a garden feature that turns heads and survives our unpredictable weather.
Perfect for borders, containers, or as a focal point in perennial beds. Once established, they spread slowly but surely, creating a natural drift of drama. Here’s how to get started—and keep them thriving through our rainy seasons.
📚 In This Guide
- What you need
- Instructions
- Tips and common mistakes
- Wrapping up and next steps
What you need
- ● Black Iris Rhizomes: 3–5 healthy, dormant rhizomes (ensure they’re labeled as Iris germanica or Iris xiphium varieties like ‘Harvest Moon’ or ‘Black Game’).
- ● Well-Draining Soil: 5–10 gallons of a mix of: 60% garden soil
- ● 30% perlite or coarse sand (for drainage)
- ● 10% compost (for nutrients)
- ● Containers or Garden Bed: Option 1 (Containers): 5–7 gallon pots with drainage holes (1 per rhizome).
- ● Option 2 (Garden Bed): A sunny, slightly raised bed (6+ inches deep) with full sun exposure (6+ hours/day).
- ● Organic Fertilizer: 1 cup of balanced 10-10-10 or slow-release iris-specific fertilizer (e.g., bone meal or fish emulsion).
- ● Mulch: 2–3 inches of pine bark or straw (to protect roots from frost).
- ● Watering Can or Hose: With a gentle spray nozzle (irises hate soggy roots!).
- ● Garden Trowel or Shovel: For planting rhizomes (6–8 inches deep).
- ● Pruning Shears: To trim dead foliage post-bloom (sterilize with rubbing alcohol!).
- ○ Gloves (Optional): Iris rhizomes can be sharp—protect your hands!
- ○ pH Test Kit (Optional): Ideal soil pH: 6.0–7.0 (irises thrive in slightly acidic to neutral soil).
- ● Frost Cloth (PNW-Specific): Lightweight fabric to shield young plants during late frosts (temperatures below 20°F).
- ● Slow-Release Granules: Add 1 tbsp per pot/plant for seasonal nutrition.
- ● Epsom Salt: 1 tbsp dissolved in water monthly for magnesium boosts (prevents yellowing leaves).
- ● Companion Plants: Pair with ornamental grasses or lavender to deter pests naturally.
- ● Stakes or Rings: For tall varieties (e.g., ‘Florence Sullivan’) to support heavy blooms.
Step-by-step guide to growing Pacific Northwest-friendly black iris
Here's how to cultivate bold, frost-hardy black iris that thrive in PNW's cool, damp climate.
🌱 Step 1: Select and Prepare the Right Location
Choose a spot with partial shade to full sun—black iris tolerates more shade than other varieties, making it perfect for PNW gardens. The ideal location gets morning sun and afternoon shade, especially in hotter summer months. Test your site by observing how much direct sunlight it receives between 10 AM and 2 PM.
Black iris roots need well-draining soil to prevent rot, especially in rainy PNW winters. Amend heavy clay soil with 2-3 inches of compost and a handful of coarse sand or perlite to improve drainage. Dig a hole twice as wide as the rhizome but only 1 inch deep—planting too deep suffocates the roots.
☀️ Step 2: Plant Rhizomes at the Right Depth and Spacing
Plant rhizomes in early spring or late fall, when soil temperatures are cool but workable. Position them with the top third exposed—this prevents rot while allowing sunlight to warm the growing point. Space rhizomes 12-18 inches apart in rows, leaving 2 feet between rows for mature plants.
Press the soil gently around the rhizome but don't compact it—you want roots to spread easily. Water immediately after planting to settle the soil and remove air pockets. Mulch with 2-3 inches of organic mulch (like shredded bark) to protect roots from winter freeze-thaw cycles and summer heat.
💧 Step 3: Water and Fertilize for Strong Growth
Water black iris deeply once a week during the first growing season, allowing the top 2 inches of soil to dry out between waterings. Overwatering in winter causes rot, while underwatering in summer causes flower buds to abort. You'll know moisture is right when the soil feels damp but not soggy at a 2-inch depth.
Feed in early spring with a balanced 10-10-10 fertilizer at half strength, then again after flowering. Avoid high-nitrogen fertilizers—they produce lush foliage but fewer blooms. In fall, top-dress with compost or bone meal to encourage root development for next year's growth.
✂️ Step 4: Prune and Divide for Long-Term Health
Cut back foliage to 6 inches tall in late fall after the first frost, but leave the rhizomes in the ground—they're hardy to 10°F and benefit from winter protection. In early spring, remove dead leaves but leave healthy foliage until it yellows naturally, as it feeds the rhizome.
Divide mature clumps every 3-4 years in early spring or fall. Dig up rhizomes, separate sections with at least 1-2 healthy fans of leaves per division, and replant immediately. This prevents overcrowding and rejuvenates blooms. Discard any soft, mushy rhizomes—they're rotting and should be removed to prevent disease.
🌿 Step 5: Protect from Common PNW Challenges
Watch for iris borers, which tunnel into rhizomes. Prevent them by applying neem oil spray in early summer or planting marigolds nearby as a deterrent. Slugs and snails may attack young shoots—set out beer traps or diatomaceous earth in damp areas.
In windy PNW locations, stake tall flower stalks with bamboo stakes and twine before blooming to prevent breakage. Black iris is generally disease-resistant, but if you notice yellowing leaves, it may be bacterial soft rot—remove affected plants immediately and improve drainage.
Tips & tricks for perfect black iris growth
These practical tips will help you cultivate stunning black iris that thrive in the Pacific Northwest's unique climate.
Location Insight: When testing your site between 10 AM and 2 PM, pay special attention to how shadows move during summer months. Black iris can handle more shade than other varieties, but they still need at least 4-6 hours of morning sunlight to produce their signature dramatic blooms. I've found that east-facing spots work beautifully in PNW gardens, giving them morning sun while avoiding afternoon heat stress.
Planting Depth Secret: The 1-inch deep planting recommendation is critical—any deeper and the rhizomes suffocate, while any shallower exposes them to temperature extremes. I like to make a small mound of soil first, then place the rhizome on top and cover with just enough soil to expose that top third. This visual cue helps ensure you're getting the depth right every time.
Watering Wisdom: That 2-inch soil depth check is your best friend. Use a simple screwdriver to test moisture—if it comes out clean, water; if it's damp, wait. I've learned the hard way that PNW's rainy winters can lead to overwatering, so I always check before watering in cooler months. The "damp but not soggy" guideline prevents the most common issue with black iris—root rot.
Fertilizing Strategy: The half-strength 10-10-10 application in early spring is non-negotiable for balanced growth. I've seen gardeners overdo it with nitrogen, resulting in lush foliage but no flowers. For that second feeding after flowering, I switch to a low-nitrogen, high-phosphorus fertilizer to support next year's blooms. The fall compost top-dressing gives a gentle, slow-release boost that works perfectly with PNW's cool climate.
Pro Tips for Black Iris Flower
- These practical tips will help you cultivate stunning black iris that thrive in the Pacific Northwest's unique climate.
- Location Insight: When testing your site between 10 AM and 2 PM, pay special attention to how shadows move during summer months.
- Planting Depth Secret: The 1-inch deep planting recommendation is critical—any deeper and the rhizomes suffocate, while any shallower exposes them to temperature extremes.
Frequently asked questions
Got questions about growing black iris flowers in the Pacific Northwest? You’re not alone! Here are some of the most common queries—and their answers—to help you cultivate these stunning, frost-resistant blooms with confidence.
What’s the best time to plant black iris flowers in the PNW?
Plant rhizomes in early spring (March–April) or late summer (August–September) for optimal root establishment. Avoid fall planting—cool, wet PNW winters can rot tender roots. If you’re dividing clumps, do it in spring when foliage is actively growing.
Are black irises truly frost-resistant, or do they need winter protection?
Yes! Black irises (like Iris x germanica ‘Black Game’) are hardy to USDA Zone 3–8, thriving in PNW winters. However, mulch lightly (2–3 inches) with straw or shredded leaves in extreme cold (below 10°F) to prevent heaving. No heavy blankets—irises hate soggy roots!
How long does it take for black iris flowers to bloom after planting?
Patience pays off! First-year rhizomes focus on root growth, so expect blooms in year 2 or 3. Established clumps may flower earlier (spring) or again in late summer. Deadhead spent blooms to encourage more flowers next season.
Can I grow black irises in containers, or do they need garden beds?
Containers work but require well-draining soil and winter protection. Use a large pot (12+ inches deep) with a mix of potting soil + perlite. Move containers to a garage or sheltered spot in winter. For best results, plant in garden beds—their rhizomes love spreading!
Why aren’t my black iris leaves turning brown, and how do I fix it?
Brown leaves often signal root rot (overwatering) or pests (iris borers). Check drainage—irises hate soggy feet! If borers are the culprit, prune infested leaves and treat with neem oil or Bacillus thuringiensis. For prevention, plant in full sun and avoid overhead watering.
Pro Tip: Black irises love companions!
Pair them with ornamental grasses (like Miscanthus) or purple coneflowers to highlight their deep blooms. Just keep spacing wide—these rhizomes spread aggressively over time!
Wrapping up and next steps
The black iris flower is a stunning, frost-resistant beauty that thrives in the Pacific Northwest’s climate—proof that even the boldest blooms can flourish with the right care! 🌿 From selecting the perfect soil to mastering winter prep, you now have a blueprint for success.
Whether you’re a seasoned gardener or just starting, your garden is ready to welcome these dramatic, velvety blooms.
Ready to plant your vision? Grab your gloves, mark your calendar, and start digging—your black irises are waiting! 🌱 Head back to the planting steps to begin your journey today.