
Container Gardens
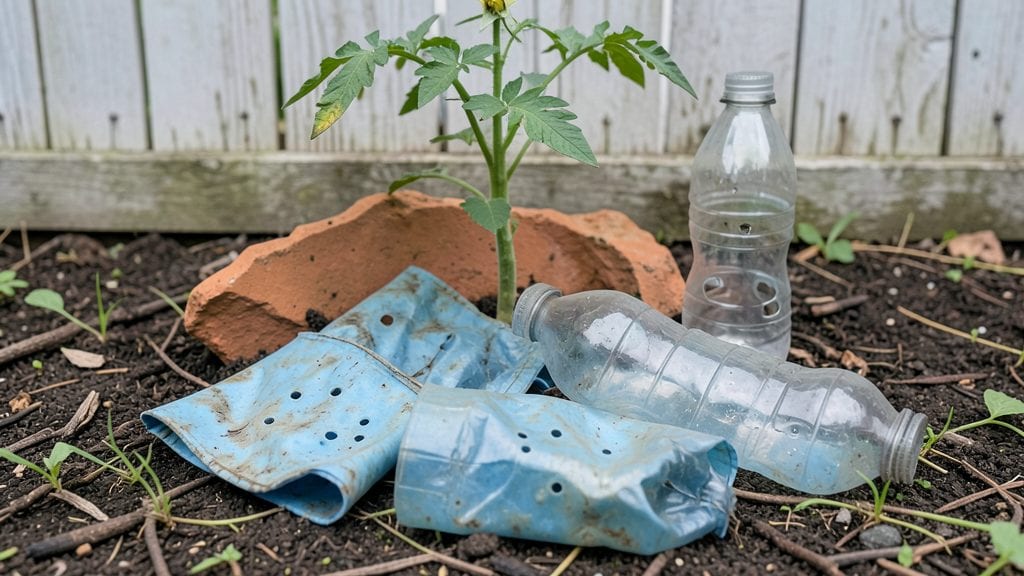
Turn trash into treasure with recycled flower pots that transform your garden into a one-of-a-kind display. 🌿 I’ve turned plastic bottles, tin cans, and old tires into planters that save money, reduce waste, and add personality to my space—no green thumb required.
The best part? You already have most of what you need. Clean containers, a drill or scissors for drainage holes, and a little creativity turn forgotten items into stylish pots.
Whether you’re working with milk jugs or vintage buckets, the possibilities are endless—and so is the satisfaction of giving new life to old materials.
Your garden will glow with character, from cascading petunias in repurposed colanders to bold succulents in painted tin cans. These planters aren’t just functional; they’re conversation starters that make your outdoor space uniquely yours.
Perfect for small balconies, vertical gardens, or sprawling yards, recycled pots adapt to any space. Let’s get creative—your next favorite planter might already be sitting in your recycling bin!
📚 In This Guide
- What you need
- Instructions
- Tips and common mistakes
- Wrapping up and next steps
What you need
- ● Old containers: 3–5 plastic bottles, yogurt cups, tin cans, or glass jars (16–64 oz size for medium pots)
- ● Drill or nail: For drainage holes (if using non-porous materials like plastic or glass)
- ○ Sandpaper: Medium-grit (120–150) to smooth rough edges (optional but recommended for safety)
- ● Acrylic paint or spray paint: Weather-resistant (e.g., Rust-Oleum) + brushes/rollers
- ● Paintbrushes or foam applicators: 1–2 for detailing
- ○ Clear sealant (optional but ideal):** Outdoor-grade varnish or Mod Podge for durability
- ● Potting soil: Lightweight mix for containers (1–2 bags, depending on pot size)
- ● Plants! Choose compact varieties like succulents, herbs, or trailing flowers
- ● Safety gear: Gloves, goggles (for drilling/sanding)
- ● Stencils or stenciling tape: For custom designs (e.g., geometric patterns or floral motifs)
- ● Hot glue gun: To secure lightweight decorations (e.g., twine, beads, or mosaic pieces)
- ● Newspaper or drop cloth: Protect your workspace from paint splatters
- ● Measuring tape: Ensures consistent hole sizes (¼–½ inch for drainage)
Step-by-Step instructions for creating recycled flower pots
Transform everyday household items into stylish, functional planters with these creative techniques.
🪴 Step 1: Select and Prepare Your Base Materials
Start with containers that can hold soil and moisture without degrading. I love using plastic milk jugs, tin cans, or even old boots—anything sturdy enough to hold weight. Clean them thoroughly to remove labels, food residue, or chemicals that might harm plants. For plastic containers, use a bleach solution (1 part bleach to 10 parts water) to sterilize, then rinse well and let dry completely.
Here's the thing—some materials need extra prep. Poke drainage holes in the bottom of any container that lacks them using a heated nail or drill. If working with porous materials like terracotta shards or woven baskets, line the interior with plastic mesh or a plastic bag to prevent soil loss. Remember, the more drainage, the healthier your plants will be.
🎨 Step 2: Customize the Exterior Design
This is where creativity shines. For a rustic look, wrap containers in burlap or twine, securing with hot glue or staples. I often use paint or acrylic markers to create patterns or write plant names directly on the surface. If using tin cans, try hammering textures or painting with outdoor-safe enamel paint for a durable finish. Always let paint cure fully before planting—nobody wants chemical fumes near their greenery.
For a natural aesthetic, embed shells, pebbles, or mosaic tiles into unpainted surfaces using waterproof adhesive. The key is balancing function and form: your design should protect the container while enhancing your garden's style. Test the weight of your decorations first—some materials add significant bulk that could topple lightweight containers.
🌱 Step 3: Add Drainage and Soil Layering
Place a 1-inch layer of gravel, broken pottery, or even recycled glass at the bottom of each container. This creates essential drainage space while preventing soil from clogging holes. For lightweight containers like plastic bottles, I sometimes add a layer of packing pebbles first to increase stability. Fill the remaining space with quality potting mix—never garden soil, as it compacts too easily in containers.
Leave about 1 inch of space between the soil surface and container rim. This prevents overflow when watering and gives you room to add mulch later. If using heavy decorative elements, place them on top of the soil rather than embedding them—this keeps the weight distributed evenly and makes future repotting easier.
✂️ Step 4: Plant and Maintain Your Upcycled Containers
Choose plants that match your container's size and drainage capabilities. Succulents and herbs thrive in lightweight containers, while larger pots can handle tomatoes or small shrubs. Gently remove plants from their nursery pots and place them in your recycled containers, filling gaps with additional soil. Press lightly around the roots to eliminate air pockets, but don't compact the soil too firmly.
Water immediately after planting to help soil settle, then monitor moisture closely. Recycled containers often dry out faster than traditional pots—check soil moisture by sticking your finger 1 inch deep. Most upcycled planters will need watering every 2-3 days during hot weather. Place containers where they'll receive the appropriate sunlight for your chosen plants, and rotate them occasionally for even growth.
🌿 Step 5: Seasonal Care and Refreshing
At the start of each growing season, refresh your recycled containers by removing old soil and adding fresh potting mix. This replenishes nutrients and prevents soil-borne diseases. I always inspect containers for wear—cracked plastic or rusted metal should be replaced or reinforced. For decorative elements, clean them with mild soap and water, and reapply any paint or sealants as needed.
Winter care varies by material: store plastic containers outside or in a garage, while porous materials like woven baskets should be emptied and stored dry to prevent rot. If you notice plants struggling, it might be time to upgrade to larger containers—recycled pots often start small and need expanding as plants grow. The beauty of upcycling is that you can repurpose containers again and again with minimal investment.
Tips & tricks for perfect upcycled planters
Transforming trash into treasure takes a little strategy—here's how to make your recycled flower pots truly stand out while keeping them functional.
Material Selection Tip: When choosing containers, prioritize those with smooth interiors to prevent soil from sticking. I've found that plastic milk jugs and tin cans work best for beginners because they're uniform and easy to modify. For more rustic designs, consider wooden crates or old colanders—but test their stability first, as these can tip over when filled with soil and plants. The key is balancing aesthetics with structural integrity, especially for larger containers that will hold heavier plants.
Drainage Strategy: In Step 1, when creating drainage holes, make them slightly larger than you think you need—about ¼-inch diameter works perfectly. I've learned this the hard way after watching water pool at the bottom of containers with tiny holes. For lightweight materials like plastic bottles, consider adding a layer of landscape fabric over the drainage layer to prevent soil from washing out while still allowing water to flow freely. This extra step prevents messy overflow during watering.
Design Weight Test: Before finalizing your decorative elements in Step 2, perform a quick stability test. Fill your container halfway with water and place it on a flat surface—if it wobbles, your design needs adjustment. I often use hot glue to secure heavier decorations like mosaic tiles or shells, which prevents them from shifting over time. Remember, the goal is to create beautiful planters that won't topple during your first summer storm.
Seasonal Transition Hack: For containers that will spend winters indoors, wrap them in plastic wrap before storing to prevent moisture loss. I place a small piece of cardboard at the bottom of each container to absorb any condensation that forms during storage. This simple trick keeps your upcycled planters ready for spring planting without the hassle of reconditioning dried-out materials.
Pro Tips for Recycled Flower Pots
- Transforming trash into treasure takes a little strategy—here's how to make your recycled flower pots truly stand out while keeping them functional.
- Material Selection Tip: When choosing containers, prioritize those with smooth interiors to prevent soil from sticking.
- Drainage Strategy: In Step 1, when creating drainage holes, make them slightly larger than you think you need—about ¼-inch diameter works perfectly.
Frequently asked questions
Got questions about recycled flower pots?
You’re not alone! Here are some of the most common queries—plus simple, eco-friendly solutions to keep your container garden thriving.
What materials can I use to make recycled flower pots?
Almost anything can become a planter! Try plastic bottles, old buckets, cardboard egg cartons, or even worn-out boots. Just ensure they’re clean, have drainage holes, and can hold moisture without leaking. Pro tip: Line non-porous materials (like plastic) with burlap or coconut coir to improve airflow!
How do I add drainage to a repurposed container?
Drainage is key to preventing root rot. For containers without holes, use a drill or hammer to poke 3–5 small holes in the bottom. If drilling isn’t an option (like with cardboard), place a layer of pebbles or broken pottery at the base instead. Warning: Avoid sharp edges—sand them down to protect your hands!
How long do recycled flower pots last before breaking down?
Durability depends on the material:
- Plastic/Metal: Years (if sturdy and undamaged).
- Cardboard/Paper: 1–2 growing seasons (replace when soggy).
- Clay/Concrete: Long-term, but check for cracks.
Extend their life: Store pots indoors during harsh winters or heavy rains!
Can I use recycled pots for herbs or vegetables?
Just ensure they’re food-safe (avoid treated wood or toxic glues). Herbs like basil and mint thrive in small containers, while veggies like tomatoes need deeper pots (at least 12 inches). Bonus: Add compost-rich soil to boost nutrient uptake—your homegrown veggies will thank you!
What do I do if my recycled pot starts leaking or falling apart?
Leaks? Patch them with duct tape, silicone sealant, or melted wax for plastic. For crumbling containers (like cardboard), transfer plants to a sturdier pot and compost the old one. Quick fix: Place a leaky pot inside a larger one with a saucer to catch drips—no mess, just greenery!
Wrapping up and next steps
Transforming everyday items into recycled flower pots isn’t just eco-friendly—it’s a creative way to breathe new life into your container garden! 🌱 From tin cans to plastic bottles, the possibilities are endless, and the best part?
You’re reducing waste while adding charm to your space. Whether you’re a seasoned gardener or just starting out, every upcycled planter tells a story—and yours could be the next trend in sustainable gardening.
Ready to get hands-on? Start small—pick one material from your recycling bin and turn it into a planter today! Share your creations with fellow gardeners or challenge yourself to design a whole upcycled garden. The earth (and your plants) will thank you! 🌿