Flowers
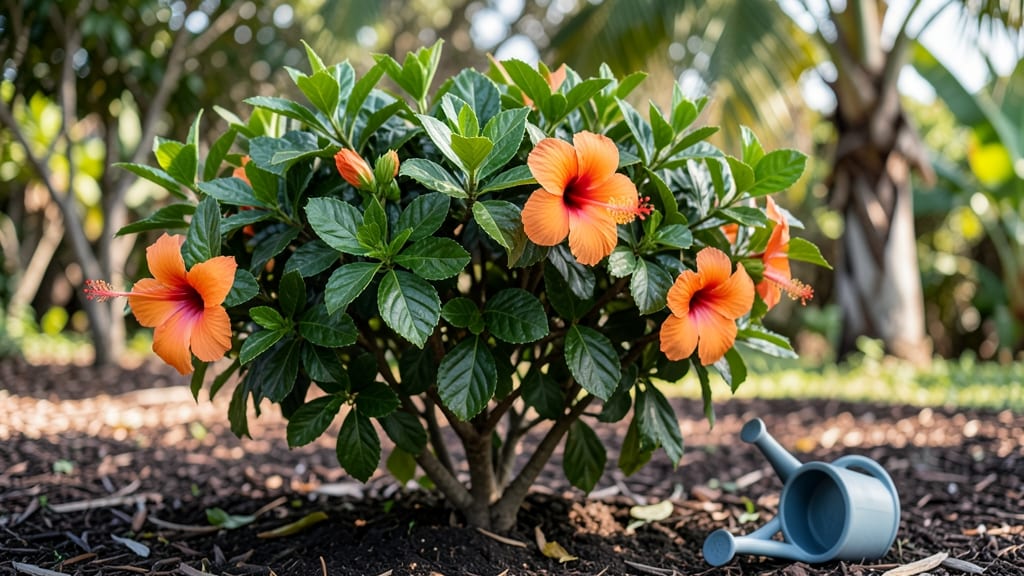
Growing an orange hibiscus flower in containers is the secret to year-round color—even when frost threatens your yard. 🌺 I’ve watched mine burst into fiery blooms from spring to fall, and the key isn’t just the bright sunshine or tropical vibes, but the right balance of care that keeps them thriving in pots.
The beauty of container hibiscus lies in their adaptability: they forgive minor mistakes but demand consistency in watering and feeding. You’ll need a 15-gallon pot with drainage, well-draining soil mixed with compost, and a spot that gets 6+ hours of sunlight daily.
Prune spent blooms regularly, and fertilize monthly with a balanced formula—this keeps them flowering nonstop.
What you’ll end up with is a bold, frost-resistant centerpiece that turns heads at patios and porches. The leaves stay glossy, the blooms stay vibrant, and with proper winter prep (like moving pots indoors or wrapping them), they’ll bounce back stronger every spring.
Here’s how to make it happen without the guesswork.
Works for balconies, decks, or sunny windowsills—just adjust watering when temps drop. The payoff? A plant that outshines store-bought bouquets and lasts for years. Let’s get those roots settled in the right soil first.
📚 In This Guide
- What you need
- Instructions
- Tips and common mistakes
- Wrapping up and next steps
What you need
- ● Container: A 5-gallon or larger pot with drainage holes (minimum 12-14 inches in diameter for mature plants). Terracotta or fabric pots work best.
- ● Potting Mix: 1 part high-quality all-purpose potting soil + 1 part perlite or coarse sand (for drainage). Avoid garden soil—it compacts too easily!
- ● Orange Hibiscus Plant: A healthy nursery-grown hibiscus (look for Hibiscus rosa-sinensis varieties like ‘Orange King’ or ‘Dwarf Orange’). Choose a 3-5 gallon container-grown plant for best results.
- ● Fertilizer: Balanced liquid fertilizer (e.g., 10-10-10 or 20-20-20) for initial feeding.
- ● Slow-release granular fertilizer (e.g., Osmocote) for long-term nutrition (mix 1 tbsp per gallon of soil).
- ● Mulch: 1-2 inches of organic mulch (e.g., pine bark fines or shredded leaves) to retain moisture and regulate soil temp.
- ● Pruning Shears: Clean, sharp shears (sterilize with rubbing alcohol between cuts).
- ● Watering Can or Hose: With a gentle spray nozzle to avoid disturbing soil.
- ● Container Stand or Wheels: For easy mobility (especially if growing on a patio or balcony).
- ● Soil Moisture Meter: To monitor root zone moisture (hibiscus hates soggy roots!).
- ● Epsom Salt: 1 tbsp dissolved in water monthly for magnesium boost (promotes vibrant blooms).
- ● Copper Fungicide: Preventative measure for powdery mildew (spray lightly if humidity is high).
- ● Support Stake or Trellis: If growing taller varieties (e.g., ‘Orange King’ can reach 6+ feet!).
Step-by-Step instructions for growing orange hibiscus in containers
Here’s how to nurture vibrant orange hibiscus that thrive in pots year after year.
🌱 Step 1: Select the Right Container and Soil Mix
Choose a 5-gallon or larger container with drainage holes—hibiscus roots need room to spread and hate soggy feet. I use terra cotta pots because they wick away excess moisture, but any unglazed ceramic or plastic with drainage works. Fill the bottom 2 inches with gravel or coarse sand to prevent clogging.
Next, mix two parts potting soil with one part perlite or coarse sand—this ensures aeration and prevents root rot. Hibiscus love slightly acidic soil (pH 6.0-6.5), so add a handful of sulfur-based soil amendment if your mix runs neutral. Moisten the blend until it’s damp like a wrung-out sponge before planting.
☀️ Step 2: Plant and Position for Maximum Sunlight
Dig a hole twice as wide as the root ball but only as deep as the top of the root flare—burying the stem too deep invites rot. Gently loosen the roots if they’re circling, then place the hibiscus in the center. Backfill with your soil mix, pressing lightly to eliminate air pockets.
Orange hibiscus crave full sun (6+ hours daily), so position your container where it gets morning sun and afternoon shade in hot climates. In cooler zones, south-facing exposure works year-round. If you notice leaves curling or yellowing, it’s a sign of too much direct afternoon sun—move the pot to a slightly shaded spot for a few hours.
💧 Step 3: Water Deeply and Establish a Routine
Water deeply once a week (or more in heatwaves) until water drains freely from the bottom. Hibiscus are drought-tolerant once established, but underwatering causes buds to drop. To check moisture, stick your finger 2 inches into the soil—if it’s dry, water thoroughly. Avoid wetting the foliage to prevent fungal diseases like powdery mildew.
After the first month, fertilize every 4-6 weeks with a balanced, water-soluble fertilizer (10-10-10 or 20-20-20). I switch to a low-nitrogen, high-phosphorus blend (like 5-10-10) when buds form to encourage blooming. Over-fertilizing burns roots, so always follow label instructions.
✂️ Step 4: Prune for Bushier Growth and Continuous Blooms
Prune right after flowering to shape the plant and encourage new growth. Cut back 1/3 of the oldest stems to the nearest leaf node, and trim any leggy or crossing branches. Hibiscus respond well to pruning—you’ll see new shoots within 2-3 weeks. Always use sterilized pruners to avoid spreading disease.
In frost-prone areas, wrap the container in burlap and move it to a sheltered spot when temperatures drop below 30°F. Even frost-resistant varieties like ‘Dwarf Orange’ can suffer damage if left exposed. If the plant loses leaves, don’t panic—it often rebounds with new growth once warmth returns.
🌿 Step 5: Overwintering and Year-Round Care
Reduce watering in winter to every 10-14 days, letting the top 1-2 inches of soil dry out between waterings. Hibiscus go semi-dormant in cooler months, so halt fertilization until spring. Place the container near a south-facing window or under grow lights for 12 hours of light daily to maintain health.
Come spring, repot every 2-3 years if roots are circling the container. Refresh the soil mix and trim any dead or weak growth before resuming regular care. With consistent sunlight, water, and pruning, your orange hibiscus will reward you with bold blooms from spring through fall.
Tips & tricks for perfect orange hibiscus in containers
Here's what nobody tells you about keeping your orange hibiscus thriving—and how to avoid the most common pitfalls.
Soil Mix Secrets: The two-part potting soil to one-part perlite ratio in Step 1 is crucial, but don't skip the sulfur-based soil amendment if your tap water is alkaline. I've found that hibiscus in neutral pH soil (around 7.0) often show yellowing leaves within weeks—test your soil first! For extra insurance, mix in a handful of peat moss to maintain that slightly acidic environment (pH 6.0-6.5) that hibiscus crave.
Sunlight Strategy: When positioning your container in Step 2, pay special attention to afternoon sun in hot climates. I've seen many orange hibiscus suffer from sunburned leaves when left in full afternoon sun—look for subtle yellowing or crispy edges as early warning signs. A simple solution is to use a sheer curtain to filter the harsh afternoon rays while still allowing plenty of morning sunlight.
Watering Wisdom: The "water deeply once a week" guideline in Step 3 is perfect for established plants, but newly planted hibiscus need more frequent watering. For the first two weeks after planting, water every 3-4 days to help roots establish. You'll know you're doing it right when water runs freely from the drainage holes—this ensures the entire root system gets hydrated, not just the surface.
Frost Protection: When temperatures drop below 30°F in Step 4, don't just wrap the container—consider moving it to a protected location like a garage or covered porch. I've had hibiscus survive winters with just burlap wrapping, but adding a layer of mulch around the container's base can provide an extra 5-10°F of protection. This double-layer approach has saved my plants during unexpectedly cold snaps.
Pro Tips for Orange Hibiscus Flower
- Here's what nobody tells you about keeping your orange hibiscus thriving—and how to avoid the most common pitfalls.
- Soil Mix Secrets: The two-part potting soil to one-part perlite ratio in Step 1 is crucial, but don't skip the sulfur...
- Sunlight Strategy: When positioning your container in Step 2, pay special attention to afternoon sun in hot climates....
Frequently asked questions
Got questions about growing orange hibiscus flowers? You’re not alone! Here are answers to the most common queries—from care tips to troubleshooting—so you can keep your frost-resistant beauties thriving in containers.
How cold can orange hibiscus tolerate before frost damage occurs?
Orange hibiscus (Hibiscus rosa-sinensis) is surprisingly hardy for a tropical plant! It can survive light frosts down to 28–32°F (-2 to 0°C) if protected. For colder climates, move pots indoors or wrap them in frost cloth. Pro tip: Avoid sudden temperature drops—gradual acclimation helps!
How long does it take for orange hibiscus to bloom after planting?
With proper care, you’ll see buds in 6–12 months, but established plants (2+ years old) may bloom sooner. Prune leggy growth in spring to encourage bushier, flower-heavy stems. Use a balanced fertilizer (like 10-10-10) every 4–6 weeks during growing season to speed up flowering!
Can I grow orange hibiscus in a small container, or do they need deep pots?
Yes! While they thrive in 12–18-inch pots, orange hibiscus adapt well to smaller containers if you repot every 2–3 years. Ensure pots have drainage holes and use a well-draining mix (cactus/succulent mix + perlite works great). Root-bound plants bloom better—so don’t rush upsizing!
What pests should I watch for, and how do I treat them?
Common pests include aphids, spider mites, and whiteflies. Start with a strong spray of water to dislodge soft-bodied bugs. For stubborn infestations, use neem oil or insecticidal soap (apply at dusk). Prevent pests by keeping leaves dry and avoiding over-fertilizing!
Do orange hibiscus need full sun, or can they tolerate partial shade?
They prefer 6+ hours of direct sun daily for vibrant blooms, but can tolerate 3–4 hours in partial shade (especially in hot climates). In shadier spots, flowers may be smaller or less frequent. Rotate pots occasionally for even growth!
How often should I water orange hibiscus in containers?
Water when the top 1–2 inches of soil are dry (usually every 2–3 days in summer, less in winter). Overwatering causes root rot—always check drainage! Mulch the soil surface to retain moisture. Morning watering prevents fungal issues!
Wrapping up and next steps
The orange hibiscus flower isn’t just a stunning addition to your garden—it’s a resilient, low-maintenance beauty that thrives in containers, even in cooler climates! With the right care, you’ll enjoy vibrant blooms that brighten up any space while attracting pollinators.
Whether you’re a seasoned gardener or just starting out, this frost-resistant gem makes growing easy and rewarding. 🌸
Ready to bring a splash of color to your patio or balcony? Grab your supplies, follow the steps, and watch your hibiscus flourish! Start planting today—your future blooms will thank you! 🌱