
Flowers
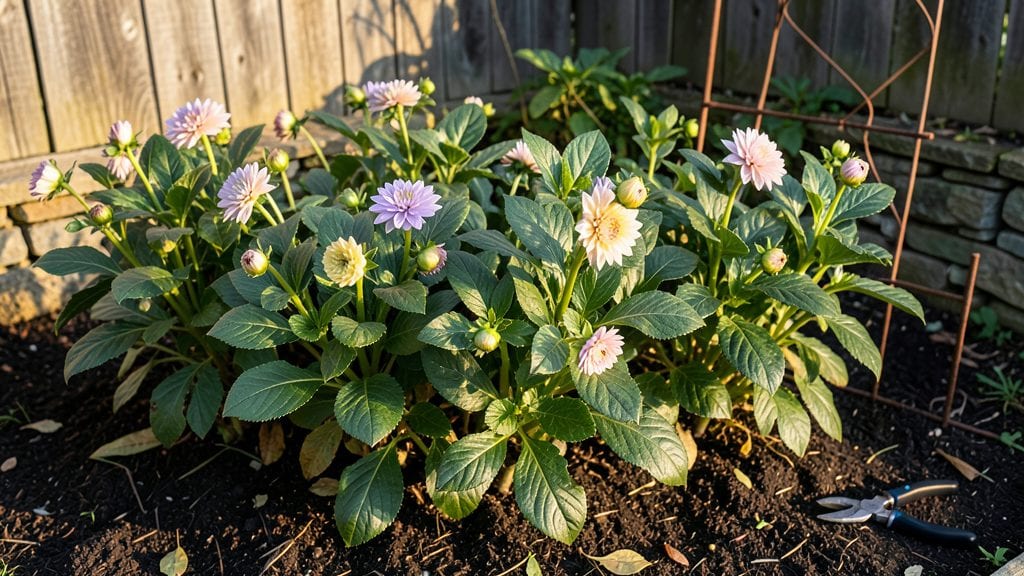
Transforming a small space into a micro flower farm with dahlias starts with containers that turn bold blooms into a standout feature. 🌸 The secret isn’t just choosing the right varieties—it’s arranging them so every stem feels intentional, whether you’re filling gaps in a patio or creating a mobile display for markets.
My first micro farm used repurposed whiskey barrels and vintage crates, turning what could’ve been clutter into a showstopping display that neighbors kept asking about.
You’ll need 5-gallon containers for single-stem varieties and 10-gallon pots for larger blooms, plus a well-draining mix of compost, perlite, and coconut coir to keep roots happy. Dahlias thrive in full sun, but containers dry out faster—so drip irrigation or self-watering setups become your best friends.
The layout matters too: taller varieties in back, shorter ones in front, and trailing types spilling over edges creates depth without sacrificing space.
What you’ll end up with is a year-round conversation piece—vibrant blooms from early summer through frost, with colors that range from deep burgundy to sunny yellow.
Customers (or your own home) will notice the textured foliage and oversized blooms first, but it’s the consistent production that keeps people coming back. Even in tight spaces, a well-planned micro farm can yield 50-100 stems per season from just a few containers.
This approach works for hobbyists and small-scale sellers alike—whether you’re filling a balcony or prepping for a farmers’ market. The key is treating containers like tiny gardens with their own rules: more frequent watering, strategic fertilizing, and creative staging to make every bloom count.
Ready to turn containers into a cut-flower powerhouse?
📚 In This Guide
- What you need
- Instructions
- Tips and common mistakes
- Wrapping up and next steps
What you need
- ● Dahlia tubers: 3–5 tubers per container (choose heirloom or disease-resistant varieties like 'Café au Lait' or 'Galaxy').
- ● Containers: 12–18" deep pots (5-gallon minimum) with drainage holes. Pro tip: 🌡️ Use lightweight fabric pots for better airflow!
- ● Potting mix: 10–15 gallons of high-quality, well-draining mix (add perlite or sand for extra fluff).
- ● Slow-release fertilizer: 1 cup per container (look for 10-10-10 or organic options like worm castings).
- ● Watering can or hose: With a gentle spray nozzle to avoid disturbing tubers.
- ● Pruning shears: Sharp, clean shears for deadheading and shaping.
- ● Stakes or cages: 3–4 ft tall (dahlias need support as they grow!).
- ● Epsom salt: 1 tbsp per gallon of water (monthly feeding for magnesium boost).
- ● Mulch: Straw or shredded leaves to retain moisture.
- ● Grow lights: For indoor starts or low-light spots.
- ● Floral preservative: For cutting blooms that last longer in vases.
- ● Journal/notebook: Track growth stages, sunlight, and watering habits!
Step-by-step instructions for growing dahlias in containers
Here's how to cultivate dramatic dahlias in small spaces—no garden bed required.
🌱 Step 1: Select and Prepare Tubers for Planting
Choose healthy, firm tubers with multiple "eyes" (growth points) and no soft spots. I always soak mine in a 1:10 hydrogen peroxide solution for 15 minutes before planting—this sterilizes the surface and prevents rot. Rinse thoroughly afterward. Dahlias grow best from tubers with 3-5 eyes per section, so cut larger tubers into smaller pieces, ensuring each piece has at least one eye.
Place the cut pieces in a shallow tray and let them dry for 24 hours in a warm, shaded spot. This callusing process helps prevent disease when you plant. I like to position the tubers with the eyes facing upward—this gives the emerging shoots a clear path to the surface. If you're impatient like me, you'll notice tiny green shoots within 7-10 days of soaking.
🪴 Step 2: Choose and Prepare Containers
Dahlias need deep containers—at least 12 inches deep—to accommodate their long, tuberous roots. I use 15-gallon fabric grow bags because they allow roots to expand naturally while preventing waterlogging. Ensure each container has multiple drainage holes at the bottom; if not, drill them yourself. Line the bottom with 2 inches of coarse gravel to improve drainage and prevent soil compaction.
Fill the bottom 6 inches of the container with a lightweight, well-draining potting mix blended with 20% perlite. Avoid garden soil—it compacts in containers and strangles roots. I like to mix in a slow-release fertilizer (10-10-10) at this stage to give the tubers a nutrient boost right away. Press the mix down lightly to create a firm base for the tubers.
☀️ Step 3: Plant Tubers and Provide Ideal Growing Conditions
Position the tuber sections 2-3 inches deep in the prepared soil, with the eyes facing upward. Space multiple tubers 6-8 inches apart—crowding leads to weak stems and fewer blooms. Cover them with 2-3 inches of soil, leaving the top of the tuber exposed. Water gently until the soil is evenly moist but not soggy. Dahlias hate soggy roots, so always ensure excess water drains away.
Place the containers in a location with full sun (at least 6-8 hours daily) and warm soil temperatures (above 60°F). I use a soil thermometer to monitor—dahlias won’t sprout until the soil warms up. Once shoots emerge (usually 2-3 weeks after planting), I add 2 more inches of potting mix around the base to encourage stronger stems. Keep the soil consistently moist but never waterlogged; dahlias are drought-tolerant once established but need steady moisture during early growth.
✂️ Step 4: Support Stems and Maintain for Maximum Blooms
As stems grow to 12 inches tall, I install bamboo stakes or tomato cages to support the heavy blooms. Dahlias can reach 4-5 feet tall, so sturdy support is a must. I tie stems loosely with soft plant ties every 6-8 inches—too-tight ties can damage the delicate stems. Pinch back the top set of leaves when the plant reaches 18 inches to encourage bushier growth and more blooms.
Feed plants every 2-3 weeks with a balanced liquid fertilizer (like 20-20-20) diluted to half strength. I always fertilize after watering to prevent root burn. Deadhead spent blooms regularly to redirect energy into new flowers. Watch for aphids or slugs—these pests love dahlias. I spray with neem oil at the first sign of trouble and handpick slugs at night when they’re most active.
🌿 Step 5: Overwinter Tubers for Next Season
When frost threatens, cut back stems to 2 inches above the soil. Gently lift the tubers from the container, shake off excess soil, and let them dry for 24 hours. Store them in a cool, dark place (around 40-50°F) in a paper bag or cardboard box filled with dry peat moss or vermiculite. Check tubers monthly for rot—discard any soft or moldy sections immediately. With proper storage, your tubers will last 3-5 years, producing more dramatic blooms each season.
Tips & tricks for perfect container-grown dahlias
These game-changing insights will help you transform your balcony or patio into a vibrant flower farm—even with limited space.
Tuber Prep Pro Tip: After cutting your tubers, I recommend adding a pinch of cinnamon to the cut surfaces before the 24-hour drying period. The natural antifungal properties help prevent rot during the callusing process—especially important when working with tubers that have multiple eyes. This simple step has saved me from losing tubers to mold in past seasons.
Container Depth Strategy: While the instructions call for containers at least 12 inches deep, I've found that 15-gallon fabric grow bags work exceptionally well because their flexible sides allow roots to expand naturally without becoming root-bound. If you're using rigid containers, make sure they're at least 15 inches deep—dahlias' tuberous roots need room to grow downward as much as outward. The extra depth prevents the roots from circling and strangling themselves.
Soil Temperature Secret: The instructions mention soil temperatures above 60°F, but I've discovered that dahlias actually perform best when soil temperatures consistently stay between 65-75°F. Use a soil thermometer to monitor—if your morning temps dip below 60°F, consider moving containers to a warmer location or using black plastic mulch to absorb and retain heat. This small adjustment can mean the difference between slow sprouting and vigorous growth.
Watering Wisdom: While dahlias are drought-tolerant once established, the critical 2-3 week period after planting requires consistent moisture. I've developed a simple trick: water deeply every morning, then check the soil moisture by lifting the container—if it feels light, water again. The key is maintaining even moisture without waterlogging; dahlias hate soggy roots but won't thrive with inconsistent watering. A moisture meter can be your best friend during this phase.
Pro Tips for Micro Flower Farm Dahlias
- These game-changing insights will help you transform your balcony or patio into a vibrant flower farm—even with limited space.
- Tuber Prep Pro Tip: After cutting your tubers, I recommend adding a pinch of cinnamon to the cut surfaces before the 24-hour drying period.
- If you're using rigid containers, make sure they're at least 15 inches deep—dahlias' tuberous roots need room to grow downward as much as outward.
Frequently asked questions
Got questions about starting a micro flower farm with dahlias?
You’re not alone! Here are some of the most common queries—and their answers—to help you grow bold, thriving blooms in containers with confidence.
How much space do I need for a micro flower farm with dahlias?
Dahlias are compact but need room to breathe! Aim for at least 12–18 inches of diameter per plant in containers. If you’re growing multiple varieties, space them 18–24 inches apart to prevent overcrowding. Raised beds or deep pots (12+ inches) work best for root health. Pro tip: Use vertical supports or trellises for taller varieties to save space!
When is the best time to plant dahlias in containers?
Timing is key! Plant tubers in spring after the last frost (when soil temps hit 60°F+). For a head start, pre-sprout tubers indoors 4–6 weeks before transplanting. In warmer climates, you can plant as early as February–March, while cooler zones may wait until April–May. Troubleshoot: If nights are still chilly, use row covers or move containers to a sheltered spot.
Can I grow dahlias in containers year-round?
Dahlias are perennial in warm climates (Zones 8–10), but most gardeners treat them as annuals in cooler areas. To extend their life, overwinter tubers indoors in a cool, dry place (like a garage) after frost. In containers, they’ll thrive spring through fall with proper care. Alternative: Try cold-hardy varieties like ‘Café au Lait’ if you want to experiment with winter growth!
What are the most common pests for container dahlias, and how do I prevent them?
Dahlias attract slugs, aphids, and spider mites—but don’t worry, prevention is easy! Inspect leaves weekly for holes or sticky residue. Use neem oil or insecticidal soap for mild infestations. Elevate containers to deter slugs, and prune crowded foliage to improve airflow. Quick fix: Introduce ladybugs or nematodes for natural pest control.
How do I keep my container dahlias blooming all season?
Deadheading (removing spent blooms) is your secret weapon! Snip off faded flowers just above a set of leaves to encourage more buds. Fertilize every 2–3 weeks with a balanced bloom booster (like 10-10-10), and water consistently—containers dry out fast. Bonus tip: Rotate containers occasionally for even sunlight exposure.
Wrapping up and next steps
Starting your own micro flower farm with dahlias is a rewarding journey that brings bold, vibrant blooms to even the smallest spaces! Whether you’re a seasoned gardener or a beginner, these container-friendly beauties prove that big results come in small packages. 🌸✨
Now that you’re armed with the right materials and answers to common questions, it’s time to roll up your sleeves and plant those tubers. Begin with just one container—your confidence (and garden!) will grow from there. Happy growing!