
Shrubs
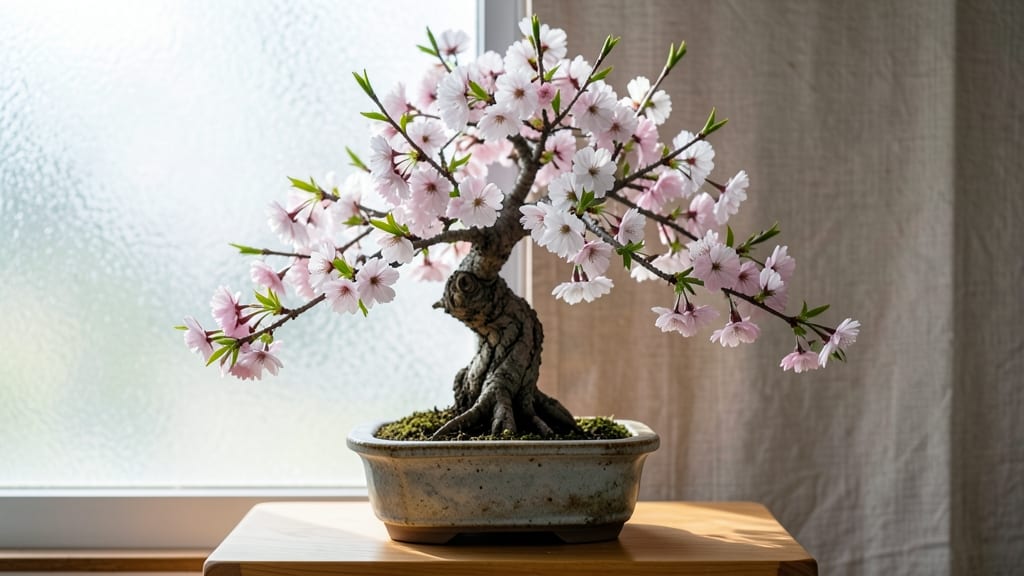
Creating a Japanese flowering cherry bonsai from a young tree transforms your home into a living spring festival. 🌸 The delicate pink blossoms that usually grace park canopies become yours to shape, prune, and nurture—each branch a miniature masterpiece.
I learned the hard way that these trees demand patience, but the payoff is worth every careful trim and wire adjustment.
You’ll need a healthy young tree (3-5 years old), well-draining bonsai soil, and the right tools: concave cutters for pruning, aluminum wiring for shaping, and a humidity tray for winter care. The soil mix is critical—too dense and the roots suffocate; too loose and the tree can’t anchor itself.
Start with a 60/30/10 blend of akadama, pumice, and organic matter to balance drainage and nutrients.
By spring, your bonsai will burst into blossoms that rival full-sized trees, their fragrance filling the room. The key is balancing growth and flowering: prune after blooms fade to encourage new branches, but never cut into last year’s wood—those buds hold next season’s flowers.
With time, you’ll develop an eye for the perfect curve, the right leaf count, and the harmony between trunk and branches.
This bonsai thrives indoors during winter but needs outdoor exposure in spring and fall for proper blooming. Common challenges include weak growth from insufficient light or overwatering, and bud drop from stress. Master these, and you’ll have a tree that brings spring’s magic to your windowsill every year.
📚 In This Guide
- What you need
- Instructions
- Tips and common mistakes
- Wrapping up and next steps
What you need
- ● Japanese Flowering Cherry Tree: A young, healthy specimen (3–5 years old) with a sturdy trunk and branches. Look for varieties like Prunus serrulata or Prunus subhirtella.
- ● Bonsai Pot: 1 shallow, well-draining pot (6–12 inches wide) with drainage holes. Choose unglazed clay or ceramic for optimal airflow.
- ● Bonsai Soil: 1 bag of high-quality akadama (60%), pumice (30%), and peat moss (10%) blend for optimal drainage and aeration.
- ● Root Pruning Shears: 1 pair of sharp, precision shears (e.g., Felco or Gesswein) for trimming roots without damaging the tree.
- ● Wire (Aluminum or Copper):strong> 1–2 rolls of 1–3mm gauge wire for branch shaping (avoid over-tightening!).
- ● Pruning Tools: 1 pair of concave-cutting bonsai scissors for branch pruning.
- ● 1 small saw for thicker branches (if needed).
- ○ Jiffy-7 or Seedling Starter: 1–2 units for propagating cuttings (optional, for future expansion).
- ● Misting Bottle: 1 for maintaining humidity around leaves (especially during transplanting).
- ● Bonsai Fertilizer: 1 bottle of balanced liquid fertilizer (e.g., 10-10-10 or organic options like fish emulsion).
- ● Root Stimulator: 1 small bottle (e.g., Clonex or seaweed extract) to encourage root growth during repotting.
- ● Wire Cutters: 1 pair for safely removing wire from branches.
- ○ Decorative Elements (Optional):strong> Small rocks, moss, or figurines for aesthetic touches.
- ● Bonsai display stand or cake for showcasing your masterpiece.
- ● A sunny spot with 4–6 hours of direct sunlight daily (south or west-facing window/outdoor space).
- ● Patience! Japanese flowering cherries are slow growers and require gentle, consistent care.
- ● Basic knowledge of bonsai techniques (or willingness to learn!). Pro tip: 💡 Watch YouTube tutorials or join a local bonsai club!
Step-by-Step instructions for cultivating Japanese flowering cherry bonsai
Here’s how to transform a young cherry tree into a delicate spring showpiece.
🌱 Step 1: Select and Prepare Your Starting Material
Choose a 5-7 year old Japanese flowering cherry tree with a naturally curved trunk—these develop the most character over time. I always look for branches with multiple buds along the trunk, as these will become your bonsai’s flowering points. Prune any overly thick or crossing branches now to encourage a balanced structure.
Remove the tree from its container and inspect the roots. Trim any circling or overly long roots with clean, sharp bonsai shears—this prevents root-bound stress later. Soak the roots in lukewarm water for 20-30 minutes to revive them before repotting. The goal is to wake up the roots gently without shocking the tree.
🪴 Step 2: Repot with Bonsai Soil and Style the Base
Fill your 5-7 inch bonsai pot with a mix of 50% akadama, 30% pumice, and 20% organic compost—this blend drains well while retaining enough moisture for delicate roots. Position the tree slightly off-center to create visual interest, and use wire or chopsticks to shape the root system into a natural, cascading form.
Add soil gradually, tapping the pot to eliminate air pockets while keeping the tree stable. Leave the surface slightly uneven—this mimics natural terrain and helps with water drainage. Once planted, water thoroughly until it drains from the bottom holes. The soil should feel damp but not soggy when squeezed.
☀️ Step 3: Prune and Train for Spring Bloom
Prune back one-third of the new growth to encourage bushier branching—this is where your bonsai’s future flowers will develop. Focus on keeping the strongest branches and removing any that grow inward or weaken the tree’s structure. Use sharp bonsai shears and make cuts just above a bud or leaf node to promote healing.
Place your bonsai in bright, indirect light (east or west-facing windows work best) and maintain 50-65°F temperatures. Avoid direct sunlight, which can scorch the delicate leaves. Water when the top inch of soil feels dry, and mist the foliage daily to increase humidity—this mimics the tree’s natural woodland environment.
✂️ Step 4: Refine and Prepare for Flowering Season
In late winter, when buds begin to swell, reduce watering slightly to every 3-4 days—this helps the tree focus energy on flowering rather than leaf growth. Apply a balanced 10-10-10 fertilizer at half strength every 4-6 weeks during the growing season (spring and summer) to support blooming.
Watch for pink or white flower buds in early spring—this is your cue to increase airflow around the tree. Gently prune any spent flowers immediately after blooming to redirect energy to new growth. The first year may yield sparse blooms, but with patience, your bonsai will reward you with stunning clusters of cherry blossoms in years to come.
Tips & tricks for perfect Japanese flowering cherry bonsai
Here's what I learned after years of cultivating these delicate trees—these tips will help you avoid common pitfalls and create a thriving miniature masterpiece.
Root Revival Technique: During the 20-30 minute lukewarm water soak in Step 1, I always add a few drops of seaweed extract to the water. This gives the roots a gentle nutrient boost while they revive, helping them recover faster from the transplant shock. The key is to use lukewarm water—too hot can scorch delicate roots, while cold water shocks them.
Soil Blend Secrets: The 50-30-20 akadama-pumice-compost mix is perfect, but here's the thing: I always sift the akadama first to remove any large particles. This prevents clumping in your 5-7 inch pot and ensures even moisture distribution. For the first watering after repotting, I use a spray bottle to gently mist the soil—this helps settle it without disturbing the newly positioned roots.
Pruning Precision: When pruning back one-third of the new growth in Step 3, I look for branches that grow at a 45-degree angle or less from the trunk. These are the ones to keep—they'll develop the most character. For the cuts, I use a fresh blade on my bonsai shears after every 3-4 cuts to prevent crushing stems. The goal is clean cuts just above a bud, which promotes faster healing and new growth.
Lighting Strategy: Bright indirect light is crucial, but here's my pro move: I rotate my bonsai every 2-3 weeks to ensure even growth. In Step 3, when placing your tree, position it so the strongest side faces the light source—this prevents lopsided development. I also keep a small fan nearby to gently circulate air, which mimics natural forest conditions and helps prevent fungal issues.
Pro Tips for Japanese Flowering Cherry Bonsai
- Here's what I learned after years of cultivating these delicate trees—these tips will help you avoid common pitfalls and create a thriving miniature masterpiece.
- Root Revival Technique: During the 20-30 minute lukewarm water soak in Step 1, I always add a few drops of seaweed extract to the water.
- Soil Blend Secrets: The 50-30-20 akadama-pumice-compost mix is perfect, but here's the thing: I always sift the akadama first to remove any large particles.
Frequently asked questions
Got questions about growing your own Japanese Flowering Cherry Bonsai? You’re not alone! Here are some of the most common queries—and their answers—to help you nurture your miniature spring masterpiece with confidence.
How long does it take for a Japanese Flowering Cherry Bonsai to bloom?
A young bonsai may take 3–5 years to produce flowers, depending on its age, care, and species (e.g., Prunus serrulata varieties). Patience is key—focus on proper pruning, sunlight, and dormancy cycles. Once established, expect stunning blooms in early spring!
Can I grow a Japanese Flowering Cherry Bonsai indoors?
While possible, it’s challenging. These trees thrive outdoors with full sun (6+ hours/day) and seasonal temperature swings. If indoors, place near a south-facing window, use grow lights, and mimic outdoor conditions (e.g., cooler winters). Expect slower growth and fewer flowers.
How do I protect my bonsai from winter damage?
Japanese Flowering Cherries need dormancy in winter (40–50°F). Protect yours with:
- A winter wrap (burlap or fleece) to shield from wind.
- Avoid heating vents or frost pockets.
- Reduce watering (keep soil slightly moist, not soggy).
What’s the best alternative if I can’t grow a cherry bonsai?
Try these low-maintenance, flowering alternatives:
- Japanese Maple (Acer palmatum) – Vibrant fall colors, easier care.
- Dwarf Fothergilla (Fothergilla gardenii) – Fragrant spring blooms, compact.
- Chinese Elm (Ulmus parvifolia) – Hardy, fast-growing, and forgiving.
Why are my cherry bonsai leaves yellowing or dropping?
Common causes and fixes:
Issue
Likely Cause
Solution
Yellow leaves
Overwatering or nutrient deficiency
Check soil moisture (top 1–2 inches dry); fertilize with balanced bonsai mix in spring.
Dropping leaves
Stress from transplanting or cold shock
Acclimate gradually to outdoor temps; avoid pruning during dormancy.
Brown edges
Underwatering or fluoride buildup
Water deeply; flush soil with rainwater monthly.
Act fast—most issues are reversible with proper care!
Wrapping up and next steps
Cultivating a Japanese flowering cherry bonsai brings a touch of serene spring beauty into your space—no matter the season! 🌸 With the right tools, patience, and care, you’ll nurture a living masterpiece that blooms with delicate pinks and whites.
Whether you’re a beginner or a seasoned gardener, this rewarding hobby offers endless creativity and connection to nature.
Ready to turn your vision into reality? Start by gathering your supplies, then dive in—your miniature cherry tree is waiting for its story to unfold! 🌱✨