
Container Gardens
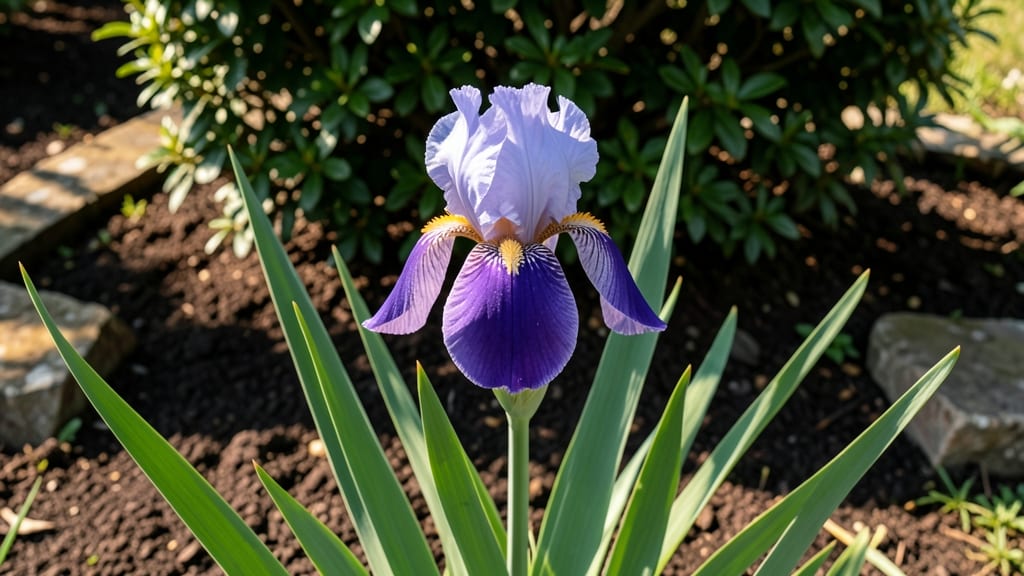
Growing iris flowers in containers lets you bring Pacific Northwest skies into your garden with those iconic blue spires—no sprawling beds required. 🌿 I’ve grown them in pots for three years now, and the secret isn’t just the right soil or sunlight, but understanding how they thrive in our damp, cool summers.
These irises don’t just survive in containers; they multiply and bloom more reliably than their in-ground cousins.
The key is well-draining soil (think gritty loam mixed with perlite) and pots with drainage holes—12-14 inches deep at minimum. Place them where they get morning sun and afternoon shade, which mimics their native woodland edges.
Water only when the top inch of soil feels dry; overwatering is the #1 killer of container irises in our climate.
By late summer, you’ll see those signature sword-like leaves emerging, and by next spring, tall, velvety blue blooms will rise like Pacific Northwest rain clouds. The best part? These plants divide every 3-4 years, giving you free extra plants to share or expand your collection.
Even in our rainy summers, container irises stay healthy with the right care—no soggy roots or fungal issues. Let’s get yours thriving in pots this season!
📚 In This Guide
- What you need
- Instructions
- Tips and common mistakes
- Wrapping up and next steps
What you need
- ● Iris rhizomes: Choose Iris germanica or Iris sibirica varieties (blue, purple, or white). Buy 3–5 mature, firm rhizomes (1–2 inches wide) from a trusted nursery.
- ● Well-draining potting mix: A blend of 50% potting soil, 30% perlite or pumice, and 20% coarse sand or gravel (PNW soil can be heavy—avoid clay-heavy mixes!).
- ● Containers: Size: At least 12 inches deep and wide per rhizome (e.g., a 14–16" pot for 3–5 rhizomes).
- ● Type: Terracotta, fiberglass, or plastic with drainage holes (critical for preventing rot!).
- ● Slow-release fertilizer: A balanced 10-10-10 or 5-10-5 granular fertilizer (follow package rates for containers).
- ● Mulch: 1–2 inches of gravel or bark chips (keeps rhizomes exposed and dry).
- ● Garden trowel or small shovel
- ● Pruning shears (for trimming foliage)
- ● Watering can with a narrow spout (avoids disturbing rhizomes)
- ○ Gloves (optional—rhizomes can be sharp!)
- ● Epsom salt (for magnesium boost—mix 1 tbsp per gallon of water monthly).
- ● Container saucers or trays (to catch excess water).
- ● Stakes or rings (to support tall stems if needed).
- ● pH test kit (ideal pH: 6.0–7.0; amend soil if necessary).
How to grow Pacific Northwest-friendly iris in containers
Here’s how I’ve successfully grown vibrant blue iris spires in containers—perfect for the PNW’s mild, wet climate.
🌱 Step 1: Select the Right Iris Variety and Containers
Choose bearded iris varieties like ‘Blue Flag’ or ‘Pacific Giant’—they thrive in containers and tolerate the PNW’s cooler, damp conditions. Avoid rhizomes (the thick, fleshy roots) that are too large for small pots; aim for 3-4 inch rhizomes per container. Use glazed ceramic or plastic containers with drainage holes—unglazed terra cotta can retain too much moisture in our rainy climate.
Containers should be at least 12 inches deep and 12 inches wide per rhizome. I like to use fiberglass or heavy-duty plastic because they won’t crack in freezing winters. Fill the bottom third with gravel or broken pottery for drainage—this prevents root rot, which is a common issue in our wet climate.
🪴 Step 2: Prepare Soil and Plant Rhizomes Correctly
Mix 50% high-quality potting soil with 50% perlite or coarse sand to improve drainage. The PNW’s acidic soils can be too dense, so this blend keeps roots aerated. Avoid garden soil—it compacts and suffocates rhizomes. Moisten the mix until it’s damp but not soggy; rhizomes rot easily in waterlogged conditions.
Plant rhizomes partially exposed—about half buried in soil, with the top third above the surface. This prevents rot and encourages strong root growth. Space them 6-8 inches apart in the container. If using multiple rhizomes, arrange them in a circle for a fuller look. Water lightly after planting to settle the soil.
☀️ Step 3: Position for Light and Protect from Rain
Iris needs full sun (6+ hours daily), but in the PNW, that means morning sun and afternoon shade to prevent scorching. Place containers on a patio or deck where they get bright, indirect light in the afternoon. If growing in full sun, water every 2-3 days—the PNW’s humidity means soil dries slower than you’d expect.
Protect containers from direct, heavy rain by moving them under a covered porch or awning during downpours. Too much water sitting on rhizomes causes rot. A clear plastic dome (like those used for seed starting) can also shield them temporarily if you can’t move them.
💧 Step 4: Water and Fertilize for Strong Growth
Water only when the top inch of soil feels dry—overwatering is the fastest way to kill container iris. In summer, this might mean every 3-4 days; in winter, reduce to once a week. Always water at the base, not overhead, to avoid fungal issues. Let excess water drain completely to prevent soggy roots.
Fertilize once in early spring with a balanced, slow-release fertilizer (10-10-10). Avoid high-nitrogen feeds—iris blooms best with low nitrogen and higher phosphorus. I mix a tablespoon of bone meal into the soil at planting time for extra phosphorus. Stop fertilizing after mid-July to encourage blooming the following year.
✂️ Step 5: Prune and Divide for Long-Term Health
After flowering, cut back faded blooms to 2 inches above the rhizome—this prevents seed production and redirects energy to next year’s flowers. Never cut the leaves; they feed the rhizome until late summer, when they naturally yellow and die back. Remove dead foliage in early fall to keep the container tidy.
Divide rhizomes every 3-4 years in early spring before new growth appears. Lift them from the container, separate any crowded or small rhizomes, and repot them in fresh soil. This keeps plants vigorous and prevents overcrowding, which reduces blooming. Discard any soft, mushy rhizomes—they’re rotten and will spread disease.
Tips & tricks for perfect Pacific Northwest iris in containers
These tried-and-true tips will help you avoid common pitfalls and maximize your iris blooms in the PNW's unique climate.
Container Selection: For the 12-inch deep containers mentioned, choose ones with multiple drainage holes at the bottom—this is non-negotiable in our wet climate. I've found that fiberglass containers work best because they resist cracking from winter freeze-thaw cycles while still allowing proper drainage. If using ceramic, opt for glazed varieties to prevent moisture absorption from the sides.
Soil Mix Secrets: The 50-50 blend of potting soil and perlite/sand is crucial, but don't skimp on quality. I recommend adding one part worm castings to that mix for extra nutrients—it helps offset the phosphorus deficiency common in PNW soils. When moistening your mix, squeeze it gently; it should hold its shape but not drip water when formed into a ball.
Rhizome Exposure Technique: The instructions mention planting rhizomes with half buried and top third exposed, but here's the pro move: create a slight mound of soil so the rhizome sits at a 45-degree angle rather than flat. This positioning encourages more robust root development and prevents water from pooling against the rhizome during our frequent rain showers. After planting, give them a light misting rather than a thorough watering to help settle the soil without oversaturating.
Rain Protection Hacks: For the covered porch or awning protection mentioned, I've found that clear plastic plant saucers (the kind used for seed starting) work perfectly as temporary shields during sudden downpours. Place one over the container, securing it with small pebbles if needed. Another trick: elevate containers on pot feet or bricks to prevent water from pooling at the base during heavy rains—this mimics the natural drainage iris would get in garden beds.
Pro Tips for Iris Flower Growing
- These tried-and-true tips will help you avoid common pitfalls and maximize your iris blooms in the PNW's unique climate.
- Container Selection: For the 12-inch deep containers mentioned, choose ones with multiple drainage holes at the bottom—this is non-negotiable in our wet climate.
- Soil Mix Secrets: The 50-50 blend of potting soil and perlite/sand is crucial, but don't skimp on quality.
Frequently asked questions
Got questions about growing iris flowers in containers? You’re not alone! Here are answers to the most common queries—from timing to troubleshooting—so you can cultivate stunning blue spires with confidence.
When is the best time to plant iris bulbs in containers?
Plant Iris germanica or Iris sibirica in early fall (September–October) for spring blooms. If you’re in the Pacific Northwest’s cooler climate, aim for late summer to early fall (August–September) to avoid winter frost. For bearded irises, divide and replant rhizomes in late summer after blooming.
How often should I water potted irises?
Keep soil evenly moist but not soggy—especially after planting. Water deeply 1–2 times per week (adjust for rain). During active growth (spring–summer), ensure the top inch of soil stays damp. Drainage is critical: Use containers with holes and a mix of perlite or sand to prevent root rot.
Can I grow irises in full shade?
Most irises thrive in full sun (6+ hours/day), but Iris sibirica and Iris ensata tolerate partial shade (4–6 hours). If growing in shade, choose variegated or lighter-colored varieties and supplement with bright, indirect light. Avoid deep shade—it weakens stems and reduces blooms.
What pests should I watch for, and how do I treat them?
Common pests include iris borers, aphids, and spider mites. For borers, handpick larvae or apply neem oil in early summer. Aphids? Spray with soapy water. Spider mites thrive in dry conditions—mist leaves and use horticultural oil if needed. Prevention tip: Keep plants healthy with balanced fertilizer!
How do I overwinter potted irises in cold climates?
Move containers to a protected spot (garage, shed, or insulated porch) before hard frosts. Bury pots in straw or mulch if left outdoors, and reduce watering in winter. In the PNW, Iris germanica may need winter protection, while Iris sibirica is hardier. Resume watering in early spring once growth resumes.
Wrapping up and next steps
Growing iris flowers in containers is a rewarding way to bring those stunning Pacific Northwest-friendly blue spires into your garden—even with limited space! With the right soil, sunlight, and care, you’ll enjoy vibrant blooms year after year. Remember, patience and consistency are key, especially in the first growing season.
Now that you’re ready to dive in, pick your favorite variety and start planting! Whether you’re a beginner or a seasoned gardener, every iris you nurture will add a splash of color and charm to your container garden. 🌸 Happy growing!