
Flowers
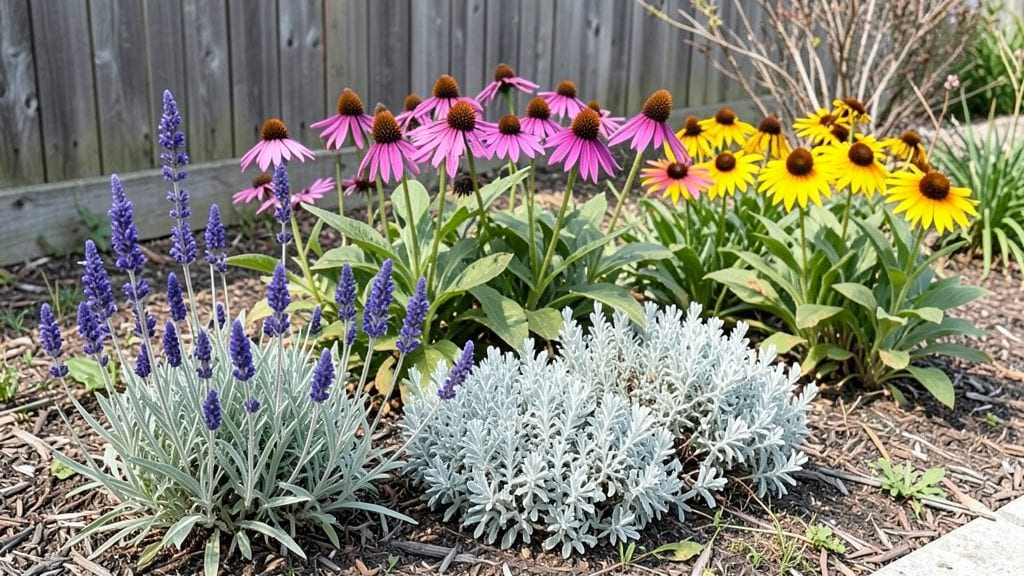
An in-ground flower bed that blooms from spring through frost starts with layered soil—not just dirt, but a carefully crafted foundation that keeps roots happy and colors vibrant. 🌸 I learned this the hard way when my first bed produced flowers but flopped by summer, roots struggling in compacted soil.
The secret isn’t just pretty plants; it’s the invisible work beneath them.
You’ll need a flat, well-defined space (at least 3 feet wide for easy maintenance), a shovel or spade, compost, and a handful of organic matter like leaf mold or aged manure.
The magic happens in the layers: coarse sand for drainage at the bottom, compost-rich topsoil for feeding roots, and a top dressing of mulch to protect against heat and weeds. This setup saves you from replanting every year—once established, your bed becomes self-sustaining.
What you end up with is a lush, low-maintenance display that thrives through heatwaves and droughts. Imagine deep purple coneflowers standing tall in July, salmon geraniums spilling over edges in June, and evergreen hellebores adding winter structure.
The soil stays loose, water drains properly, and plants grow stronger—meaning bigger blooms and fewer pests. You’ll spend less time fixing problems and more time admiring the results.
This design works for any climate, from sunny borders to shaded woodland edges. Whether you’re reviving an old bed or starting fresh, the layered approach cuts down on guesswork. Let’s get your soil ready for a show that lasts all season.
📚 In This Guide
- What you need
- Instructions
- Tips and common mistakes
- Wrapping up and next steps
What you need
- ● Topsoil: 2–4 cubic yards (depending on bed size; opt for high-quality, well-draining soil).
- ● Compost: 1–2 bags (for enriching soil and improving fertility).
- ● Organic mulch: 2–3 bags (e.g., shredded bark or pine straw to retain moisture and suppress weeds).
- ● Perennials/annuals: 12–24 plants (mix of blooming varieties for color and seasonality).
- ● Fertilizer: Slow-release granular or organic (e.g., 10-10-10 or compost tea).
- ● Edging material: Flexible metal, stone, or plastic (e.g., 5–10 ft rolls or pre-cut bricks).
- ● Garden shovel or spade: For digging and soil prep.
- ● Garden fork: To aerate and loosen compacted soil.
- ● Wheelbarrow: For hauling soil, mulch, and plants.
- ● Rake: To level and smooth the soil.
- ● Measuring tape: For precise bed dimensions.
- ● Gloves & knee pads: Comfort is key!
- ● Soil test kit: To check pH and nutrient levels before planting.
- ● Drip irrigation system: For consistent watering (e.g., 50–100 ft of tubing).
- ● Decorative stones or gravel: For borders or pathways.
- ● Plant markers: To label varieties (e.g., wooden stakes or metal tags).
- ● Post-hole digger: If installing permanent edging stakes.
Step-by-Step instructions for designing a layered in-ground flower bed
Here's how I create a thriving flower bed that blooms season after season.
🪴 Step 1: Mark and Prepare the Flower Bed Layout
Use a garden hose or string to outline your flower bed shape. Step back and visualize how it will look from different angles—this is your chance to adjust before digging. I always mark the center with a stake and measure outward to ensure the bed is at least 3 feet wide for good air circulation and easy maintenance.
Once you're happy with the shape, remove the top layer of grass or weeds using a spade or edging tool. Work in sections about 2 feet wide to avoid tiring yourself. The goal is to expose the native soil while keeping the surrounding lawn intact. If you're working in an established yard, consider laying down landscape fabric along the edges to prevent grass from creeping back in.
🌱 Step 2: Build the Soil Layers for Optimal Drainage and Nutrition
Start with a 2-inch layer of coarse gravel or small rocks at the bottom of your prepared bed. This creates essential drainage and prevents waterlogging, which is especially important if your area has heavy clay soil. I like to use crushed granite because it breaks down slowly and adds minerals over time.
Next, add a 4-inch layer of composted organic matter—this could be well-rotted manure, leaf mold, or store-bought compost. This layer feeds your plants over time and improves soil structure. Top this with 6 inches of your existing topsoil or high-quality garden soil, mixing in a handful of bone meal or slow-release fertilizer for extra nutrients. The key here is to create a loose, airy mix that roots can easily penetrate.
☀️ Step 3: Plan and Plant Your Flower Layers
Design your flower bed using three distinct layers: tall plants at the back, medium-height plants in the middle, and low-growing flowers at the front. This creates depth and ensures all plants get adequate sunlight. I like to sketch a simple diagram first to visualize the arrangement before digging holes.
Start planting your tallest flowers first, typically 12-18 inches apart, then work your way forward with medium and low-growing varieties. Space perennials 18-24 inches apart and annuals 6-12 inches apart depending on their mature size. Dig holes just deep enough to accommodate the root ball, then water each plant thoroughly after planting to settle the soil around the roots.
💧 Step 4: Mulch and Establish Your Flower Bed
Spread a 2-3 inch layer of organic mulch like wood chips, straw, or shredded leaves over the entire bed. This helps retain moisture, suppress weeds, and regulate soil temperature. I prefer pine bark mulch because it breaks down slowly and adds acidity, which many flowers prefer.
Water deeply right after mulching to help everything settle. You'll want to keep the soil consistently moist but not soggy for the first 2-3 weeks as your plants establish roots. Watch for signs of stress like wilting or yellowing leaves—these usually indicate either underwatering or overwatering. A good rule of thumb is to water when the top 1-2 inches of soil feel dry to the touch.
⏰ Step 5: Maintain Seasonal Care for Year-Round Blooms
In early spring, remove any dead foliage and add a fresh layer of compost around your plants. This gives them a nutrient boost as they begin their growing season. Throughout the summer, water in the morning to reduce evaporation and prevent fungal diseases. I set a reminder to check my flower beds every 3-4 days during dry spells.
Fall is the perfect time to divide and transplant perennials that have outgrown their space. After the first frost, cut back dead foliage but leave the stems of perennials like coneflowers and black-eyed Susans—they provide winter interest and protect the crowns from freezing. In late fall, add a thick layer of mulch to insulate the soil and protect plant roots during winter.
Tips & tricks for perfect in-ground flower bed design
Creating a stunning flower bed that thrives all year takes more than just planting flowers—it's about smart planning and soil prep. Here are my go-to tips to help you avoid common mistakes and create a bed that's the envy of the neighborhood.
Layering Matters: In Step 2, when building your soil layers, don't skip the 2-inch gravel base—this is your secret weapon against waterlogging, especially in clay-heavy soils. I've seen flower beds fail spectacularly when this step is rushed. Take your time spreading the gravel evenly, and consider adding a layer of landscape fabric over the gravel if you're in a particularly wet climate. This prevents soil from mixing down into the drainage layer.
Visual Planning Pays Off: Before you dig a single hole in Step 3, sketch your design on paper. I can't stress this enough—this simple step prevents costly mistakes. Use different colored markers to represent each plant type (tall, medium, short) and their mature sizes. This visual guide helps you space plants correctly from the start, avoiding that crowded look that makes flower beds look messy. Pro tip: Place your tallest plants first in your sketch, then work forward.
Mulch Like a Pro: The 2-3 inch layer of mulch in Step 4 isn't just decorative—it's your flower bed's protective blanket. I've learned the hard way that too little mulch leads to weed problems and soil temperature swings. Use pine bark mulch for acid-loving plants like azaleas and hydrangeas, or cedar mulch for its natural pest-repelling properties. Just remember to keep mulch 2 inches away from plant stems to prevent rot.
Seasonal Care Shortcuts: In Step 5, I've developed a simple system for seasonal maintenance. Mark your calendar for these key dates: early spring (compost refresh), summer solstice (start morning watering), and first frost (cut back dead foliage). This keeps your flower bed on track without requiring daily attention. For watering, I use a rain gauge to track rainfall—if we've gotten 1 inch of rain in a week, I skip my scheduled watering.
Pro Tips for In Ground Flower Bed
- Creating a stunning flower bed that thrives all year takes more than just planting flowers—it's about smart planning and soil prep.
- Layering Matters: In Step 2, when building your soil layers, don't skip the 2-inch gravel base—this is your secret weapon against waterlogging, especially in clay-heavy soils.
- Visual Planning Pays Off: Before you dig a single hole in Step 3, sketch your design on paper.
Frequently asked questions
Got questions about creating or maintaining an in-ground flower bed? You’re not alone!
Here are answers to the most common concerns—from planning to troubleshooting—to help you design a thriving garden that blooms all year long.
What’s the best time of year to plant an in-ground flower bed?
The ideal time depends on your climate, but early spring (after the last frost) or early fall (4-6 weeks before the first frost) are the best windows. These periods give plants time to establish roots before extreme heat or cold. In warm climates, you can plant year-round with seasonal adjustments!
How deep should my in-ground flower bed be?
Aim for 6–12 inches deep for most flower beds, but deeper (12–18 inches) is better for perennials or shrubs. This depth allows roots to spread comfortably and access moisture. Mix in compost or aged manure to enrich the soil as you dig—your plants will thank you!
Can I use an in-ground flower bed in shady areas?
Shade-tolerant plants like hostas, impatiens, ferns, and astilbes thrive in low-light spots. Just amend the soil with organic matter to improve drainage. If your area is very dark (less than 3 hours of sun), opt for foliage plants over sun-loving bloomers.
What do I do if my flower bed has poor drainage?
Poor drainage can drown roots, but you can fix it! Amend the soil with sand or perlite to loosen compacted areas, or create a raised section within the bed. For severe cases, install a French drain or plant in mounds. Test your soil’s drainage by digging a hole, filling it with water, and timing how long it takes to drain—ideal is 4–6 hours.
Are raised beds better than in-ground flower beds?
It depends! In-ground beds are low-maintenance and great for large areas, while raised beds offer better control over soil quality and drainage (plus fewer weeds). If your native soil is rocky or clay-heavy, a raised bed might be the easier choice. For most gardeners, though, in-ground beds are a budget-friendly, space-efficient option!
How do I keep pests and weeds out of my flower bed?
Prevention is key! Mulch with 2–3 inches of organic material (like wood chips or straw) to suppress weeds and retain moisture. Hand-pull weeds early, and use neem oil or insecticidal soap for pests. Planting marigolds or lavender around the edges can also deter bugs naturally.
Wrapping up and next steps
Creating a stunning in-ground flower bed is all about patience, preparation, and a little creativity! By layering your soil with the right mix of nutrients and textures, you’ll unlock year-round blooms that turn your garden into a vibrant masterpiece.
Remember, the key lies in balancing drainage, aeration, and organic matter—so don’t rush the process.
Now that you’re armed with the secrets, it’s time to roll up your sleeves and get planting! Start small if you’re new, experiment with colors, and enjoy the journey. Happy gardening—your future flower bed will thank you! 🌸🌿