
Flowers
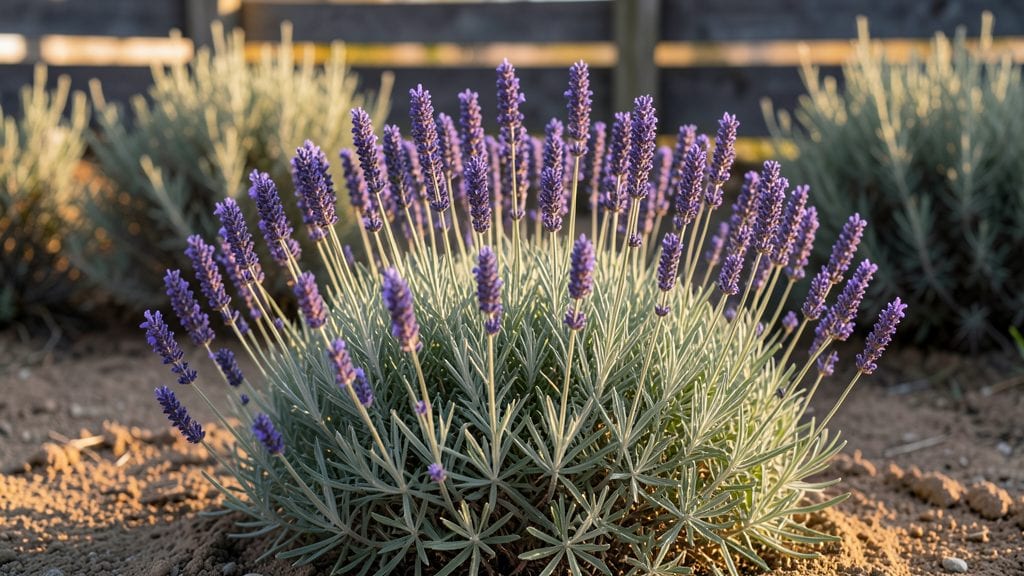
English lavender flower thrives where summers stay mild—like the Pacific Northwest’s coastal gardens—because its silvery foliage and lavender-blue blooms crave sun but hate humidity. 🌿 I’ve grown it in my own yard, and the secret isn’t just the soil or spacing; it’s the balance of water and airflow that keeps it from turning yellow or flopping over.
The first time I saw those fragrant spikes in early summer, I knew I’d never buy it again.
You’ll need well-draining soil, a sunny spot with at least 6 hours of direct light daily, and a spot where it won’t compete with thirsty neighbors. English lavender hates soggy roots, so raised beds or slopes work best—even in containers, as long as the pot has drainage holes.
Once established, it’s nearly foolproof, surviving droughts and light frosts with minimal fuss. The real magic happens in late spring when those purple buds open, filling the air with a scent that makes bees buzz happily.
Pruning after flowering keeps it compact and bushy, while harvesting stems for bouquets or sachets encourages more blooms. Pair it with rosemary, thyme, or ornamental grasses for a low-maintenance border that smells like a Provençal vacation.
By midsummer, your garden will hum with pollinators—and your neighbors will ask for cuttings. The best part? It keeps getting prettier every year.
Even in the PNW’s damp summers, English lavender stays healthy with the right care. The key is avoiding overhead watering (drip irrigation or soaker hoses work best) and giving it room to breathe.
If you’ve struggled with lavender before, this variety forgives more than others—just don’t let it sit in wet soil, and you’ll have fragrant blooms for decades. Ready to grow yours?
📚 In This Guide
- What you need
- Instructions
- Tips and common mistakes
- Wrapping up and next steps
What you need
- ● English Lavender Plants: 3–5 healthy nursery-grown plants (varieties like Lavandula angustifolia or Lavandula × intermedia thrive in PNW’s climate). Choose 1-gallon pots for established roots.
- ● Well-Draining Soil: 50% garden soil (test pH: 6.0–7.5)
- ● 30% coarse sand or perlite (for drainage)
- ● 20% compost (organic matter for nutrients)
- ● Sunlight Spot: 6+ hours of full sun daily (partial shade in hot summers).
- ● Watering Can or Hose: With a fine spray nozzle (lavender hates soggy roots!).
- ● Pruning Shears: Sharp, clean (sterilize with rubbing alcohol between cuts).
- ● Mulch: 2–3 inches of gravel or pebbles (preserves moisture, deters weeds).
- ● Slow-Release Fertilizer: Balanced 10-10-10 (sprinkle lightly in spring).
- ● Drip Irrigation System: For automated, low-pressure watering (lavender dislikes overhead water).
- ● Windbreak: Trellis or lattice (protects young plants from PNW winds).
- ● Harvesting Basket: For clipping blooms (leave 1/3 of stems for regrowth!).
- ● Lavender Companion Plants: Rosemary, thyme, or catmint (they share similar care needs!).
Step-by-Step instructions for planting English lavender
Here's how to grow fragrant, drought-resistant lavender that thrives in Pacific Northwest's mild climate.
🪴 Step 1: Choose the Perfect Location and Soil
English lavender needs full sun—at least 6 hours daily—so pick a spot with southern exposure. In the Pacific Northwest, where summers are mild, it can handle afternoon shade, but morning sun is non-negotiable. I always test the soil first—lavender hates soggy roots, so amend heavy soil with 3-4 inches of coarse sand or gravel to improve drainage.
If your soil is acidic, mix in 1 cup of lime per square foot to raise the pH to 6.5-7.5. You'll know it's right when the soil feels gritty and drains quickly after watering. Avoid low-lying areas where cold air pools—lavender is tender to frost and needs good airflow.
🌱 Step 2: Plant at the Right Time and Depth
Plant in early spring or fall when temperatures are mild—50-70°F is ideal. Dig a hole twice as wide as the root ball but only as deep as the container it came in. Lavender roots are shallow, and burying too deep suffocates them. Gently loosen the roots if they're circling in the pot before placing them in the hole.
Space plants 18-24 inches apart—closer spacing leads to overcrowding and weak stems. I like to plant in clusters of 3-5 for a fuller look, but never more than 4 plants per square yard. Water deeply right after planting to settle the soil, but don't soak it. The goal is to moisten the roots without drowning them.
☀️ Step 3: Water and Mulch Correctly
Lavender is drought-tolerant once established, but water deeply every 7-10 days for the first year to help roots spread. You'll know it's time when the top 2 inches of soil feel dry. Avoid wetting the foliage—water at the base in the morning so leaves dry quickly and prevent fungal diseases.
Apply 2-3 inches of gravel or pebbles around the base (but not touching the stems) to reflect heat and deter weeds. Organic mulch like wood chips rots too quickly and keeps soil too moist—lavender roots need to breathe. After the first year, you can reduce watering to once every 3-4 weeks unless there's a prolonged dry spell.
✂️ Step 4: Prune for Health and Fragrance
Prune right after flowering in early summer to encourage bushier growth. Cut back one-third of the current year's growth with clean, sharp shears, making cuts just above a leaf node. Never prune into old wood—you'll sacrifice next year's blooms. I always wear gloves because lavender stems are prickly!
Shape lightly in late winter if needed, but avoid heavy pruning. Over-pruning weakens the plant and reduces its ability to handle Pacific Northwest's occasional cold snaps. Deadhead spent blooms regularly to prolong flowering and keep the plant looking tidy. A well-pruned lavender plant will reward you with stronger fragrance and denser foliage.
⏰ Step 5: Protect and Maintain Year-Round
In the Pacific Northwest, lavender can handle light frosts down to 20°F, but a heavy freeze will kill it. If winter temps drop below 15°F, mound 4-6 inches of straw or mulch around the base for insulation. Remove it in early spring before new growth appears.
Fertilize once in early spring with a balanced, slow-release fertilizer (10-10-10) at half strength. Too much nitrogen makes lavender leggy and less fragrant. Watch for spider mites—drought stress makes plants susceptible. Spray with neem oil if you see webbing or tiny yellow specks on leaves. With proper care, your lavender will thrive for 10+ years!
Tips & tricks for perfect English lavender flower planting
These game-changing tips will help you grow the most fragrant, hardy lavender in your Pacific Northwest garden!
Sunlight Secret: That 6 hours of daily sun is non-negotiable, but here's the thing—morning sun is more important than afternoon in our climate. If you must choose, prioritize morning sunlight over afternoon shade. I've seen lavender thrive with 4 hours of morning sun plus 2 hours of afternoon, but never the other way around. In Step 1, if your spot gets afternoon shade, test it for at least 4 hours of morning sun first!
Soil Test Trick: Before amending your soil with the 3-4 inches of coarse sand or gravel, do this quick test: Grab a handful of moist soil and squeeze it. If it holds its shape like playdough, it's too heavy. If it crumbles easily, you're good to go. For the lime adjustment, use a simple pH test kit—aim for that 6.5-7.5 range. I've seen lavender struggle in soil that tested at 6.0 even after adding lime because the pH wasn't properly balanced throughout.
Planting Depth Hack: When you're digging that hole twice as wide but same depth as the root ball in Step 2, here's my pro move: Place the plant slightly higher than the surrounding soil level. This prevents water from pooling around the base, which lavender absolutely hates. Think of it like creating a tiny hill—just enough elevation to keep those roots dry. This one tweak has saved my lavender from root rot more times than I can count!
Watering Wisdom: For that first year watering schedule of every 7-10 days, here's how I remember it: Stick your finger 2 inches into the soil. If it feels dry like a desert, it's time to water. But here's the catch—water until you see it draining out the bottom of the hole. That's how you know the roots are getting properly hydrated. After the first year, when you reduce to every 3-4 weeks, check for dryness at 4 inches down instead of 2.
Pro Tips for English Lavender Flower
- These game-changing tips will help you grow the most fragrant, hardy lavender in your Pacific Northwest garden!
- Sunlight Secret: That 6 hours of daily sun is non-negotiable, but here's the thing—morning sun is more important than afternoon in our climate.
- Soil Test Trick: Before amending your soil with the 3-4 inches of coarse sand or gravel, do this quick test: Grab a handful of moist soil and squeeze it.
Frequently asked questions
Got questions about growing English lavender? Here are some of the most common ones—and their answers!
Whether you're a first-time gardener or a seasoned green thumb, these FAQs will help you cultivate fragrant blooms with confidence.
How much sunlight does English lavender need daily?
English lavender thrives in full sun (6–8+ hours daily). In the Pacific Northwest’s cloudy spells, pair it with a sunny spot (like near a south-facing wall) to ensure vigorous growth. Too little light? Expect leggy stems and fewer blooms.
How often should I water English lavender?
Water deeply but infrequently—about once a week (or less in winter). Overwatering is the #1 killer! Let soil dry completely between waterings; lavender’s drought-tolerant roots prefer it this way. Pro tip: Mulch lightly to retain moisture without suffocating roots.
Can English lavender survive PNW winters?
Yes! English lavender is hardy to USDA Zone 5, making it perfect for the PNW’s mild winters. Cut back 1/3 of the plant in late winter to encourage fresh growth. Add a light mulch if temps dip below 10°F to protect roots.
What’s the difference between English lavender and Spanish lavender?
English lavender (Lavandula angustifolia) has narrower leaves, smaller buds, and a sweeter fragrance—ideal for cooking and sachets. Spanish lavender (L. stoechas) has fluffy "rabbit ear" blooms and thrives in hotter climates. Choose based on your goals: English for aroma, Spanish for bold looks.
Why are my lavender leaves turning yellow or brown?
Yellow leaves often signal overwatering or poor drainage. Brown tips? Likely underwatering or salt buildup (from tap water). Check soil moisture, trim damaged foliage, and repot if needed. Fix it: Use rainwater or distilled water, and ensure pots have drainage holes.
Can I grow English lavender in containers?
Use well-draining pots (at least 12" deep) with a mix of potting soil + perlite/sand. Place containers in full sun and water sparingly. Bonus: Container lavender is perfect for balconies or patios—just avoid saucers that trap water.
Wrapping up and next steps
Growing English lavender in the Pacific Northwest isn’t just about adding beauty to your garden—it’s about embracing a fragrant, low-maintenance perennial that thrives in your climate. 🌿 With the right soil, sunlight, and care, you’ll enjoy its soothing scent and stunning blooms for years to come.
Ready to take the next step? Start small—plant a few cuttings or seeds this season and watch your garden transform. Whether you’re crafting bouquets, enjoying its aroma, or attracting pollinators, your lavender patch is just a few weeks of nurturing away! 🌸