
Planting
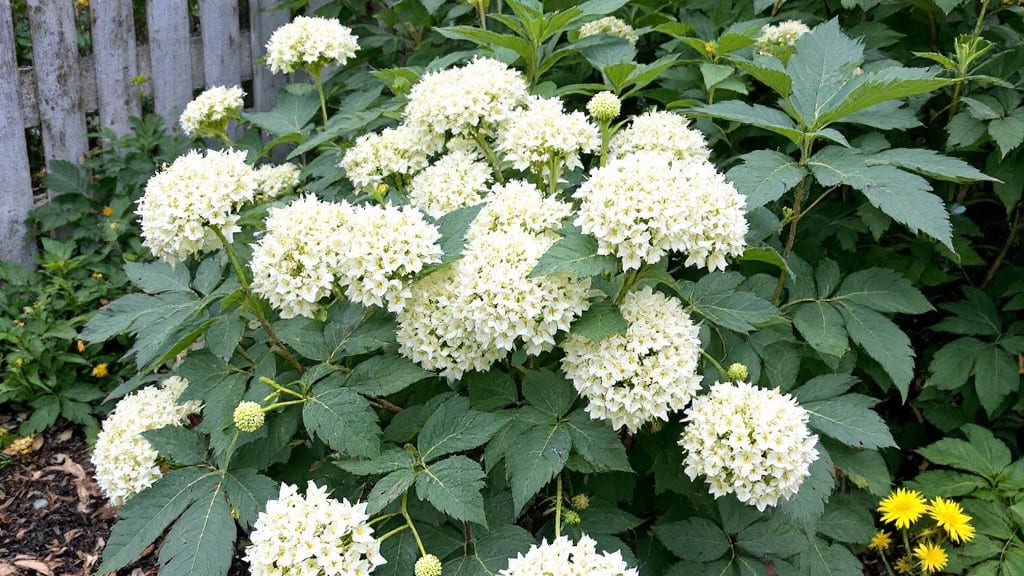
Growing elderberry flower plants in the Pacific Northwest means you’ll get stunning spring blooms and bountiful berries—even after harsh winters. 🌿 I’ve watched my own bushes push through frost year after year, their dark green leaves unfurling just as the rain lets up.
The key is starting right: whether from seed or cutting, these plants thrive when given the right conditions from day one.
The Pacific Northwest’s damp climate works in your favor, but elderberries still need well-draining soil and at least 6 hours of sunlight daily. A slightly acidic mix—think compost blended with native soil—helps roots establish fast.
Water consistently but avoid soggy soil, and mulch heavily to protect roots from freeze-thaw cycles. Pruning in late winter keeps bushes open for airflow and better fruit production.
By summer, you’ll see clusters of creamy-white flowers that hum with bees, followed by deep purple berries in fall. The berries are edible (with proper prep!) and attract wildlife, making this a multi-season star.
Just watch for powdery mildew—spraying neem oil early prevents most issues. With these steps, your elderberry will outlast the frost and reward you for years.
Works for both rural homesteads and urban yards with space for a single bush. Once established, they’re nearly maintenance-free—just prune, water, and enjoy the show. Ready to plant yours?
📚 In This Guide
- What you need
- Instructions
- Tips and common mistakes
- Wrapping up and next steps
What you need
- ● Elderberry plants: 1–3 bare-root or container-grown seedlings (choose Sambucus nigra or Sambucus canadensis for PNW resilience).
- ● Planting site: Sunny to partially shaded area (6+ hours of sunlight daily).
- ● Well-draining soil (amend with compost if clay-heavy).
- ● Space: 6–10 feet between plants (they spread!).
- ● Soil amendments: 2–3 gallons of compost or aged manure per planting hole.
- ● Mulch: 2–3 inches of wood chips or straw to retain moisture.
- ● Watering tools: Garden hose with adjustable nozzle or drip irrigation system.
- ● Pruners: Sharp, clean bypass pruners (sterilize with rubbing alcohol).
- ● Gloves: Heavy-duty gardening gloves (elderberry thorns are serious!).
- ● Trenching tool: Shovel or spading fork for digging planting holes (12–18" deep).
- ○ Soil pH tester: Optional but helpful (ideal pH: 5.0–6.5).
- ● Fertilizer: Balanced organic fertilizer (10-10-10) or bone meal for phosphorus.
- ○ Trellis or stakes: Optional for supporting vines (install early to avoid root disturbance).
- ● Row cover: Frost cloth for young plants in late spring/early fall.
- ● Pest deterrents: Neem oil or insecticidal soap (for aphids/Japanese beetles).
- ● Notebook: To track planting dates, pruning schedules, and harvest notes!
How to grow Pacific Northwest elderberry flowers
Here’s how to establish a thriving elderberry shrub that blooms reliably year after year in our cool, wet climate.
🌱 Step 1: Choose the Right Site and Prepare the Soil
Elderberries love moist, well-draining soil with a pH between 5.0 and 6.5—acidic enough to prevent fungal issues but not so wet that roots rot. In the Pacific Northwest, most native soils fit this profile, but if yours is heavy clay, amend it with 2-3 inches of compost mixed into the top 12 inches of soil. Avoid low spots where water pools after rain.
I always test drainage first by digging a 12-inch-deep hole and filling it with water. If it doesn’t drain within 4-6 hours, raise the planting area by mounding soil or creating a small berm. Elderberries hate soggy roots, but they will tolerate brief wet periods—just not standing water.
🪴 Step 2: Plant Bare-Root or Container-Grown Shrubs at the Right Time
For the Pacific Northwest, fall planting (October-November) is ideal—roots establish before winter, and spring growth kicks off strong. If you must plant in spring, do it as soon as the soil is workable (March-April) before buds break. Dig a hole twice as wide as the root ball but no deeper—elderberries resent being buried too deep.
Loosen any circling roots gently with your fingers and spread them outward in the hole. Backfill with native soil mixed with a handful of bone meal (for phosphorus) and water deeply until the soil settles. Mulch with 3-4 inches of wood chips, keeping it 6 inches away from the stem to prevent rot. This mimics the forest floor where elderberries thrive naturally.
☀️ Step 3: Provide Partial Shade and Consistent Moisture
Young elderberries need morning sun and afternoon shade—especially in hotter microclimates like urban areas. In cooler coastal regions, they tolerate full sun, but leaf scorch is common if soil dries out. Water deeply once a week (or more in summer) until the plant is 3-4 feet tall, keeping the soil evenly moist but not soggy. You’ll know it’s right when the top 2 inches of soil feel damp but not wet.
After the first year, elderberries develop deep roots and become drought-tolerant, but blooms are more abundant when moisture is consistent. I set up a drip irrigation line on a timer for the first two growing seasons—it saves time and ensures even watering.
✂️ Step 4: Prune for Health and Better Flowering
Prune in late winter (February) before buds swell, removing dead, crossing, or weak branches first. Then cut back one-third of the oldest stems to the ground—this encourages vigorous new growth and more flowers. Elderberries flower on new wood, so aggressive pruning isn’t needed, but light annual pruning keeps the shrub open and airy, reducing fungal diseases.
Watch for suckers (shoots growing from the base) and remove them promptly—they drain energy from the main plant. I also snip off any seed-bearing berries in the first year to redirect the plant’s energy into root and stem growth instead of fruit production.
⏰ Step 5: Protect from Frost and Encourage Pollinators
Pacific Northwest frosts can damage tender new growth, but elderberries are surprisingly hardy (USDA Zones 3-8). To prevent winter dieback, mulch heavily (6 inches) with straw or leaves after the first hard freeze. In spring, remove the mulch once soil warms to 50°F to avoid smothering new shoots.
Elderberries need bees and other pollinators for heavy blooms. Plant companion flowers like lavender, yarrow, or native ceanothus nearby to attract them. If your area has few pollinators, hand-pollinate by gently shaking branches during peak bloom (May-June). You’ll know it’s working when flowers turn from white to pink—then to berries within 4-6 weeks.
Tips & tricks for perfect Pacific Northwest elderberry flowers
Here's what I wish I knew before planting my first elderberry shrub—these tricks make all the difference in our wet climate.
Soil Test First: Before amending your soil, grab a soil pH test kit from your local garden center. Elderberries thrive between 5.0-6.5 pH, and our Pacific Northwest soils often lean acidic. If yours tests below 5.0, mix in pelletized lime according to package instructions—just a little goes a long way. I learned this the hard way after my first plant struggled with chlorosis (yellowing leaves) despite perfect drainage.
Root Ball Prep: When planting bare-root shrubs in Step 2, soak the roots in water for 1-2 hours before planting. This prevents transplant shock in our dry fall air. For container-grown plants, gently squeeze the root ball to check moisture—if it's dry, give it a thorough watering before planting. The goal is roots that are moist but not waterlogged, just like our native forest floors.
Watering Hack: For that deeply once a week watering in Step 3, use a long-handled watering wand to direct water right at the base. This mimics natural rainfall and prevents fungal issues from overhead watering. I set a timer on my phone for the same time each week—consistency matters more than perfect amounts in our unpredictable climate.
Pruning Visual: When you cut back one-third of the oldest stems in Step 4, look for stems that are thicker than a pencil—these are the ones to remove. Leave the thinner, more flexible stems that can bend without snapping. I mark stems with a ribbon in winter so I don't accidentally prune the wrong ones when I'm in a hurry.
Pro Tips for Elderberry Flower Plant
- Here's what I wish I knew before planting my first elderberry shrub—these tricks make all the difference in our wet climate.
- Soil Test First: Before amending your soil, grab a soil pH test kit from your local garden center.
- Root Ball Prep: When planting bare-root shrubs in Step 2, soak the roots in water for 1-2 hours before planting.
Frequently asked questions
Got questions about growing elderberry flower plants in the Pacific Northwest? You’re not alone! Here are some of the most common queries—and their answers—to help you cultivate thriving elderberries with confidence.
How cold can elderberry plants tolerate in the PNW?
Elderberries are highly frost-resistant! Most varieties handle temperatures down to -20°F (-29°C) once established. Young plants may need winter protection (like mulch or burlap wraps) in their first year, but mature bushes are tough as nails. Perfect for PNW’s chilly winters!
When is the best time to plant elderberry flowers?
For the Pacific Northwest, early spring (March–April) or fall (September–October) are ideal. Planting in spring gives roots time to establish before winter, while fall planting lets them settle before dormancy. Avoid extreme heat or frost—aim for 50–60°F (10–15°C) soil temps for best success.
Do elderberry plants need full sun, or can they grow in partial shade?
They prefer full sun (6+ hours/day) for optimal flowering and berry production, but they’ll tolerate partial shade (4–6 hours), especially in hotter PNW summers. If growing in shade, expect slightly smaller yields. A south-facing spot is ideal to maximize sunlight.
What are the most common pests or diseases for elderberry plants?
Watch for Japanese beetles, aphids, and powdery mildew—especially in humid PNW summers. Neem oil or insecticidal soap can tackle pests, while proper spacing (8–10 ft apart) improves airflow to prevent mildew. Prune regularly to keep plants healthy and reduce stress.
Can I grow elderberries in containers, or do they need ground planting?
While elderberries can grow in large containers (15+ gallons), they’re best suited for ground planting due to their expansive root systems and long-term growth. If container-growing, use well-draining soil, fertilize regularly, and plan to transplant to the ground within 2–3 years for best results.
Wrapping up and next steps
Growing elderberry flower plants in the Pacific Northwest is a rewarding journey—especially when you choose frost-resistant varieties like Sambucus canadensis or Sambucus nigra. With the right soil, sunlight, and care, you’ll enjoy vibrant blooms, bountiful berries, and a resilient plant that thrives even in cooler climates. 🌿
Now that you’re armed with the blueprint, why not take the next step? Start with a single cutting or seedling this season, and watch your elderberry bush flourish into a stunning (and useful!) addition to your garden. Happy planting! 🌱