
Container Gardens
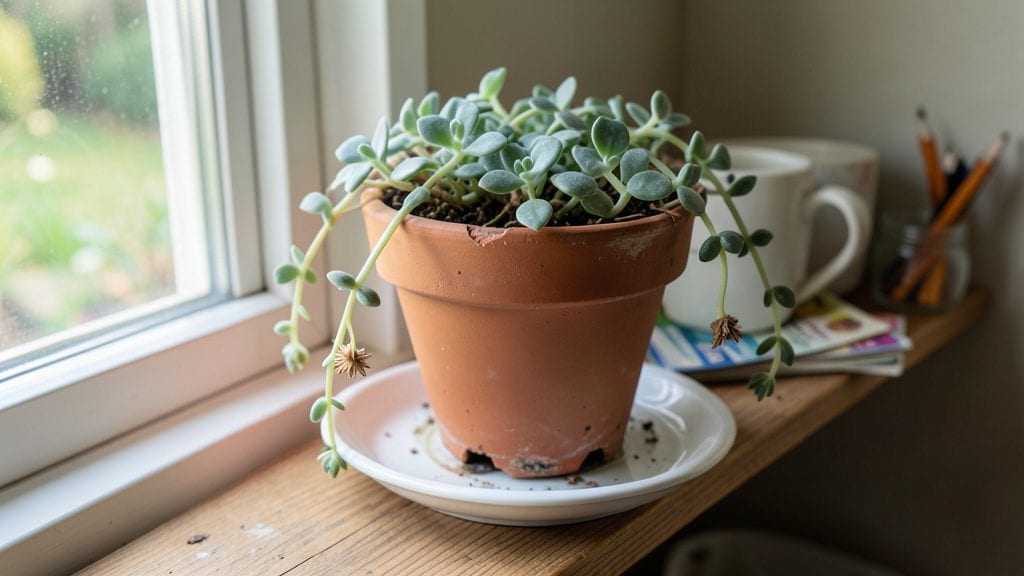
Proper drainage for flower pots is the secret to saving your wilting plants before they drown. Root rot from poor drainage kills more container plants than pests or drought combined, but these three simple hacks turn any pot into a healthy home for your flowers.
I’ve saved dozens of plants with just a few adjustments, and you can too without buying new containers.
The first rule? Drainage holes aren’t optional—they’re non-negotiable. If your pot lacks them, drill holes yourself (yes, even ceramic) or layer gravel, broken pottery, or a mesh screen at the bottom.
For repurposed containers like teapots or buckets, a false bottom made from hardware cloth solves the problem instantly. Most people overlook this step, but it’s the foundation of happy roots.
With the right setup, your plants will thrive instead of suffocate. You’ll notice faster growth, fewer yellow leaves, and roots that stay white—not mushy. The best part?
These fixes work for every plant, from fussy ferns to tough succulents. Let’s get your pots working for you instead of against you.
No more guessing—just actionable steps that prevent soggy soil. Whether you’re dealing with a thrifted planter or a brand-new pot, these hacks adapt to any container. Ready to rescue your wilting plants? Here’s how to make it happen.
📚 In This Guide
- What you need
- Instructions
- Tips and common mistakes
- Wrapping up and next steps
What you need
- ● Flower pot – Choose one with no drainage holes (or modify an existing one) to practice proper drainage techniques.
- ● Drainage medium – Pick one of these: Pebbles (¼" to ½" size) – 1–2 cups per 6" pot
- ● Ceramic pot shards – 3–5 pieces (broken from old pots)
- ● Lava rocks – ½ cup (lightweight and porous)
- ● Potting soil – 1 bag (well-draining mix, like cactus or succulent soil if planting drought-tolerant flowers)
- ● Drill or hammer & nail – For creating drainage holes (if modifying a pot)
- ● Geotextile fabric – A small square to wrap around shards/pebbles and prevent soil clogging.
- ● Coffee grounds or charcoal – 1–2 tbsp mixed into soil to improve aeration and reduce odors.
- ● Self-watering pot liner – If you want a slow-release watering system (check product specs for compatibility).
- ● Paint or sealant – For decorating pots after adding drainage (e.g., acrylic paint for terracotta).
How to fix drainage in flower pots for healthy roots
Here's the straightforward approach I use to keep my potted plants thriving—no more soggy soil or wilting leaves.
Assess Your Pot's Current Drainage
Start by examining your flower pots for existing drainage holes. Most decorative pots lack them, which is why many houseplants struggle. Turn the pot upside down and check the bottom—if there are no holes, you'll need to modify it. Even if holes exist, they might be too small or clogged with soil buildup.
Run your finger through any holes to test their size. Effective drainage requires openings at least ¼ inch wide—smaller holes restrict water flow and trap excess moisture. If you're working with a glazed ceramic pot, you may need to drill new holes carefully to avoid cracking the surface. Always wear safety goggles when drilling.
Add a Drainage Layer Using Gravel or Broken Pottery
Place a 1-2 inch thick layer of clean gravel, pebbles, or broken terracotta shards at the bottom of your pot before adding soil. This layer creates an air pocket that prevents soil from clogging the drainage holes while allowing excess water to escape. I prefer ¼ to ½ inch smooth river rocks because they don't decompose like organic materials.
For larger pots, you might need 2-3 inches of drainage material to ensure proper airflow. If you're repotting, remove any old soil first—compressed soil can block the drainage layer and defeat its purpose. This step is especially critical for moisture-loving plants like ferns or calatheas, which rot quickly in waterlogged conditions.
Choose the Right Potting Mix and Watering Technique
Use a well-draining potting mix specifically formulated for your plant type—standard garden soil compacts in pots and suffocates roots. For most flowering plants, a blend containing perlite, vermiculite, or orchid bark works best. I add 10-20% coarse sand to my mixes for extra aeration, particularly for succulents and cacti.
Water only when the top 1-2 inches of soil feel dry to the touch. Overwatering is the #1 killer of potted plants, even with perfect drainage. I use the "soak-and-dry" method: water thoroughly until it runs freely from the drainage holes, then wait until the surface dries before watering again. This mimics natural rainfall cycles and prevents root suffocation.
Elevate Pots for Better Airflow (Optional but Effective)
Place your pots on elevated trays or saucers with feet or legs to allow air circulation underneath. This prevents stagnant moisture from collecting against the pot's bottom, which can encourage fungal growth. I use plastic plant saucers with drainage holes to catch excess water while keeping roots dry.
For outdoor pots, consider using pot feet or cinder blocks to lift them off the ground. This is particularly useful in humid climates where moisture lingers near the soil surface. Elevated pots also make it easier to check drainage holes for clogs—simply lift the pot to inspect the bottom without removing it from its stand.
Monitor and Adjust Drainage Over Time
Check your drainage system every 3-6 months, especially if you notice yellowing leaves or slow growth. Soil compacts over time, reducing its natural aeration. Gently fluff the top layer of soil with your fingers or a small fork to restore airflow. If roots are circling the pot's bottom, it's time to repot into a larger container with fresh drainage material.
For plants that consistently struggle, consider switching to self-watering pots with built-in drainage, which combine convenience with root health. The key is balance—your drainage system should allow water to escape quickly but retain enough moisture to keep roots hydrated without drowning them.
Tips & tricks for perfect drainage in flower pots
These simple yet game-changing strategies will transform your potted plants from struggling survivors to thriving showstoppers.
Material Selection Matters: When choosing drainage materials for Step 2, avoid anything that can decompose or clog over time. I've found that ¼ to ½ inch smooth river rocks work best because they maintain their structure indefinitely. For a more rustic look, broken terracotta shards (from old pots) create excellent airflow while adding visual interest. Just make sure all pieces are clean and free of sharp edges that could damage delicate roots.
Drilling Safety in Step 1: If you're drilling drainage holes in ceramic pots, use a tile bit designed for ceramics and drill at a slight angle to create larger openings. Work slowly to prevent cracking—heat builds up quickly, and sudden temperature changes can compromise the pot's structure. I always wear safety goggles and mark drilling spots with a pencil first to avoid uneven holes. For decorative pots, consider using a pot with pre-drilled holes and adding a decorative outer shell afterward.
Potting Mix Proportions: The 10-20% coarse sand recommendation in Step 3 is flexible depending on your plant type. For succulents and cacti, I increase the sand to 30-40% of the mix to prevent moisture retention. For moisture-loving plants like ferns, reduce sand to 5-10% and increase perlite. Always use sterilized potting mix to prevent introducing pathogens to your drainage system.
Watering Technique Troubleshooting: If you notice water pooling on top of your drainage layer after watering (Step 3), your holes might be too small or clogged. Gently remove the plant, clear any soil buildup from the holes, and consider enlarging them slightly. For containers without holes, try the "bottom-watering" method: place the pot in a tray of water for 10-15 minutes, then remove and let excess water drain completely before returning to its stand.
Pro Tips for Drainage For Flower Pots
- These simple yet game-changing strategies will transform your potted plants from struggling survivors to thriving showstoppers.
- Material Selection Matters: When choosing drainage materials for Step 2, avoid anything that can decompose or clog over time.
- Drilling Safety in Step 1: If you're drilling drainage holes in ceramic pots, use a tile bit designed for ceramics and drill at a slight angle to create larger openings.
Frequently asked questions
Got questions about keeping your potted plants happy and healthy?
Here are answers to the most common concerns about drainage for flower pots—so you can avoid soggy roots and thriving blooms!
How often should I check my pot’s drainage?
Check drainage every 2–4 weeks or after heavy watering. If water pools at the bottom or takes longer than 10 minutes to drain, it’s time to adjust. Overwatering is sneaky—always err on the side of less water!
What if my pot doesn’t have holes? Can I still fix it?
Line the bottom with gravel or a plastic mesh to create drainage, or repot into a container with holes. For temporary fixes, use a self-watering pot with a reservoir—just monitor moisture closely. No holes? No problem!
My plant’s leaves are yellow—could it be poor drainage?
Yellowing leaves often signal root rot from excess moisture. Let the soil dry out between waterings, trim mushy roots, and repot with fresh, well-draining soil. If the pot stays soggy, upgrade to one with better airflow or add perlite to the mix.
Can I reuse old pots for drainage?
Yes! Clean old pots thoroughly, then drill drainage holes (if missing) or layer the bottom with broken pottery or pebbles. Just avoid plastic pots without holes—they trap moisture like a sauna. Pro tip: Sterilize with vinegar to kill bacteria!
Does rain affect drainage needs?
Rain can overwater potted plants quickly—move pots to sheltered areas during storms. If your pot lacks drainage, cover it with a breathable fabric to reduce water absorption. Always check soil moisture before watering again!
Wrapping up and next steps
Proper drainage in your flower pots isn’t just a detail—it’s the secret weapon against root rot and wilting plants. 🌱 Whether you’re using pebbles, pots with holes, or DIY drainage layers, these simple hacks will keep your greens thriving.
Now that you’re equipped with the know-how, roll up your sleeves and give your plants the perfect home—they’ll thank you with lush, happy growth!
Ready to take it further? Try experimenting with self-watering setups or eco-friendly drainage materials to level up your container garden game!