Flowers
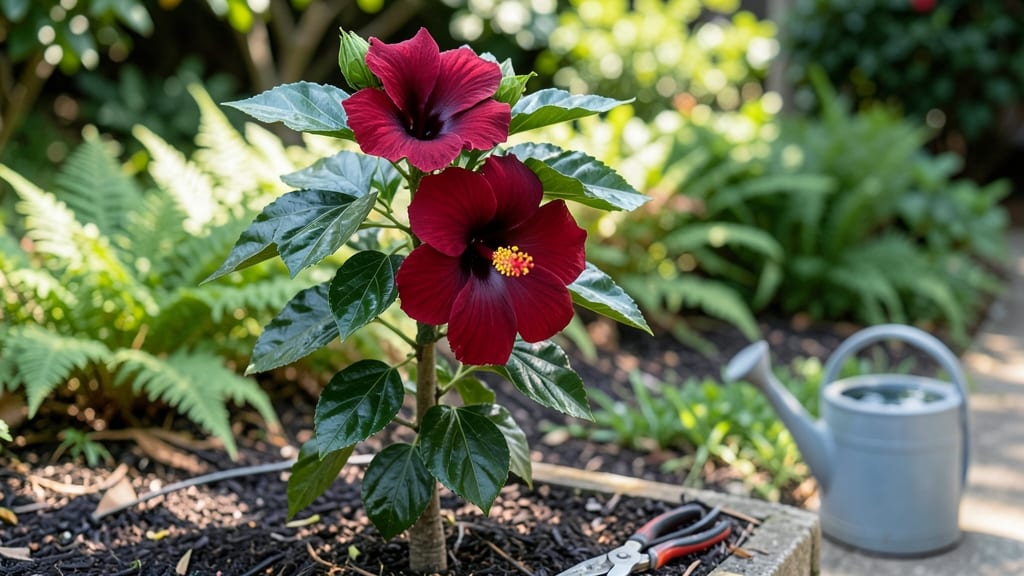
Dark red hibiscus flowers bring drama to Pacific Northwest gardens where bold colors stand out against misty skies. 🌿 I planted mine near the patio last summer, and the way they catch the late-afternoon light—deep crimson petals backlit by gray-green foliage—turns heads every time.
These aren't just flowers; they're a statement piece that thrives in coastal climates where many tropical plants struggle.
The secret to their success here is choosing the right variety—look for Hibiscus moscheutos or Hibiscus syriacus cultivars bred for cooler zones. They handle our damp summers and windy winters better than tropical hibiscus, though you'll want to protect them from heavy rain with a simple plastic cover.
Plant them where they get morning sun and afternoon shade, especially in hotter microclimates.
What you get is a year-round structure with summer blooms that last weeks, followed by seed pods that add winter interest. Pair them with silver foliage plants (like lamb's ear) or purple coneflowers to make the red pop even more.
In containers, they become instant conversation starters on porches and decks.
For maximum impact, group three plants together as a focal point near seating areas or entryways. They'll reward you with bold, long-lasting blooms that outshine many Pacific Northwest natives. Just be ready for curious hummingbirds—they can't resist these flowers either.
📚 In This Guide
- What you need
- Instructions
- Tips and common mistakes
- Wrapping up and next steps
What you need
- ● Dark red hibiscus plants: 2–4 mature plants (or 6–8 young plants for a fuller look)
- ● Choose Hibiscus rosa-sinensis ‘Scarlet O’Hara’ or Hibiscus moscheutos ‘Disco Belle’ for cold-hardy varieties
- ● Well-draining soil: Mix 1 part compost with 2 parts native soil (or potting mix for containers)
- ● Slow-release fertilizer: 10-10-10 or organic options like fish emulsion (sprinkle lightly at planting)
- ● Organic mulch: 2–3 inches of shredded bark or pine needles to retain moisture
- ● Sturdy stakes or trellis: 1–2 per plant (hibiscus can grow 6–10 ft tall!)
- ● Garden tools: Trowel or spade
- ● Pruning shears (sterilized)
- ○ Gloves (optional but recommended)
- ● Sunlight access: Full sun (6+ hours/day) or partial shade in hotter PNW summers
- ● Watering can or hose with gentle spray nozzle
- ○ pH test kit (optional):** Aim for 6.1–7.5 (hibiscus loves slightly acidic to neutral soil)
- ● Epsom salt (1 tbsp/month in water for magnesium boost)
- ● Copper fungicide (prevents rust or blight in humid PNW climates)
- ● Decorative pots (14"+ diameter) for container gardening
- ● Butterfly-friendly companion plants (e.g., salvia or lantana)
Step-by-step guide to planting and cultivating dark red hibiscus
This vibrant tropical beauty thrives in Pacific Northwest’s mild summers with the right care.
🌱 Step 1: Select and Prepare the Planting Site
Dark red hibiscus (Hibiscus rosa-sinensis) craves full sun—at least 6-8 hours daily—so choose a location sheltered from harsh winds yet exposed to southern or western sunlight. In the Pacific Northwest, where summers are cooler, extend the growing season by planting near a heat-retaining wall or using black plastic mulch to warm the soil. Test your soil’s drainage: hibiscus roots rot easily in soggy conditions, so amend heavy clay with 3-4 inches of compost or sand to improve aeration.
I always dig a hole twice as wide as the root ball but only as deep as the container’s base. This encourages roots to spread horizontally rather than settling too deep. Mix the removed soil with 1 cup of bone meal (for phosphorus) and 1 cup of slow-release fertilizer to give your hibiscus an energy boost right from planting.
☀️ Step 2: Plant and Stake for Support
Remove the hibiscus from its container and loosen the roots gently if they’re circling. Place the plant in the hole so the top of the root ball sits 1 inch below soil level—this prevents stem rot while allowing roots to access moisture. Backfill with amended soil, pressing lightly to eliminate air pockets but avoiding compaction. Water deeply to settle the soil and eliminate gaps.
Hibiscus stems can grow 6-10 feet tall in ideal conditions, so install a 5-foot bamboo stake or metal rod at planting. Tie the main stem loosely with soft plant ties (not wire) to prevent damage as it grows. I’ve seen hibiscus snap under heavy blooms if not supported early—don’t wait until it’s too late to stake.
💧 Step 3: Water and Fertilize for Continuous Blooms
Water hibiscus deeply 2-3 times per week during the growing season, ensuring the top 6 inches of soil stay moist but not waterlogged. In the Pacific Northwest’s humid summers, morning watering prevents fungal issues. Mulch with 2-3 inches of wood chips around the base (keep mulch 6 inches away from the trunk) to retain moisture and regulate soil temperature. Hibiscus is thirsty but hates soggy feet—yellowing leaves often signal overwatering.
Feed every 4-6 weeks with a balanced liquid fertilizer (10-10-10) during spring and summer. For extra-red blooms, switch to a low-nitrogen, high-phosphorus formula (5-10-10) in late summer. I swear by fish emulsion in early spring to jumpstart growth—hibiscus responds with lush foliage and bold flowers within weeks.
✂️ Step 4: Prune for Shape and Encourage New Growth
Prune hibiscus after flowering (late summer/early fall) to shape the plant and promote bushiness. Cut back one-third of the oldest stems to the nearest leaf node, and remove any dead, diseased, or crossing branches. Avoid heavy pruning in spring—new growth won’t have time to harden off before winter. In the Pacific Northwest, where winters are mild but damp, prune lightly in late winter to encourage early spring blooms.
Pinch back new growth tips in early summer to encourage branching. The goal is a rounded, open canopy that lets sunlight reach inner stems—this prevents leggy growth and ensures flowers display prominently. I always sterilize pruners with rubbing alcohol between cuts to avoid spreading bacterial wilt.
🪴 Step 5: Protect from Winter and Prepare for Next Season
In USDA Zones 7-9 (typical of the Pacific Northwest’s coastal areas), hibiscus can survive mild winters with minimal protection. After the first frost, cut back stems to 12-18 inches tall, leaving 3-4 strong buds per stem. Wrap the base in burlap and mound 6 inches of mulch around the root zone. In colder inland areas (Zone 6), dig up the plant, trim stems to 6 inches, and pot it in well-draining mix. Store indoors near a south-facing window or under grow lights until spring.
Before winterizing, take cuttings from healthy stems for propagation. Dip cuttings in rooting hormone, plant in sandy soil, and keep humid until roots form. This ensures you’ll have replacements if your main plant succumbs to winter dieback. Hibiscus is worth the effort—once established, it rewards you with bold, long-lasting blooms from spring to frost.
Tips & tricks for perfect dark red hibiscus cultivation
These tried-and-true tips will help your dark red hibiscus thrive in Pacific Northwest conditions—where cooler summers and damp winters require special attention.
Soil Preparation Secret: The 3-4 inches of compost or sand you mix into heavy clay isn't just about drainage—it's about creating the perfect air-to-water ratio hibiscus roots crave. I've seen plants struggle in amended soil that still compacted too easily. To test your mix, grab a handful: it should crumble between your fingers but still hold shape. If it turns to dust, add more compost; if it sticks together, incorporate additional sand. This balance prevents both root rot and dehydration.
Staking Strategy: That 5-foot bamboo stake isn't just for looks—it's about preventing catastrophic stem failure. I learned this the hard way when a 7-foot bloom snapped under its own weight, taking half the plant with it. Install stakes at planting and tie the main stem loosely with soft plant ties at the first sign of new growth. The goal is to support the plant as it grows, not restrict it. Think of it like training a young athlete—support their development without limiting their potential.
Fertilizer Timing: The switch to low-nitrogen, high-phosphorus fertilizer (5-10-10) in late summer isn't arbitrary—it's about encouraging blooms while the plant prepares for winter. I've noticed my hibiscus produces the most vibrant red flowers when I make this switch right after the first signs of fall color changes in surrounding plants. This timing aligns with the plant's natural cycle, giving you those stunning blooms right through frost.
Winter Protection: That 6-inch mulch mound around your hibiscus's base isn't just insulation—it's creating a microclimate that protects roots from temperature fluctuations. In Zone 7, I've seen hibiscus survive winters with just burlap and mulch, but in colder Zone 6 areas, you'll need that extra step of potting and indoor storage. The key is monitoring your local frost dates and acting 2-3 weeks before the first expected frost to give your plant time to acclimate.
Pro Tips for Dark Red Hibiscus Flower
- These tried-and-true tips will help your dark red hibiscus thrive in Pacific Northwest conditions—where cooler summers and damp winters require special attention.
- Soil Preparation Secret: The 3-4 inches of compost or sand you mix into heavy clay isn't just about drainage—it's about creating the perfect air-to-water ratio hibiscus roots crave.
- Staking Strategy: That 5-foot bamboo stake isn't just for looks—it's about preventing catastrophic stem failure.
Frequently asked questions
Got questions about growing or styling dark red hibiscus flowers in your Pacific Northwest garden? You’re not alone! Here are some of the most common queries—and their answers—to help you grow a showstopping display with confidence.
How long does it take for dark red hibiscus to bloom after planting?
Patience is key! Once planted, dark red hibiscus typically takes 1–2 years to establish and bloom, especially in cooler PNW climates. With proper care—like winter protection and consistent watering—you’ll see vibrant flowers by mid-to-late summer the following year.
Can dark red hibiscus survive the Pacific Northwest’s rainy winters?
but with a little prep! These tropical beauties are hardy to USDA Zone 7–11, so in the PNW, mulch heavily, wrap the base in burlap, or move potted plants to a sheltered spot. Avoid soggy soil—ensure pots have drainage, and trim back dead growth in early spring.
What’s the best companion plant for dark red hibiscus in my garden?
Pair hibiscus with complementary PNW-friendly plants like salvia, orchids, or succulents (for contrast). Avoid overly competitive plants like mint or invasive ground covers. For height, try bamboo or ornamental grasses—just keep them 3–5 feet away to prevent root crowding.
Why are my dark red hibiscus leaves turning yellow?
Yellow leaves usually signal overwatering or nutrient deficiency. Check soil moisture—hibiscus prefers well-draining soil and wilts when soggy. Feed with a balanced fertilizer (10-10-10) in spring/summer, and prune yellowed leaves to encourage new growth.
Can I use dried dark red hibiscus flowers in floral arrangements?
Yes! Harvest fully open blooms, strip leaves, and hang upside-down in a dry, dark place for 2–4 weeks until crisp. Dried hibiscus adds dramatic texture to arrangements—pair with eucalyptus or dried wheatgrass for a PNW-inspired bouquet. Just avoid direct sunlight to prevent fading.
Wrapping up and next steps
The dark red hibiscus flower isn’t just a stunning addition to your Pacific Northwest garden—it’s a bold statement of resilience, beauty, and adaptability. With its vibrant hue and ability to thrive in cooler climates, it’s the perfect way to bring drama and warmth to your outdoor space.
Whether you’re a seasoned gardener or just starting out, this flower offers endless creative possibilities.
Ready to transform your garden? Start small—plant one or two hibiscus and watch as they become the star of your landscape. Your next step? Research local nurseries, gather your supplies, and let your green thumb shine! 🌸✨