Flowers
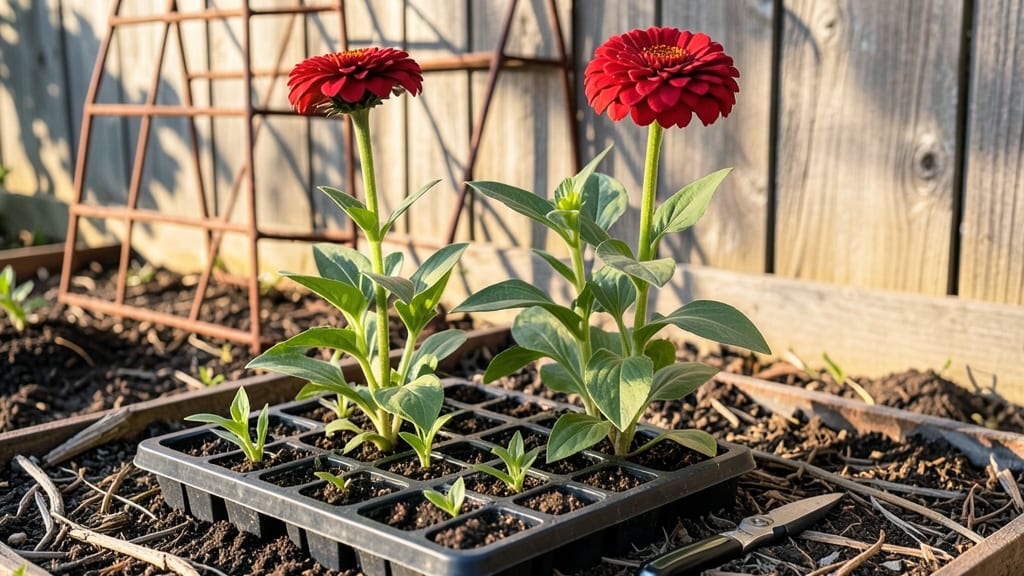
Building cheap raised flower beds doesn’t require fancy lumber or deep pockets—just a little creativity and the right materials. I’ve turned old cinder blocks, scrap wood, and even pallets into stunning elevated gardens that cost less than $50 total.
The best part? You skip the backbreaking digging, control the soil quality, and create a showstopping display that neighbors will envy.
My go-to setup uses untreated cedar scraps or reclaimed wood for the frame, stacked cinder blocks for height, or even repurposed pallets for a rustic look.
Each option keeps costs under $100 for a 4x8-foot bed, and the materials are often free if you ask around local hardware stores or construction sites. The key is matching your design to what’s available—no need for perfection, just functionality.
What you end up with is a low-maintenance space where flowers thrive without competing with weeds or compacted soil. I’ve grown everything from sun-loving coneflowers to shade-tolerant impatiens in these beds, and the drainage is always perfect—no soggy roots here.
Plus, the elevated height makes weeding and watering a breeze, even for my aging knees.
Whether you’ve got a tiny balcony or a sprawling backyard, these beds adapt to any space. The only real rule? Build them at least 6 inches deep for root growth, and line the bottom with cardboard to block weeds.
Ready to transform your garden without breaking the bank? Let’s get building!
📚 In This Guide
- What you need
- Instructions
- Tips and common mistakes
- Wrapping up and next steps
What you need
- ● Wood or lumber: Untreated cedar, pine, or recycled wood (e.g., old pallets or fencing). Recommended: 2x6 or 2x8 boards (4–6 pieces, ~8 ft long each).
- ● Screws or nails: Galvanized or deck screws (2–2.5" long, ~50–100 pieces).
- ● Hammer or drill: For assembling the frame.
- ● Landscape fabric: 1 roll (to block weeds).
- ● Soil: A mix of topsoil, compost, and perlite (1–2 cubic feet per square foot of bed).
- ● Gravel or sand: 1–2 bags (for drainage at the bottom).
- ● Measuring tape & pencil (for precise cuts).
- ● Saw (hand saw or circular saw for cutting wood).
- ● Level (to ensure your bed is even).
- ○ Optional: Stain or paint (for weatherproofing wood).
- ● Corner braces (for extra stability).
- ● Pebbles or mulch (for decorative edges).
- ● Sunlight: At least 6 hours/day for most flowers.
- ● Flat or slightly sloped ground (adjust with gravel if uneven).
- ● Basic DIY skills (or a friend to help with heavy lifting!).
Step-by-step instructions for building budget-friendly raised flower beds
Here's how to create sturdy, affordable raised beds that last seasons—no fancy materials needed.
Choose a Simple Design and Gather Free or Cheap Materials
Start with a basic rectangular shape that fits your space. I like using 2x4 lumber for the frame—it's sturdy, widely available, and costs about $10 for an 8-foot board at most hardware stores. For sides, repurposed materials work best: cinder blocks, pallet wood, or even stacked stones can create walls without breaking the bank. Measure your bed dimensions first—4 feet by 8 feet is ideal for most gardens and fits standard lumber lengths.
If you're on a tight budget, check local Facebook Marketplace, Craigslist, or construction sites for free scrap wood or discarded materials. A single 4-foot section of untreated wood can become the base for a small bed. Avoid pressure-treated wood for edging if you plan to plant vegetables, but it’s fine for flowers. Sketch your design on paper first—this prevents costly mistakes when cutting materials.
Assemble the Frame and Secure the Base
Cut your lumber to size using a hand saw or circular saw—no need for fancy tools. For a 4x8-foot bed, you’ll need two 4-foot lengths and two 8-foot lengths of 2x4s. Assemble them into a rectangle by screwing the corners together with 2.5-inch deck screws (about 8 screws total). Pre-drill holes to prevent splitting. Place the frame on level ground and adjust as needed before securing.
For the base, lay down cardboard or landscape fabric to suppress weeds. This step is often overlooked but saves hours of weeding later. If using cinder blocks or stones, arrange them in a single layer along the inside of the frame, leaving a 2-inch gap at the top for soil. For pallet wood, screw them vertically to the frame—just ensure they’re at least 12 inches tall to keep soil contained and roots aerated.
Fill with a Cost-Effective Soil Mix
Fill the bed with a 50/50 mix of garden soil and compost—this balances nutrients and drainage without costing much. If your garden soil is poor, supplement with yard waste compost (free from municipal programs) or aged manure (check local farm stores for bulk deals). Avoid cheap bagged soil mixes; they compact easily and lack organic matter. For a 4x8-foot bed filled to 12 inches deep, you’ll need about 1.5 cubic yards of soil—split this into smaller bags if buying.
Layer the soil in 2-inch increments, tamping it down lightly with a board or your hands to eliminate air pockets. Water each layer lightly before adding the next to help it settle. Leave a 1-inch gap at the top to prevent overflow during watering. If you’re planting perennials or shrubs, add a 2-inch layer of mulch (straw or shredded leaves) on top to retain moisture and suppress weeds.
Plant and Maintain for Long-Term Success
Start with drought-tolerant flowers like coneflowers, black-eyed Susans, or lavender—they thrive in raised beds and require less water. Space plants according to their mature size, leaving 6-12 inches between each. Water deeply once a week (more in hot climates) to encourage deep root growth. A drip irrigation system (made from repurposed PVC pipes) saves water and time compared to hand-watering.
Add a 1-inch layer of mulch after planting to lock in moisture and keep soil cool. Check the bed weekly for weeds—raised beds warm up faster, so weeds sprout quickly. If the wood starts to rot after 2-3 years, disassemble and replace only the damaged sections. With this method, your beds will last 5+ years with minimal upkeep.
Extend the Season with Simple Upgrades
To protect plants in early spring or late fall, drape frost cloth over the bed and secure it with bricks or clips. This extends the growing season by 2-4 weeks without costing much. If your bed is in full sun, add a shade cloth during peak summer to prevent wilting in heatwaves. For a $10 upgrade, a 5x7-foot shade cloth keeps flowers thriving even in 90°F+ weather.
Rotate plants annually to prevent soil depletion. Swap out 20% of the soil each year with fresh compost—this keeps nutrients high and reduces the need for expensive fertilizers. Over time, your bed will become a self-sustaining ecosystem that requires less effort and more beauty.
Tips & tricks for perfect budget-friendly raised flower beds
A few key strategies will help you build sturdy, affordable raised beds that last for years without breaking the bank.
Material Selection: When gathering materials, prioritize durability over aesthetics. Untreated 2x4 lumber is ideal for the frame because it's affordable and won't leach harmful chemicals into your soil. For sides, cinder blocks are surprisingly sturdy and cost-effective—just make sure to leave that 2-inch gap at the top for soil overflow. I've found that pallet wood works beautifully too, but always sand rough edges first to prevent splinters. Real talk: the best materials often come from construction sites or Facebook Marketplace where people give away perfectly good wood for free.
Precision Cutting: Before cutting your lumber, double-check your measurements against the 4x8-foot dimensions to avoid costly mistakes. I always mark measurements directly on the wood with a pencil before cutting—this prevents mix-ups when you're working quickly. For the 2x4 frame, cutting two 4-foot lengths and two 8-foot lengths might seem straightforward, but I've seen beginners accidentally cut 4-foot lengths for the long sides. Use a straightedge and clamp your wood to a workbench for clean, accurate cuts. Don't make my mistake: measure twice, cut once!
Soil Layering Technique: The 2-inch soil increments in Step 3 are crucial for proper drainage and root development. When tamping down each layer, use a flat board rather than your hands—it creates even pressure without compacting the soil too much. After adding each layer, give it a light spray of water to help it settle. This gradual layering prevents soil from washing out when you water your plants later. For the 1.5 cubic yards of soil needed, consider splitting purchases between two trips to save on transportation costs—many garden centers offer discounts for smaller quantities.
Long-Term Maintenance: To extend your beds' lifespan beyond the 5+ years mentioned, consider adding a coat of exterior wood sealer to the frame every couple of years. This simple $10 upgrade can double your bed's durability. When rotating plants annually, I've found that swapping out just 20% of the soil each year maintains nutrients beautifully. Keep a small notebook near your garden to track which plants you've used in each bed—this helps prevent soil depletion and disease buildup over time.
Pro Tips for Cheap Raised Flower Beds
- A few key strategies will help you build sturdy, affordable raised beds that last for years without breaking the bank.
- Material Selection: When gathering materials, prioritize durability over aesthetics.
- Precision Cutting: Before cutting your lumber, double-check your measurements against the 4x8-foot dimensions to avoid costly mistakes.
Frequently asked questions
Got questions about building cheap raised flower beds?
Here are answers to the most common ones to help you get started without breaking the bank!
What’s the cheapest way to build a raised flower bed?
Use free or low-cost materials like pallets, cinder blocks, or untreated wood scraps (check local listings, Craigslist, or Facebook Marketplace). Line the bottom with cardboard to suppress weeds, and fill with a mix of topsoil and compost. Even a simple 4x8-foot bed can cost under $20!
How long does it take to build a raised flower bed?
For a small bed (3x6 feet), you can assemble it in 1–2 hours if you’ve prepped materials. Larger or more complex designs (like tiered beds) may take 3–4 hours. Pro tip: Measure twice, cut once—saving time and frustration!
Can I use raised beds for vegetables and flowers?
Just avoid planting edibles near ornamental flowers (like tomatoes next to petunias) to prevent pest cross-contamination. Use separate beds or rotate crops yearly. Raised beds are great for both—just tailor soil mixes (e.g., more compost for veggies, lighter soil for flowers).
What if my raised bed collapses or leans?
Collapse usually means uneven bases or weak materials. Fix it by:
- Leveling the ground underneath with a shovel.
- Reinforcing corners with metal brackets or extra stakes.
- Using sturdy wood (like cedar) or stacking cinder blocks tightly.
For pallet beds, screw them to corner posts for extra stability. Prevention tip: Build on a flat, firm surface from the start!
Are there alternatives if I don’t want to build one?
Yes! Try:
- Hanging planters (for small spaces, $10–$20).
- Window boxes (repurpose old gutters or wood).
- Mulch rings (circular landscape fabric + soil, $5–$15).
- Container gardening (use buckets, boots, or even old tires!).
All are budget-friendly and work for flowers (or herbs!).
Wrapping up and next steps
Building cheap raised flower beds is a game-changer for gardeners on a budget—it saves space, improves drainage, and makes gardening more accessible (and less backbreaking!). With just a few materials and a little creativity, you can transform any outdoor area into a thriving garden oasis without breaking the bank. 🌱
Ready to get your hands dirty? Start by sketching your design, gathering supplies, and assembling your bed. Your dream garden is just one project away—happy planting!