Flowers
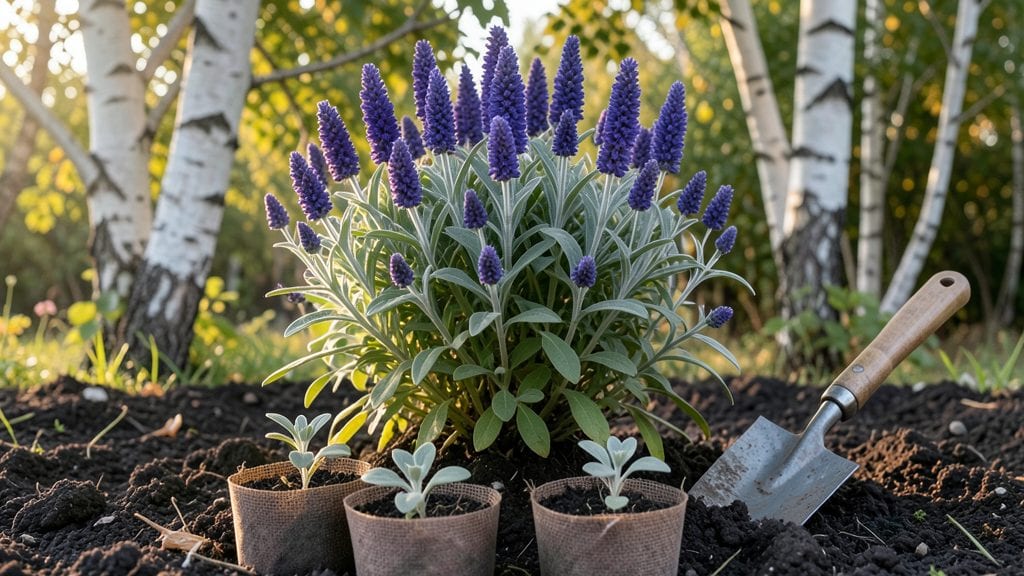
Building a flower bed that stays stunning through every season starts with a smart design—one that layers plants by height, color, and bloom time like a living painting. 🌸 I learned the hard way that skipping this step leads to a muddy, crowded mess where nothing truly stands out.
The secret isn’t just picking pretty flowers; it’s creating a foundation where each plant has room to shine while supporting its neighbors.
You’ll need basic tools—a shovel, wheelbarrow, and edging material (like bricks or metal strips)—plus quality soil and mulch to keep weeds at bay. The real magic happens in the planning: sketch your bed shape, mark sunlight spots, and group plants by their needs.
My first attempt was a chaotic circle; now I design curved beds that follow natural contours and flow with the yard’s layout.
By the time you’re done, you’ll have a bed that bursts with color in spring, holds its own in summer, and still offers winter interest with seed heads or evergreen foliage.
The key is mixing perennials for structure with annuals for pops of color, plus strategic placement so taller plants don’t block sunlight from shorter ones. Even in your first year, the results will make neighbors stop and ask for your secret.
This method works for any size bed, from a small window box to a full backyard border. The principles stay the same—just scale the materials and plant counts. Let’s turn that blank space into a showstopper that keeps giving all year long.
📚 In This Guide
- What you need
- Instructions
- Tips and common mistakes
- Wrapping up and next steps
What you need
- ● Soil & Amendments: Topsoil (2–3 cubic yards, depending on bed size)
- ● Compost or well-rotted manure (1–2 bags, 40 lb each)
- ● Organic mulch (e.g., shredded bark, straw, or pine needles, 1–2 cubic feet)
- ● Edging & Bordering: Edging material (metal, plastic, or stone—length based on bed perimeter)
- ● Landscape fabric (1 roll, 3–4 ft wide, to suppress weeds)
- ● Plants & Flowers: Perennial and annual plants (quantity depends on design; plan for 6–12 plants per square foot for full coverage)
- ● Mulch (1–2 bags, 2–3 cubic feet) for moisture retention
- ● Tools: Shovel or spade (for digging)
- ● Garden rake (for leveling soil)
- ● Wheelbarrow (for transporting materials)
- ● Measuring tape and string (to mark bed layout)
- ● Gloves and knee pads (for comfort)
- ● Pruners (for trimming plants)
- ● Decorative stones or pebbles (for accents or pathways)
- ● Solar-powered garden lights (for evening ambiance)
- ● Drip irrigation system (for low-maintenance watering)
- ● Plant markers (to label flowers and track care needs)
- ● Knee-high boots or waterproof apron (for messy work)
Step-by-Step guide to building a layered flower bed
Here's how I create a thriving flower bed that stays beautiful from spring through fall.
🪴 Step 1: Choose and Prepare the Perfect Location
Pick a spot that gets at least 6 hours of sunlight daily—most flowers need this for peak blooms. Avoid low-lying areas where water pools after rain, as soggy soil invites rot and fungal diseases. I like to sketch the bed's shape first with garden stakes and string to visualize the space before digging.
Clear all existing grass, weeds, and debris from the area. Use a shovel to cut a clean edge around your design, then remove the turf in strips. The deeper you dig—ideally 12-18 inches—the better your drainage and root growth will be. If your soil is heavy clay, mix in 2-3 inches of compost to improve texture and fertility.
🌱 Step 2: Build the Foundation with Proper Layers
Start with a 4-inch layer of coarse gravel or crushed stone at the bottom to create drainage. This prevents water from sitting at the roots, which is especially important in rainy climates. Next, add 6 inches of topsoil mixed with 2 inches of compost or aged manure—this feeds your plants for months.
For larger beds, I like to add a 1-inch layer of sand or perlite between the gravel and soil to further improve drainage. Press each layer down lightly with your hands or a board to remove air pockets. The goal is a loose, crumbly mix that roots can easily penetrate. Here's the thing—skipping this layering leads to compacted soil that strangles roots.
☀️ Step 3: Plan and Plant Your Layered Design
Start with tall plants (3-4 feet) at the back, then medium-height (1-3 feet) in the middle, and low-growing (under 1 foot) at the front. This creates a natural progression that hides smaller plants behind larger ones. Space plants based on their mature size—crowding leads to competition for nutrients and weak growth.
Dig holes just deep enough to accommodate the root ball, then place each plant so the top of the root ball sits level with the surrounding soil. Fill in with soil and press gently to eliminate air pockets. Water deeply right after planting to settle the soil and encourage root contact. You'll see the difference when plants establish quickly instead of struggling to find moisture.
💧 Step 4: Add Mulch and Final Touches
Spread 2-3 inches of organic mulch (like shredded bark or straw) over the entire bed, keeping it 2 inches away from plant stems to prevent rot. Mulch conserves moisture, regulates soil temperature, and suppresses weeds. I like to use dark brown mulch because it heats up faster in spring, giving early bloomers a head start.
Add a few low-growing ground covers like creeping thyme or ajuga to fill gaps and prevent erosion. For extra impact, tuck in some spring bulbs like daffodils or tulips at the edges—they'll pop up early and provide color before your perennials take over. Water everything thoroughly one last time to settle the mulch and encourage root growth.
⏰ Step 5: Maintain for Long-Term Beauty
Water deeply 1-2 times per week (more in extreme heat), focusing on the base of plants rather than overhead spraying. This prevents fungal diseases and keeps roots cool. Fertilize lightly in early spring with a balanced, slow-release fertilizer—too much nitrogen makes plants leafy but flowerless.
Deadhead spent blooms regularly to encourage more flowers, and prune back leggy growth in late summer to keep plants compact. I like to add a fresh layer of mulch in early spring to replenish nutrients and suppress weeds. With this care, your bed will stay vibrant year after year—no need to dig it up and start over!
Tips & tricks for perfect flower bed design
Creating a stunning flower bed doesn't have to be overwhelming—these simple tricks will help you avoid common pitfalls and create a garden that thrives all season long.
Sunlight is Non-Negotiable: That 6 hours of sunlight daily mentioned in Step 1 is crucial for most flowers. If your location gets less, consider shade-tolerant varieties like impatiens or hostas. I've learned the hard way that cutting corners here leads to weak, leggy plants that struggle to bloom. Use a sun calculator app to map your yard's sunlight patterns before sketching your design.
Layering is Everything: In Step 2, when building your foundation, don't skimp on the 4-inch gravel layer—this is your drainage insurance. For clay-heavy soils, I recommend adding 1 inch of coarse sand mixed with the gravel to break up compaction. The key is creating that loose, crumbly texture so roots can breathe. Press each layer just enough to eliminate air pockets, but don't compact it like you're tamping down a sidewalk.
Plant Height Matters: Step 3's height guidelines (tall at back, medium in middle, low at front) aren't just suggestions—they're the secret to a professional-looking bed. I always make a simple sketch showing each plant's mature height before buying anything. Pro tip: Use a tape measure to mark your bed's depth at the back and front to ensure taller plants won't get buried by shorter ones over time.
Mulch Like a Pro: That 2-3 inches of mulch in Step 4 should be spread evenly but kept 2 inches away from stems to prevent rot. I've found dark brown mulch heats up faster in spring, giving early bloomers like crocuses a head start. For extra weed suppression, add a layer of landscape fabric under the mulch in high-traffic areas, but leave it uncovered so rain can penetrate.
Pro Tips for Building A Flower Bed
- Creating a stunning flower bed doesn't have to be overwhelming—these simple tricks will help you avoid common pitfalls and create a garden that thrives all season long.
- Sunlight is Non-Negotiable: That 6 hours of sunlight daily mentioned in Step 1 is crucial for most flowers.
- Layering is Everything: In Step 2, when building your foundation, don't skimp on the 4-inch gravel layer—this is your drainage insurance.
Frequently asked questions
Got questions about crafting your dream flower bed? Here are some of the most common ones—and their easy answers!
What’s the best time of year to build a flower bed?
The ideal time is early spring or fall when soil is workable but not frozen or scorching. Spring lets you enjoy blooms sooner, while fall gives roots time to establish before winter. Avoid planting in extreme heat or cold—soil conditions matter most!
Can I build a flower bed on a budget?
Skip expensive mulch by using free grass clippings or leaves. Reuse bricks, stones, or logs as edging. Shop for perennials (they return yearly) at local plant swaps or sales. Even a small investment in quality soil can stretch your budget further with better plant health.
How do I keep weeds from taking over my new flower bed?
Start with a thick layer of cardboard or landscape fabric under mulch to block weeds. Use organic mulch (like wood chips) to suppress growth and retain moisture. Pull weeds early and often—don’t let them go to seed! A healthy, dense plant selection also crowds out invaders.
What if my flower bed gets too hot or dry in summer?
Choose drought-tolerant plants (like lavender, sedum, or yarrow) and group them together. Add a 3–4 inch mulch layer to retain moisture. Water deeply early in the morning to reduce evaporation. Shade-loving plants (e.g., impatiens) thrive in partial shade spots.
My plants are wilting—did I mess up the layers?
Check your soil drainage first! If water pools after rain, your bed may lack proper layering (e.g., gravel at the bottom). Amend heavy clay with compost or sand. Overwatering or poor mulch placement can also cause stress. Give plants time to adjust—wilting can be normal for the first few weeks.
Wrapping up and next steps
Building a stunning flower bed is all about layering, planning, and patience—but the rewards are worth every moment! 🌸 Whether you’re a seasoned gardener or a beginner, your layered design will bring year-round color, texture, and life to your outdoor space.
Now that you’ve got the blueprint, it’s time to roll up your sleeves and turn your vision into reality.
Ready to take the next step? Start small—pick one section of your flower bed and begin planting! Need inspiration? Sketch out your design, gather your tools, and watch your garden transform into a breathtaking masterpiece. Happy gardening! 🌿✨